Pages

11.03.2009

a very uncrafty halloween

The Princess
(Sung to the tune of "The Gambler" by Kenny Rogers)


On cool fall's eve, in a townhouse in Port Alberni
I met up with my daughter, to discuss Halloween
"What do you want me to sew?" was my big question
She took time answer with a different suggestion

She said, "Mom you know I love you and I love all that you do.
My twirly dresses are my favorite and I like my silly pants too.
But when it comes to Halloween I want a different kind of dress;
Let's go to the store and buy the frock of a Barbie princess."

So, I swallowed my dismay, tried to smoother my crafty horror
My daughter wants a costume bought from a store!
But looking at her expression, I knew I was out of luck.
She said," C'mon, Mom, let's face it, your princess dresses suck.

"You've got to know when to make 'em, know when to fake 'em.
Know when to straight stitch and know when to buy
You never make your skirts as glittery as the real thing
They'll be time enough for handmades, when Halloween is done."

Every sewin' Mama knows the secret to survivin'
Is known when to sew away and when to call it quits
Because your child may come from you, but her mind is all her own
and in her imagination there is only one tiara that fits.

So when she finished speaking, she looked at me with hope
Will it be a trademarked store bought dress or a linen skirt in taupe?
I said, "Sweetie you know I love you and I know you love princess bling;
I'll help you with your costume but I'm not buying a damn thing."

'Cuz I know when to make 'em, know when to fake 'em.
Know when to straight stitch and know when to buy
It's not my fault that princess don't wear patchwork
So, there'll be time enough for handmades, when Halloween is done."

***********************************************************

Presenting Smootch's collection of do it herself costumes, worn to various classes and activites during the week of Halloween. All costumes were sourced from her dress up box and bureau.

The dance class cheerleader:


The ice skating princess (with hood, in case she needed to blend in with commoners):


The swimming pool Halloween party mermaid (found a month ago at The Free Store... well, it was free!) with brother pirate.


Trick or treat mermaid in rubber boots (she went with a sure thing) and brother kitty kat:


Another shot of the kitty, because he was so cute, even though his whole costume was some lines on his face (though he did crawl around on the sidewalk meowing and chanting "trickr'tree" which was all the evidence that anyone would need that he got the whole thing):


So it wasn't, to my creative shame, a crafty halloween at all. But I was proud of myself to just let Smootch do her own thing, even though I refused to actually buy a poorly made princess dress with a vinyl picture of Barbie on it and Smootch loved everything she wore. This is a good lesson for me, as someone who makes clothes for my own children and professionally, of knowing when to get involved and when to reign in my ambitions, relax, and let her do it herself.

11.02.2009

a quick peek

I am so very close to being done with the newest pattern. This one has been done and redone in so many stages, spanning a ridiculous amount of time, with all the crazy changes going on over the past year (well, a year and a half if you want to count the baby ;). Hopefully, with a little luck, this little pattern will be off my to-do list before the next move in less than two weeks.

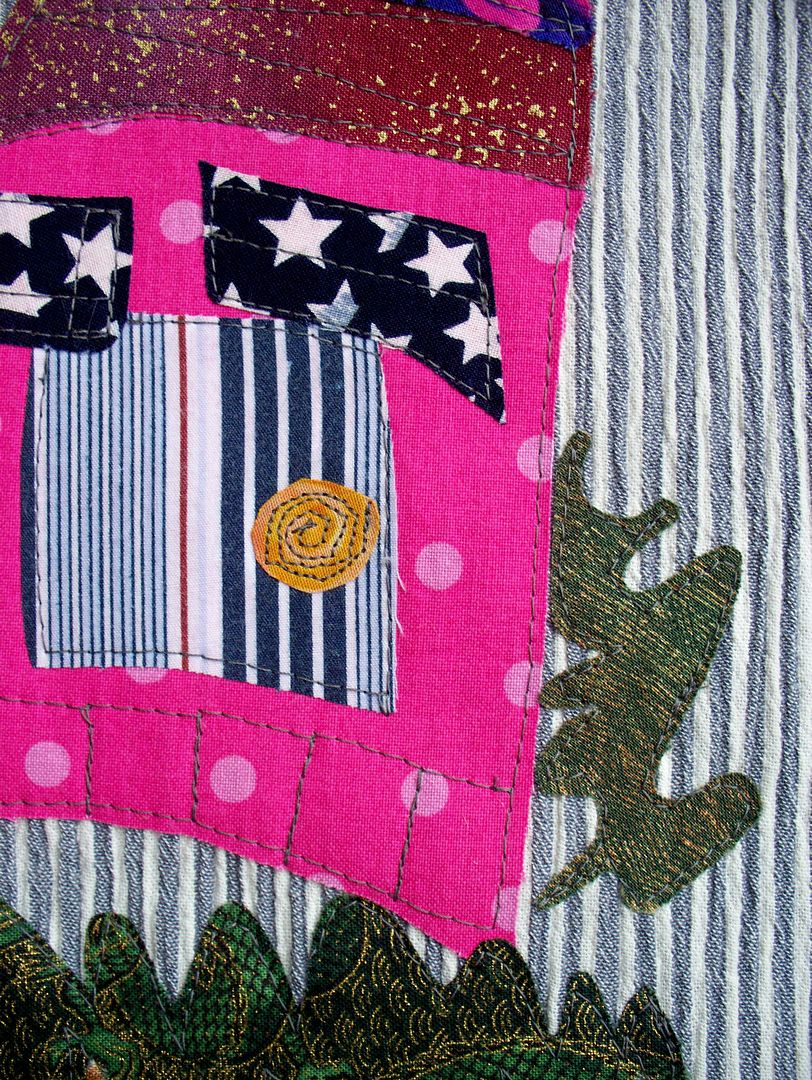
A sneak peek of the newest version of the cover:

Smootch is impressed with it. She wanted to know if it was really my pattern and not a magazine. What a compliment! Extra dessert for that girl! (She`s got me all figured out.)
I also wanted to share that sometime this month a couple of my tutorials will be featured on the Sew, Mama, Sew blog during their Handmade Holidays month. If you do not already visit often, you should check out the Handmade Holidays for tons of tutorials and giveaways. Very worth a daily visit through November. Plus, you`ll get to see my very special banana filter again :D

11.01.2009

outgrown handmades


The clothing we wear is so much more than a covering for our bodies. Our wardrobe is infused with meaning; it speaks of us and, more importantly, to us. Our clothes are our wearable memory albums, reminding us of the moments of our lives and the relationships we have. A quick survey of what I am wearing right now is a topography of my associations, roles, and concerns. These pants I am wearing right now were pulled out of a friend's garage sale, a friend I now miss terribly since she moved to the other side of the world. I think of her every time I wear them. I also feel a bit of guilt as one of the pocket buttons fell off a month ago and I still haven't sewn it back on. My shirt was a promo from a crafting site. Smootch has a similar one, or had, rather, as she outgrew it long ago and is now worn by her little brother. Sometimes we both wear our matching shirts and have a laugh at our sameness. My poor, tired nursing bra is older than my son and is a direct announcement of my humility (cheapness) as well as to the sweet functionality of my body as a mother.


If we are fond of our own clothing because of their familar presence in our lives, we can become positively smitten with our children's clothes. We communicate with our children through their clothing. There is the subtle comfort in the warm pajamas, the encouragement in the rubber boots, the protection in the jacket. And there is the obvious communion. How many times have I put a particular blue sweater on first Smootch and now Birdie Boy without saying, "Your great grandmother made this for you." I say it because, of course, handmade clothes are physical manifestations of love and adoration. A handmade dress says nothing if it doesn't say, "You are loved."


Their clothes talk to us too. Their trousers and shirts and even their socks and diaper covers whisper to us about their first solids, their first steps, their dancing and singing and quiet naps. A single tee shirt can hold hundreds of memories, all the amazing and tramatic things that can happen in a single year of a child's life. How fast a small box of baby clothes can reduce a grown woman to a goopy puddle of sentiment now that the baby is gone and off to school! Or grown and has babies of his own. The outgrown clothes remind us to be mindful of who our children and we are now, and to savior this time because it will also one day be only a memory.


So what to do with the outgrown handmade clothes? I'm never sure what to do exactly when my handmades have done their tour of duty, particularly if the garment in question was made by somebody else. When is a handmade a keepsake or heirloom and when should we just get over it and send it to the thrift store?


Sometimes my handmades have gone through two or more children as hand-me-downs or passed along to friends with younger babies. I usually only pass along to friends who appreciate the connotation of handmade or clothing with stories (just because.) I have sent some to thrift stores, lacking anyone appropriate to pass along to or it's something I didn't like in the first place (it happens). I've picked up many items obviously handmade in thrift stores and appreciate them all the more for it. A couple of baby sweaters, made by loving grannies, are in storage and will be kept until my babies have their own babies. Some items I've made have been worn into rags and simply sent out to pasture. I've redesigned and reconned many of Smootch's dresses. Dresses are great because the skirt can be separated and it's wearability prolonged through another growth spurt.


I know of others who have sold their outgrown handmades on ebay, Kijiji, and such. Others have broken down the clothes into patches for blankets and pillows. I am interested in hearing your reflections on your outgown handmades - what do you do?

10.29.2009

trouser saga part IV (or so)

You remember that whole dealie with the boy needing bottoms, and I made him some, but then the girl child stole them, but then dad made him another pair, and then I made him a few more just to make sure he's good and covered? And the whole thing happened just a month ago?

Right. I'm trying not to take it personally, but it really does seem like the boy is conspiring against me. First he doesn't sleep (well, hardly ever) and now he grows. All of his new trousers are sitting an inch and a half above his ankle bone. An inch and a half! In a month!

Fine. It's a good thing trousers are simple to make and allow for a touch of creativity with embellishments and whatnots. Actually, I've made so many now that I slip into a meditative like trance by the time I'm reinforcing the crouch seam. Trouser zen: when I hem I hem.

Here we go with the first of the new set of boy trousers. Please note my superb mothering skills as the boy:

Stands on car


Dangles dangerously over the railing (tide was low so it's okay, right?)

Eats god awful amounts of chocolate


But cute pants right?

10.28.2009

scoodie junior


As far as fresh ideas go, this one is has been sitting at the back of the fridge for so long it's evolved new life. But, with winter creeping down the mountain here I'm suddenly scrambling for warmer clothes. We moved to Vancouver Island in the last part of summer, with only a half suitcase each full of clothes, so the scramble is a bit more frantic this year. Casting about for quick ideas I ran across my pictures I took last year of my scoodie lite: a hood with a small collar, buttoned at the neck with a couple of snaps. For when I needed the warmth up top in the wind but didn't want the bulk of the scarf.


It served me well last winter in Alberta but it is currently stashed in our abandoned RV some 1200 kilometers away, along with all our other toques, mittens and scarves, save but my red wizard mittens with stars on I received in a craft swap a few years ago and I love so very much. Yes, you are probably thinking that perhaps we aren't too bright and I'm nodding along with you on that one. How's that go? Crafty but stupid?

Still, this is an excellent opportunity to make some winter gear more suited to island life, where it is more rainy than snowy. I am going to make another that will be water resistant as well as warm. But try not to be too plastic rain hat, a la pensioner with a fresh perm. The kids could use some warm rain wear too, so perhaps some fun could be had...

For anyone wantiing to make a scoodie lite, visit the scoodie page and forgo the scarf, putting on a rectangler collar instead. Snaps or buttons work a treat to keep your hood on.

Okay, humor me with one more pic so I can remind myself how tiny Birdie was a year ago. He is now draped across my lap having an illicit early evening nap, while I type one-handed at you.

Ah, baby bliss!

10.26.2009

sewing a yoke

I've just put up the newest post editor for blogger and its image editing is throwing me through a loop.  Hopefully I can get through this with the illustrations in the right place.  Bear with me.

Last post was about creating a yoke by modiifying a bodice sloper or pattern.  Assembling the yoke is slightly more involved.  The instructions here are for front and back yoke pieces and corresponding linings.

Depending on how your yoke is closed will affect the yoke assembly.  I am going to assume that you are using a yoke with snaps on one shoulder, but if you have a back closure with buttons or zipper, you can just stitch together the front and back yoke pieces at the shoulder, skip the shoulder snap info, and then jump back in where the yoke and the lining are joined together.

Begin by stitching the front to back at the shoulders, if your design calls for it, of the yoke and the yoke lining.


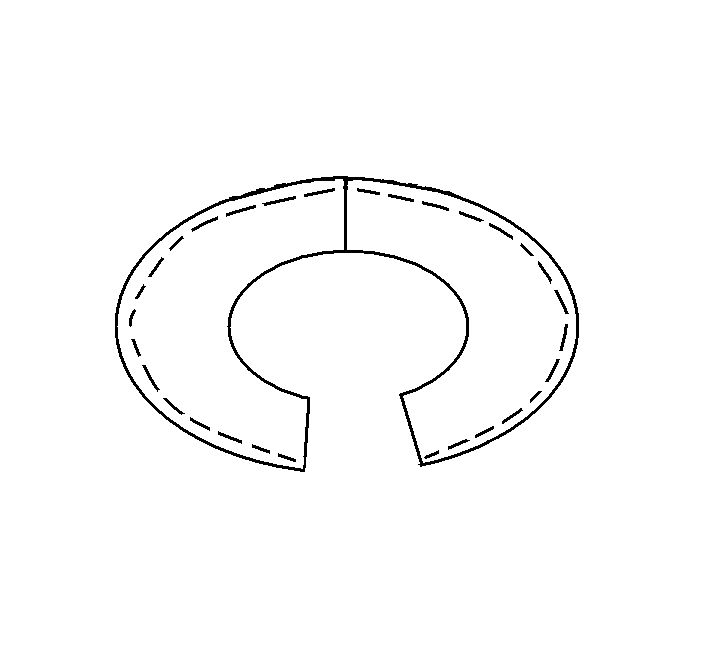
Stitch at the seam allowance all the way round the yoke lining.  This is to be a guide when sewing the yoke to the lining. 

Clip along the curve by making a small vertical cut from the raw edge to almost where the seam allowance is to facilitate a smooth curve when sewn.  Put aside the lining for now.   

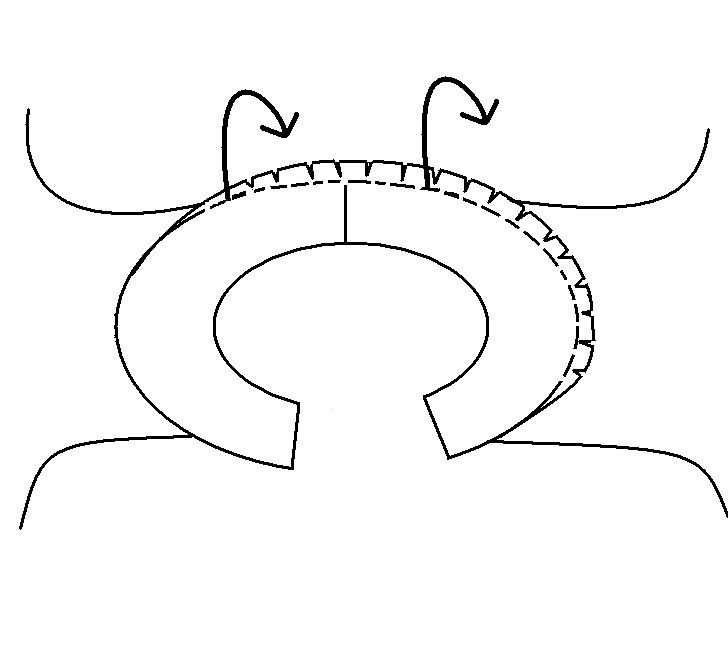
Attach the bodice front and back to the yoke piece in the appropriate postions.  Continue the stitching around the arc from the one bodice piece around across any attached shoulders to the other bodice piece.  This stitching will serve as a guide to pressing the curved edge.

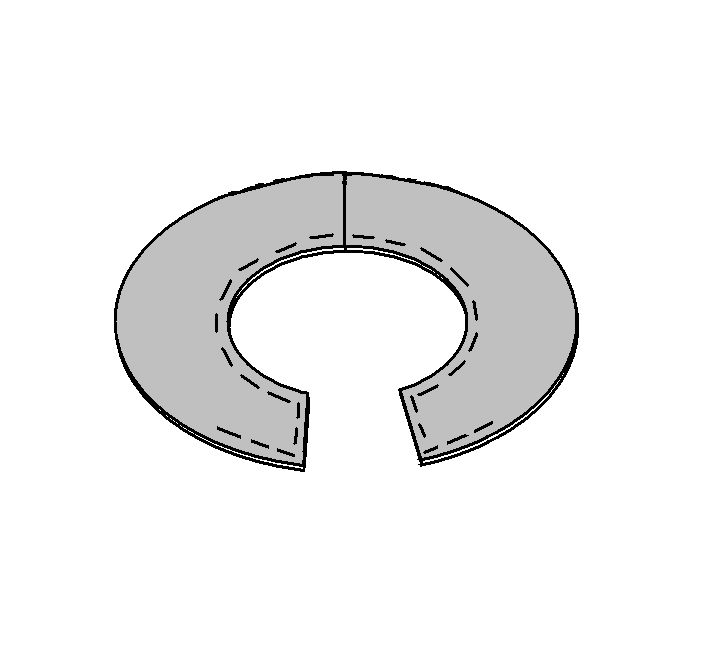
Align the yoke with the lining, right sides together, and stitch together around the center arc, around any ends intended for closures and around the outside of the outside arc edge, stopping when the bodice is attached.  Clip curves.

Turn the yoke right sides out and press seams.  Use the stitching as a guide on the lining and the yoke to turn under and press any portions not attached to the bodice pieces.

Pin together the yoke and lining and top stitch all around the edges.  Attach snap or button closures on shoulder.

I hope that was reasonably clear.  Questions are welcome, of course :)

*****************************************************
This is a free tutorial and I encourage you to use the information in any way you need to (check the disclaimer at the bottom of the page). If it works for you, please consider supporting my etsy shop by purchasing a Little Print Design pattern or toss a dollar or two in my paypal to show appreciation and to encourage me to offer up even more quality patterns and tutorials.


Thank you!
Questions about the Donation? FAQ here.