Pages

1.25.2010

his and hers mad skillz

When my husband and I got together some ten years ago, one of our very first acts as a couple was to institute 'craft Sundays', when we would try out a new craft every week. I'm fairly certain for a young couple thrilling with their togetherness, we actually took our co-habitation to another level of geek. Not only would we grocery shop together and socialize together, but we hobby together. Together, we sampled polymer clay beads, paper mache, paper making, hemp necklaces, batik, origami and a whole lot more. Some of these crafts stayed with us for awhile, allowing us to develop a familiarity and a base competence, and others were tried and despised almost instantly.

Quickly, it became apparent that The Man's crafty skill set was in a different realm than mine. The same craft, wood carving for example, would have one of us grooving in this beautiful, peaceful bubble of creativity and the other would be going boinkers with frustration and boredom.

I loved to experiment with the polymer clay, rolling the beads in different substances to create textures, and I loved batik, an old friend from some of my youngest days, where I would slop wax on and dye almost any fabric I could get my hands on. If it was messy and colourful, I was in. The Man, on the other hand, had a real aptitude for itty bitty details that requires fine motor skills. The actual beading part, that was him. Jewelery making, knot tying, paper folding was the areas he naturally gravitated to. And bless him for that, because he always gets to untangle the necklaces and untie the hopelessly knotted dolly hair. These skills all involve little fiddly finger movements that make me want to scream.

Now, despite my earlier comment about our geekiness, I feel that building our lives together with creativity as a foundational stone has served us well over the years. I've branched and explored and done my own thing with the sewing, and The Man has ventured out into the sweet land of music. And between the two of us, we have a fairly wide range of skills to handle almost any crafting situation. Okay, maybe not completely valuable in an emergency situation, but it's handy when entertaining children.

Over time our natural skill sets, me with my master plan in large and him with his fussy little fine details, has not changed at all. I wish I could say that we've grown and evolved, but it seems like there is something fundamental to this. In fact, for myself anyway, I've grown even less tolerant of the fussy work and, when working with a fine detailed project, even more prone to throwing a mini-spaz and thrusting the offending project in my husband's direction. Often I'm rattled enough to even feel angry at The Man for even letting me get involved in this detailed work when he knows I'm not good at it. How dare he!

I have a deep appreciation of what The Man can do. Mostly because I can't. I just can not.

The other day, The Man disappeared for a few minutes into our front porch area and came out a bit later with this:


He did not appear to be sweating, nor missing an earlobe when he ripped it off in in a beserker rage initiated by messing with trying to bend wire with prettiness like I would of. He actually finds it relaxing.

Hmph.


I guess the point this long spiel is that learning new things is good. Very good! Get out, try as many things as you can, keep and open mind, you never know where you'll end up. But also know when to call for mercy and stop. Stop pushing, stop teeth grinding, stop killing yourself with something that you hate.

Balance.

Thank you to my husband, for helping me learn this. Every damn day.

1.22.2010

know the yo-yo

I am not a fine detail sewer. I am a make 'em quick and robust with as many shortcuts as possible kind of gal. It comes from my nature - I'm easily irritated by fiddly stuff - and from learning how to sew while caring for a toddler. I make no apologies.

But, lately, I've had this nagging feeling like I should maybe be focusing a bit more on the details, the little embellishments that make handmade so much more than ready made. I'm find myself studying colours and textures in a relaxed (spaced out) way that I really haven't indulged in since I was a child studying my Holly Hobbie wallpaper instead of falling asleep in the evening under the mid-summer sun.

Or maybe right there is the connection. The feeling came about about the same time as I made Smootch her Holly Hobbie snack backpack, which is now also my first victim of my forays into embellishments.

Yes, I yo-yo'd it.


I'm not sure how I feel about the yo-yo. It does require the hand sewing, something I usually avoid, but it's actually a fairly easy embellishment and is interesting enough to look at (if you can avoid rectal associations). The thing that the yo-yo has most going for it, I believe, is that it is a big circle of fabric that can be used to cover up sewing flaws and stains, which is why I've started making a bunch of yo-yos for a dress I'm working on. The dress isn't going so well.

Just in case you no know the yo-yo and want to try, I've put together a quick little tute.


1. Cut out a circle that is about twice as wide as you want your yo-yo, plus a 1/4" seam allowance.

2. Fold the seam allowance down, wrong sides together, and sew in place with a running stitch all around the circle.

3. When you come back to the start, do not secure thread, but pull the edges of the circle in.

4. Now secure the thread.

5. Press the edges of the yo-yo.

6. Slip stitch the edges of the yo-yo to desired location.

Now I'm off to play with more yo-yos, and explore some other embellishment techniques I can use to tart up my sewing (and cover oopsies). Happy weekend all!

**********************************************

This is a free tutorial and I encourage you to use the information in any way you need to (check the disclaimer at the bottom of the page). If it works for you, please consider supporting my etsy shop by purchasing a Little Print Design pattern or toss a dollar or two in my paypal to show appreciation and to encourage me to offer up even more quality patterns and tutorials.


Thank you!
Questions about the Donation? FAQ here.

1.21.2010

Time for some changes

Today is play day.

What do you think of my third column? Sexy, yes?

I have been wanting to modify the look here for so very long - years, actually - but I am seriously tech challenged when it comes to the internet. I've typically gotten horribly frustrated, overloaded myself and let my feelings of tech inadequacy spill over to other areas of my life and had to go away feeling like a terrible parent and guilty about have disorganized bank statements. Today I'm feeling pretty good, got some coffee and cookies, and I decided today was the day I was going to makes some changes, damnit!

And I did!

If you want to know what I've done, I've changed my html code in my layout using the very simple instructions found here.

Tomorrow I'll be back with some pictures and more embellishments, only this time made of fabric.

1.20.2010

paper puzzle

Thank you everyone who played along yesterday. I will announce the winner's name for the Lace Up Dress ePattern at the bottom of yesterday's post.

I got to tell you, I've got all sorts of ideas whirling around in my head from the guesses and a new found fascination with lint art! The photo was not, alas, lint. There were a few correct guesses, though.

Behold! Our stack of paper puzzle pieces:


Alright, the picture probably didn't make it any clearer.

This little paper making kit arrived in the mail last week for Smootch as a late coming Christmas gift from her uncle. It holds the basic materials for reconstituting paper, the screen, a pulper (blender) and such, and a puzzle piece shaped mold. The Man gave it a whirl with the kids...

1.19.2010

woe is me, a puzzle and a giveaway

Sorry, no project today - I'm on my way out the door to the dentist. I shall be spending the day creatively trying to avoid thinking about my poor extracted tooth. The upside is that sewing helps me forget about pain, so Smootch may actually get that long awaited ball gown she's been asking for :D

This is a craft blog, however, and a post - even one on to say that there isn't a post today - isn't complete without a picture of some type. Thus, a preview of an upcoming photo tute lite of a children's project.


Anyone have a guess as to what it is? If you think you know, leave a comment and I will do a draw tomorrow morning from the comments for a copy of the Lace Up Dress in it's new PDF format.

In the meanwhile, everyone who has fully functioning teeth, please take a moment to enjoy them. Eat something sticky and sweet for me :)

****************************************************************
I have posted the answer this puzzling enigma here.

And the draw winner is...

Katie from Runaway October!

Thank you all for playing along and thank you also for the well wishes for my tooth. So as you know, I feel completely violated by my dentist and am suffering from post traumatic stress disorder over the whole thing. I want my tooth back! But I'm keeping pretty quiet about it because it is a minor, silly thing to get worked up over when there is so much suffering in the world now and every day. Still, where'd my ibuprofen get off to?

1.18.2010

repurposing Vinyl Packaging into aPocket Organizer

I promised some vinyl packaging upcycling and here is just one idea - I have more, stay tuned! This post first appeared on Whip Up a couple days ago. I am reproducing it here basically because I can. If you aren't familiar with Whip Up, do pop over and check it out. They have lots of great stuff and links.

*******************************************************

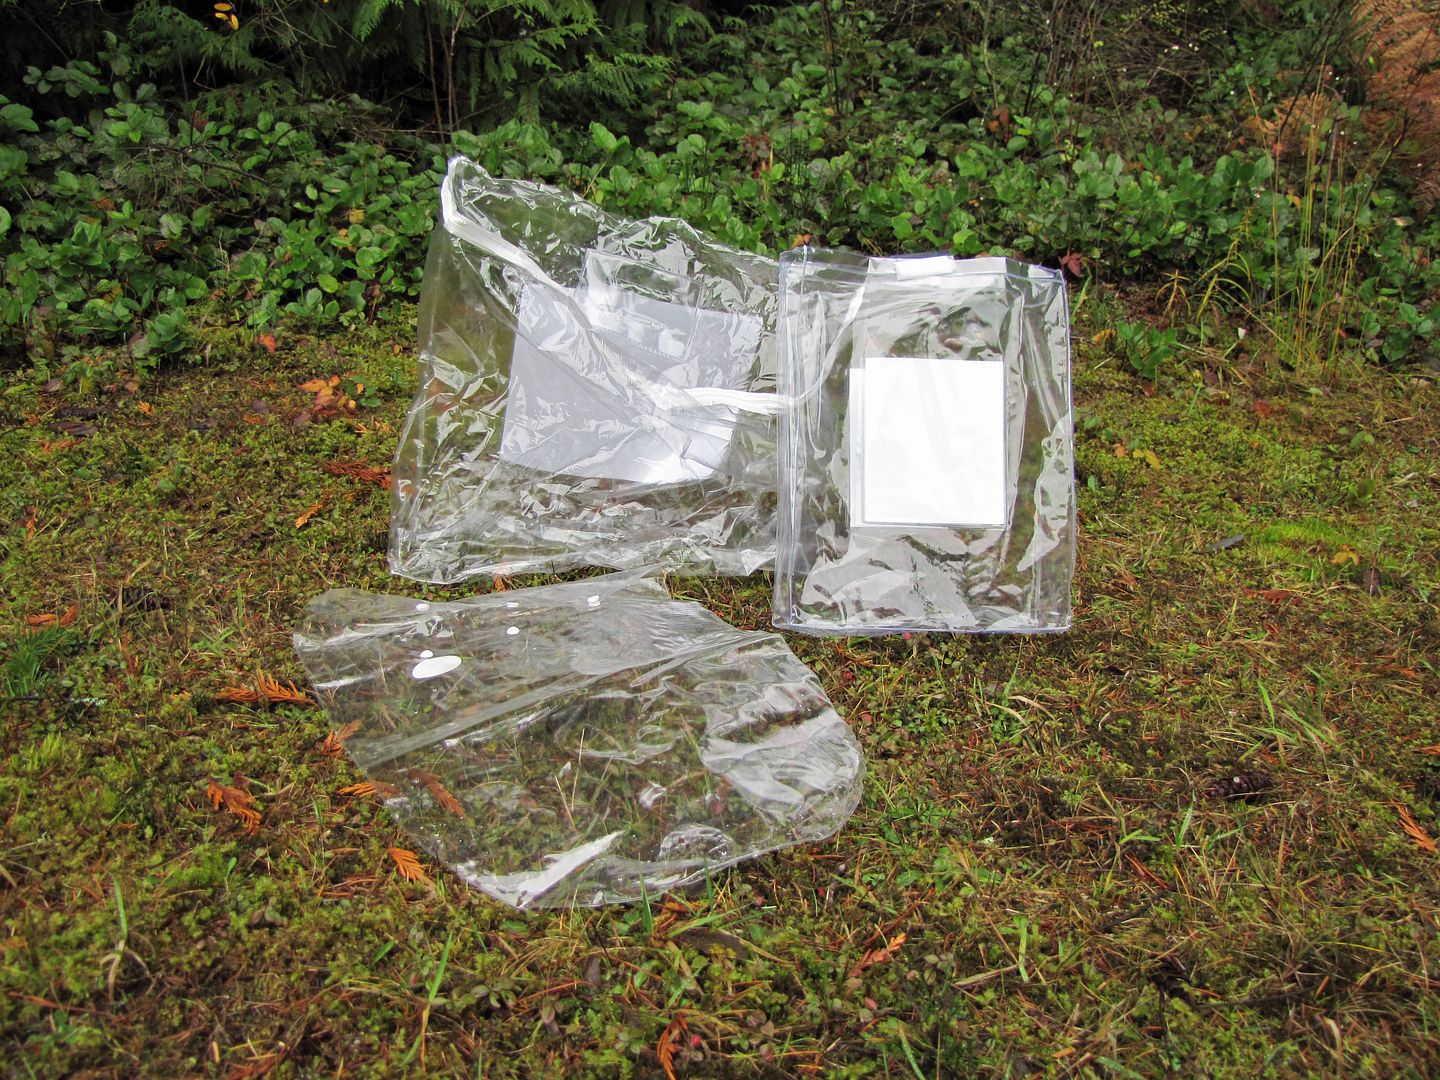
Hey, do you have too much of this?


I do. Every time I get something factory new, I always end up with more packaging than product. Not content with just tossing the stuff away, I've been pondering how best to deal with this surplus packaging. Plastic bubble packs are pretty much a write off, though I'm hoping an idea will it present itself in time. Vinyl packaging, however, actually happens to be pretty useful stuff. Many items made of cloth and some types of toys come pre-bagged in their own heavy duty vinyl wrap, often decked out with zippers, snaps or velcro used as closures. This is packaging to be reckoned with and begs to be reused. Still, after storing all my off-season clothing, bagging up every last one of my toiletries, making terrariums, and mining them for notions, I still have a few vinyl packages kicking around.

Time to bring it to the sewing machine.

Here's is one way to repurpose excess vinyl packaging.


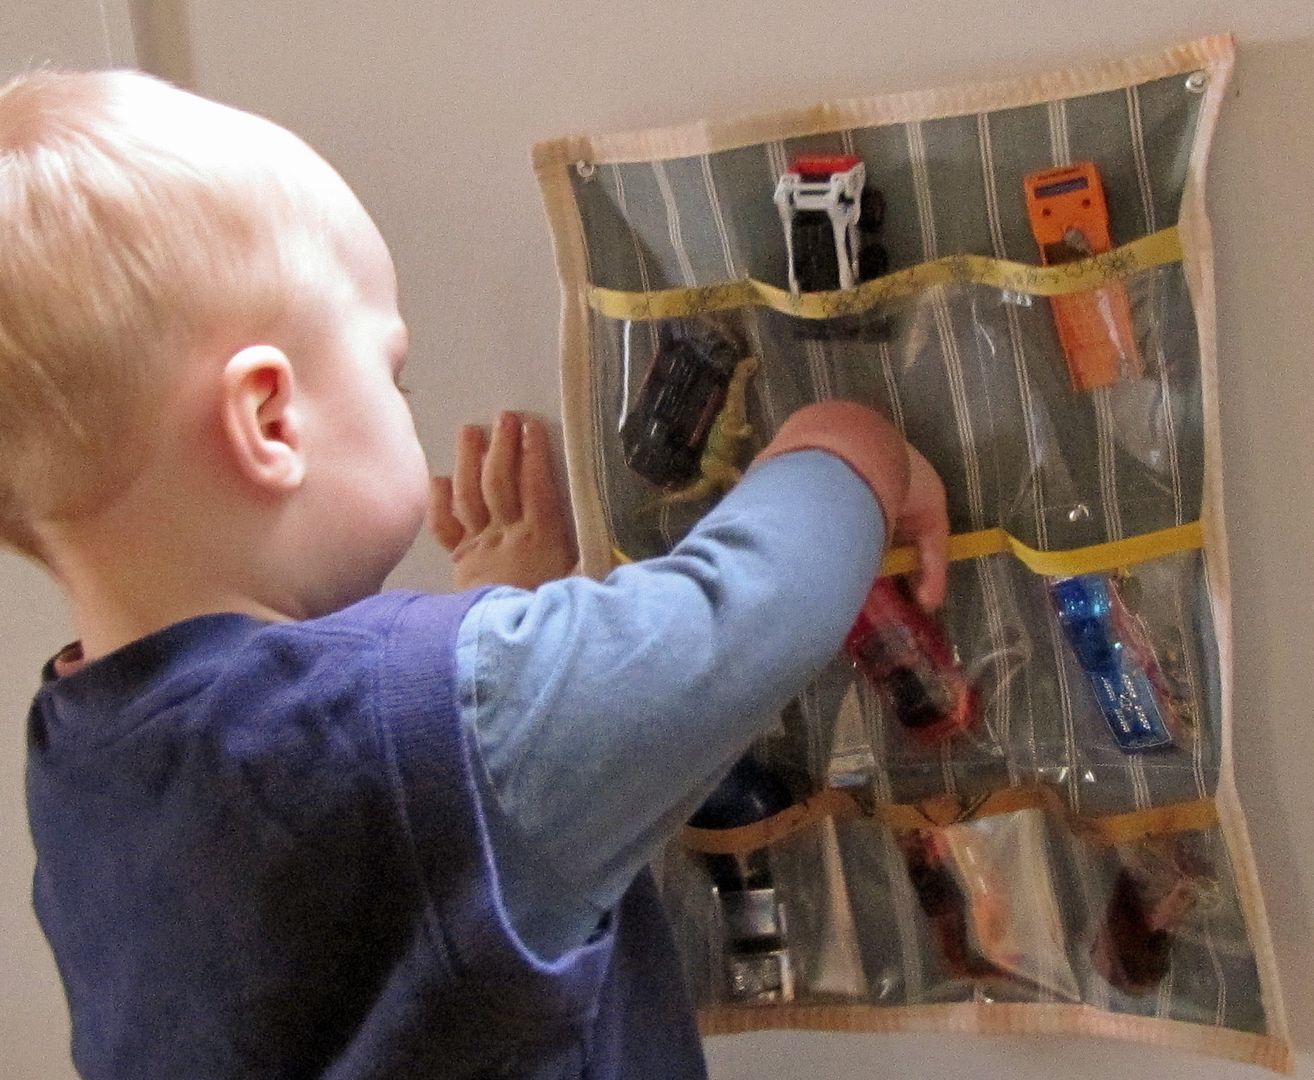
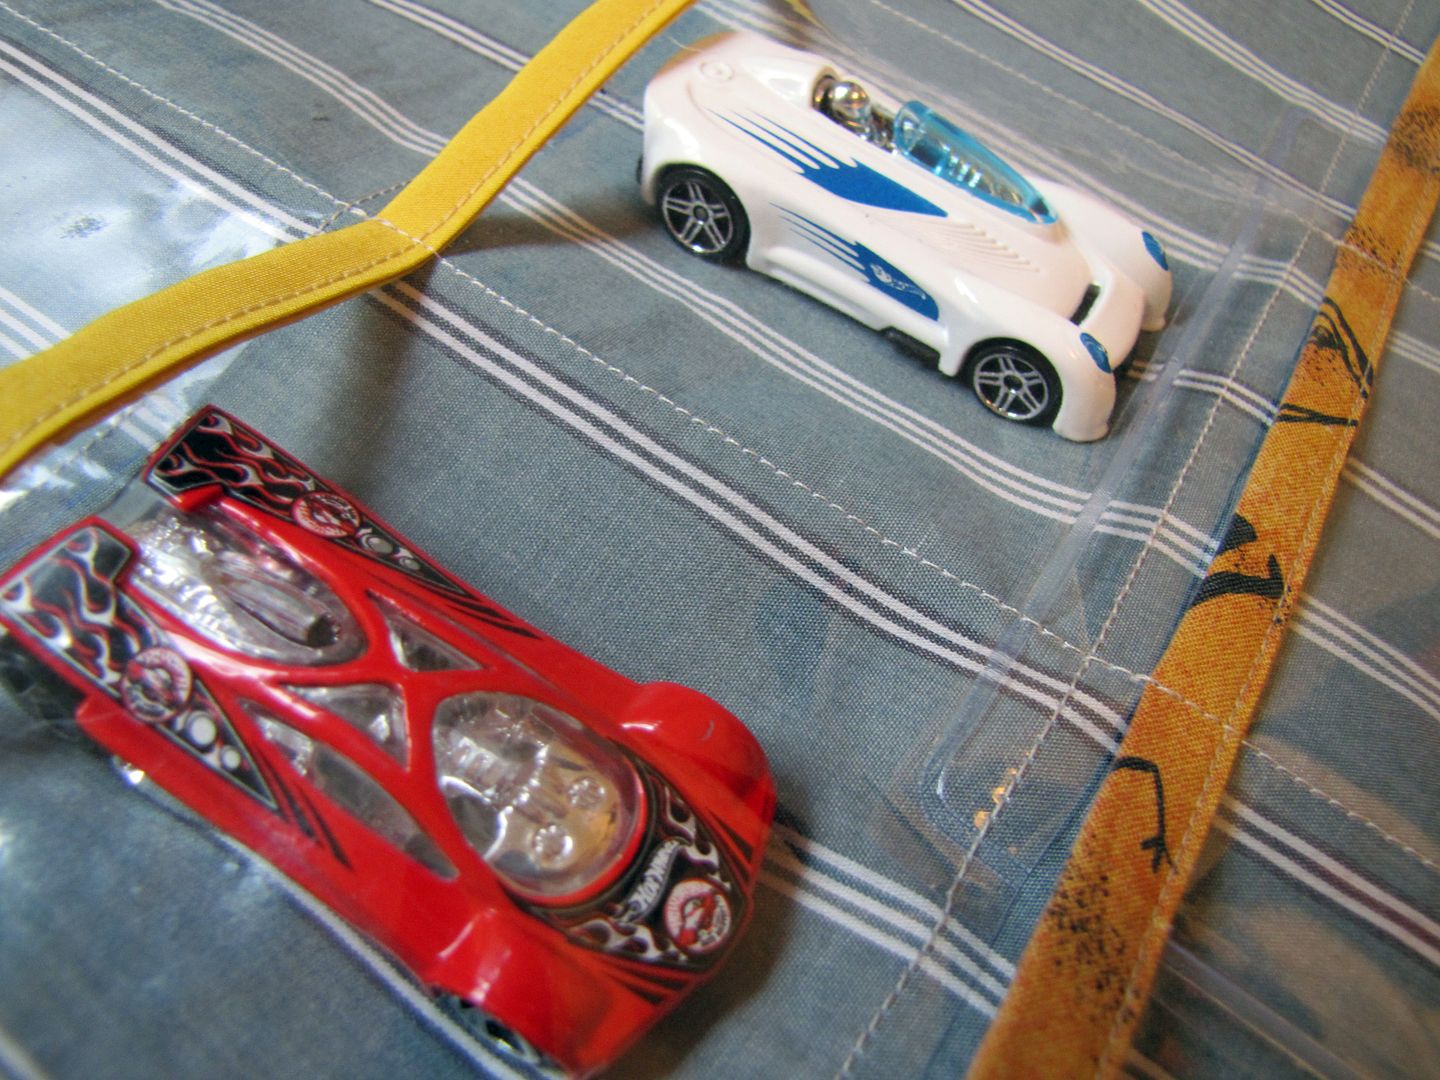
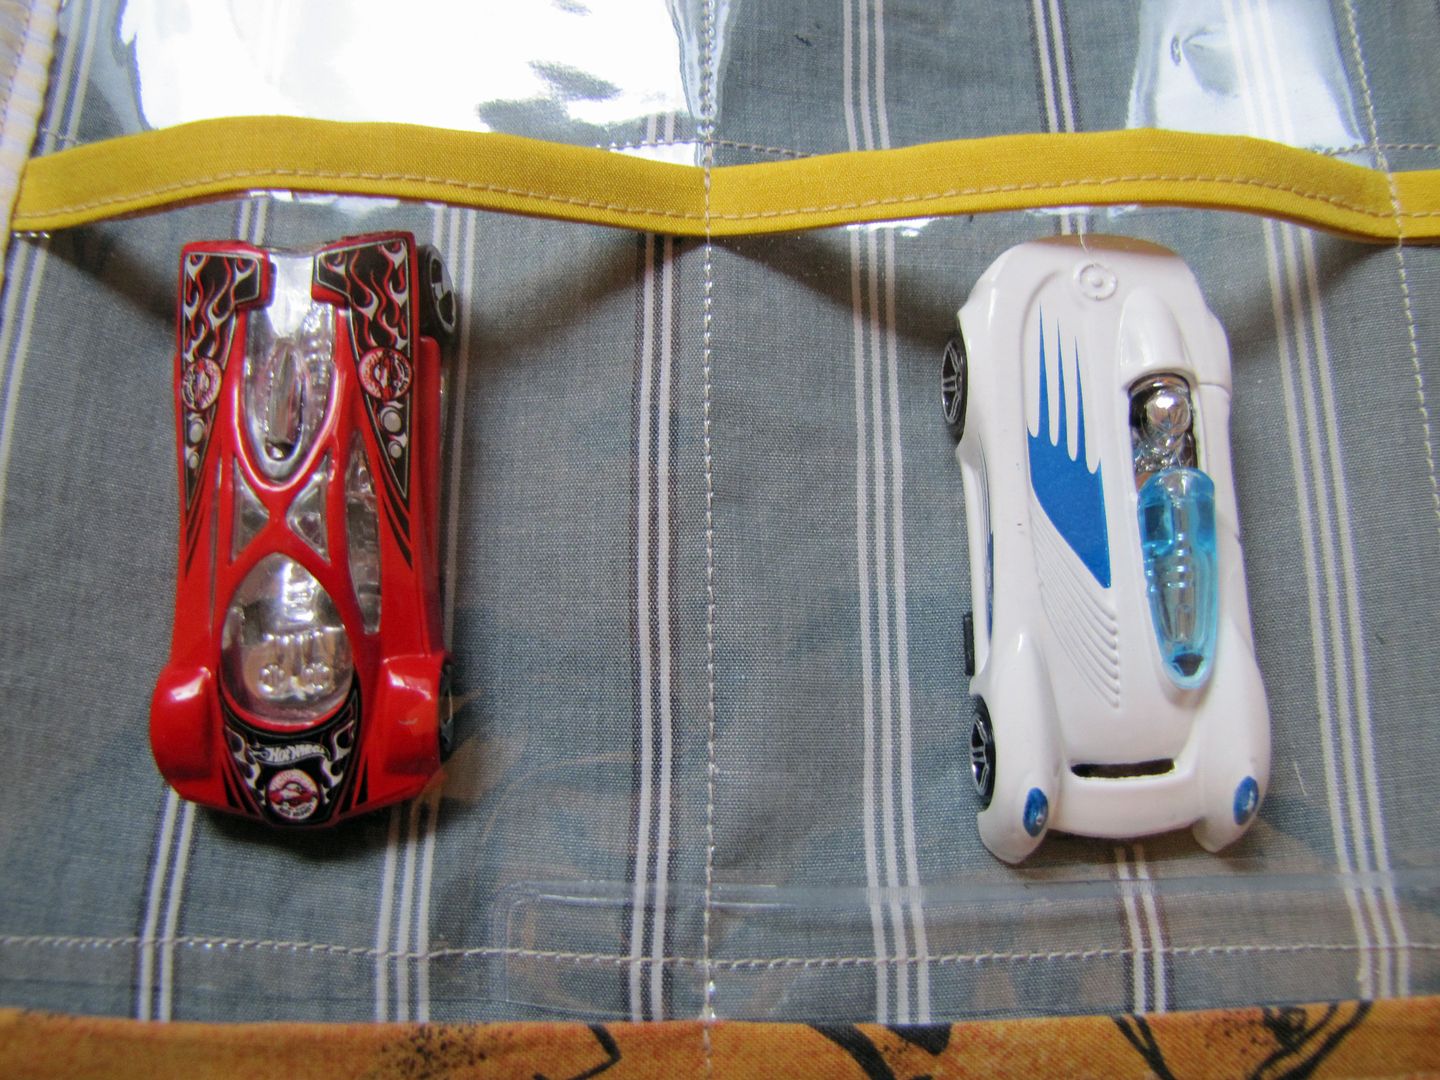
This little pocket organizer is just the right size for storing the small stuff that gets misplaced like craft supplies and jewelery, or hang it low for the little ones, who love to sort, organize, and generally poke things into pockets.


To make your own clear pocket organizer, gather up your sturdy vinyl packaging, some fabric for the backing (I used an old button down dress shirt), some medium to heavy weight iron-on interfacing, fabric strips (or pre-made double-fold bias tape) for edging both the pockets and the outside frame, and two eyelets for hanging. A grid ruler and rotary cutter is your friend for this project, so bring them out too if you have them.

Begin by cutting the backing fabric and interfacing both into 14" by 11" rectangles. Iron the interfacing to the wrong side of the fabric rectangle, following the manufacturers directions.

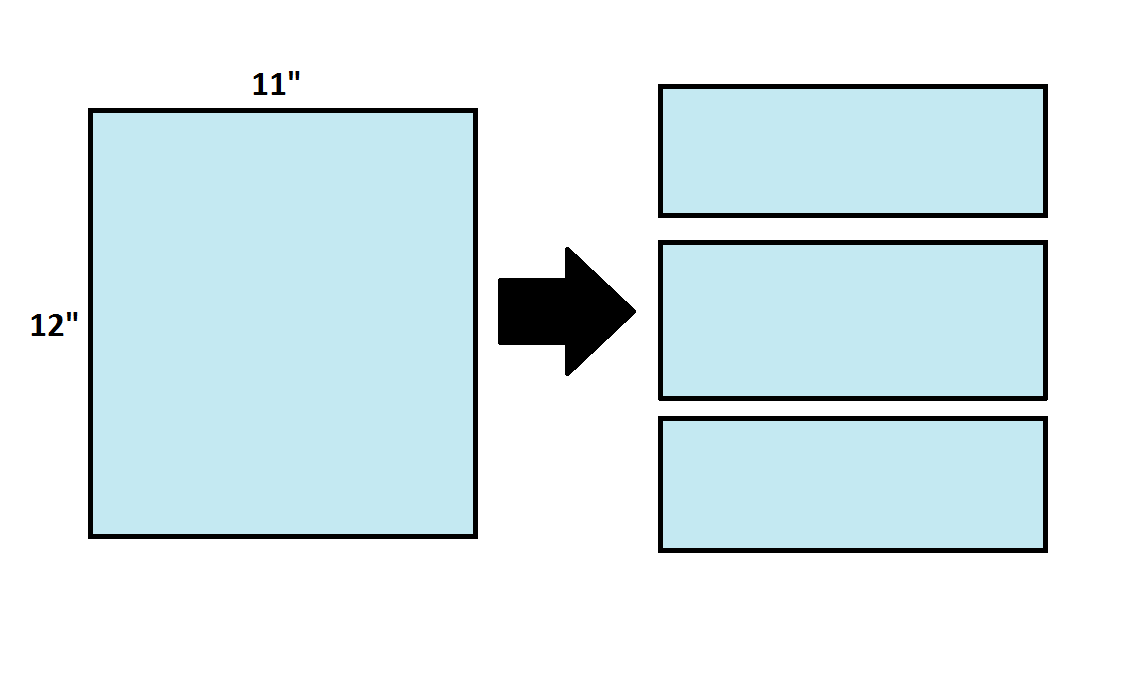
Cut a 12" by 11" rectangle of vinyl. Divide that vinyl rectangle into three equal sections of 4" by 11".

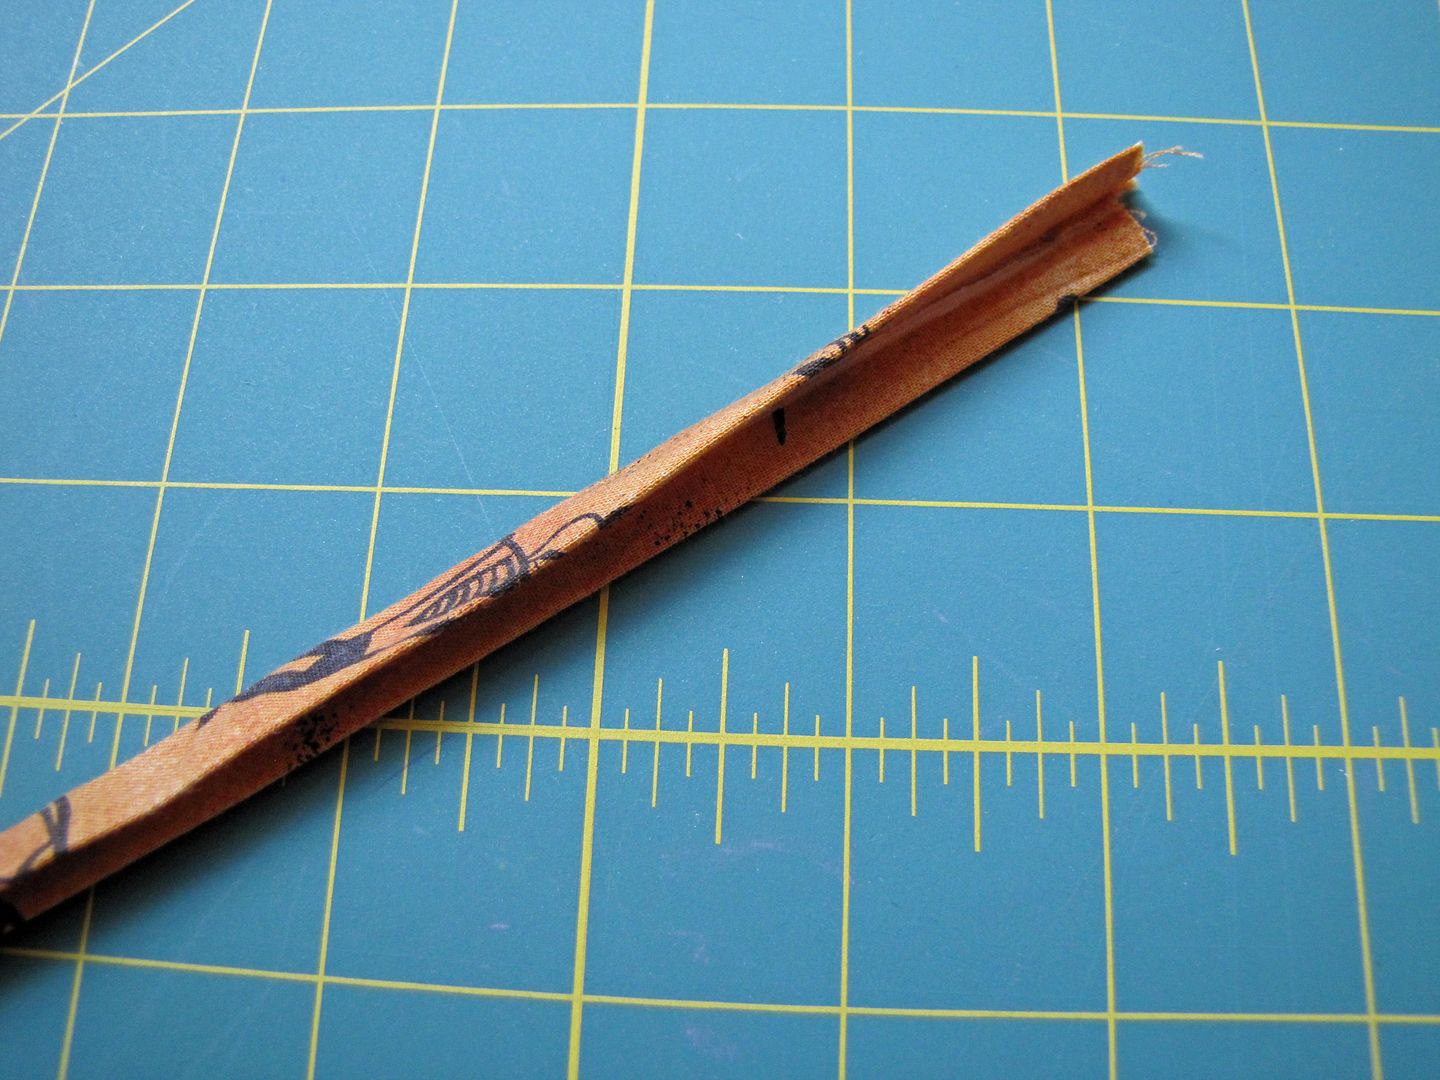
Cut three fabric strips for edging the vinyl pockets, 1 1/2" by 11" wide (or cut three 11" long pieces of the double-fold bias tape). Prep the strips by folding each them in half length-wise, wrong sides together, and pressing flat. Open up the strip and fold the raw edges in to meet the center fold. Press. Once more fold and press the center.


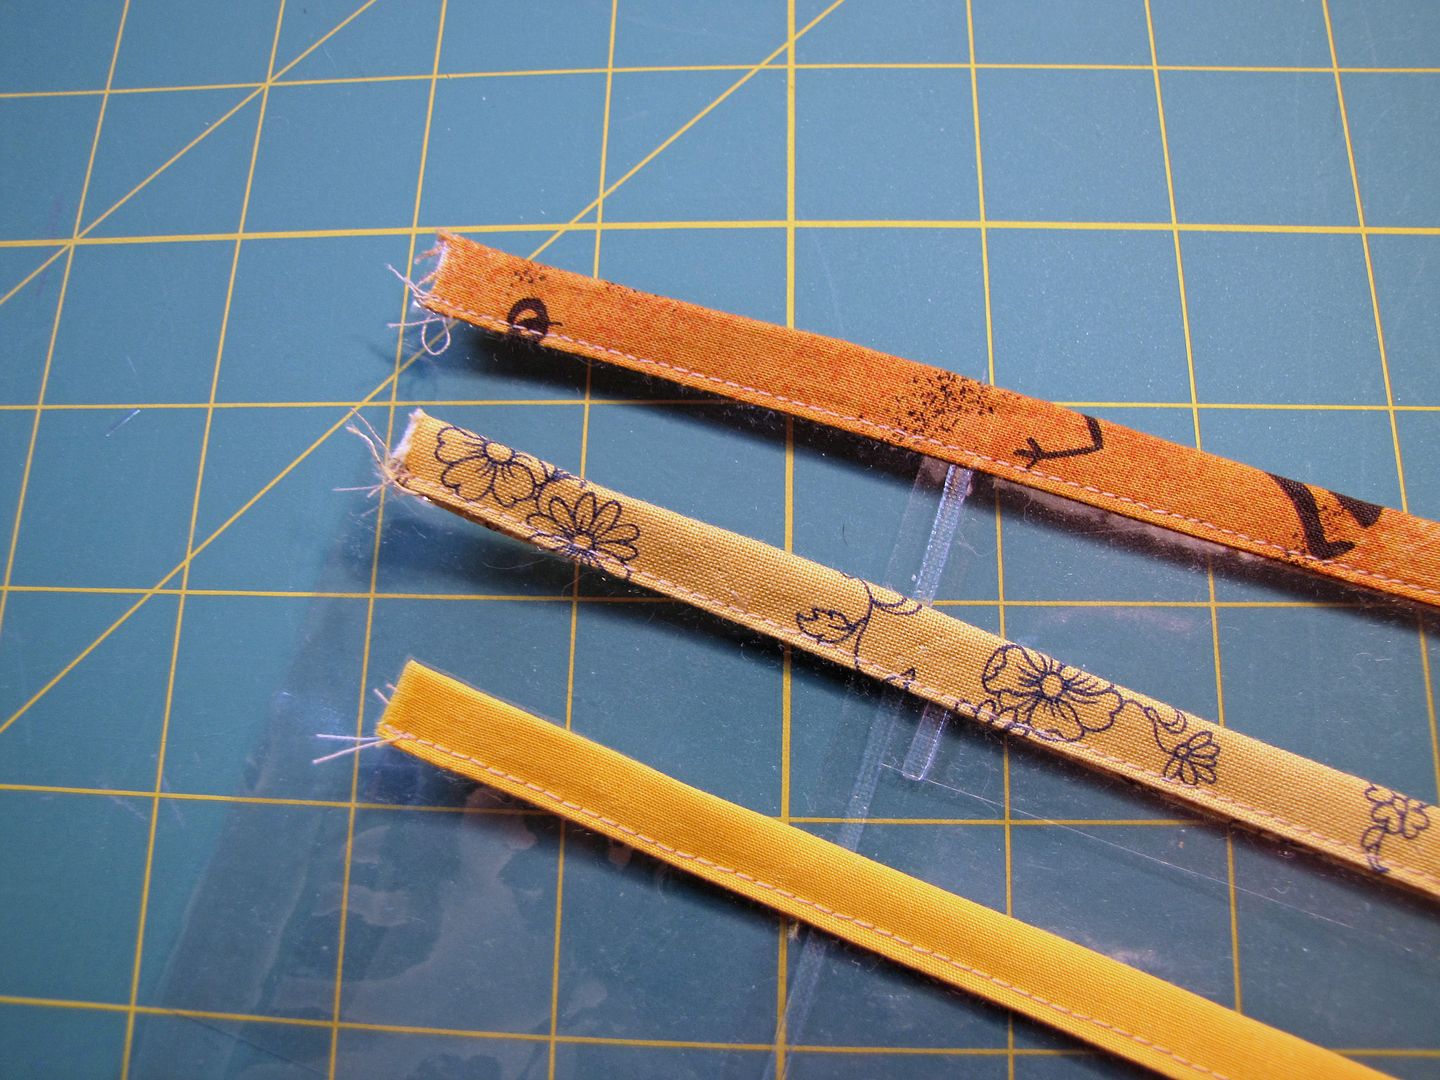
Open up a fabric (or bias tape) strip and align a raw edge, right sides together, with the longer side of a vinyl strip. Machine baste the fabric to the vinyl. Refold the fabric strip over the vinyl edge and stitch fabric to vinyl. Repeat for other two vinyl pieces.


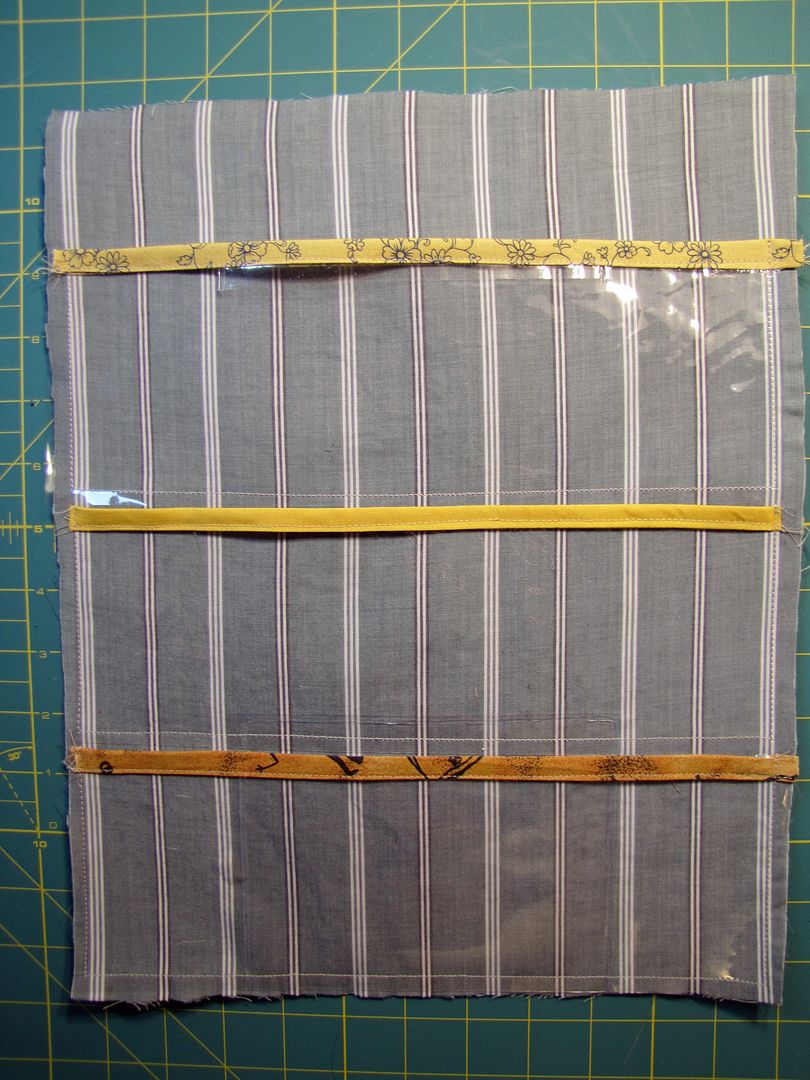
Position the vinyl strips onto the right side of the fabric backing as shown:


The bottom strip should align with the bottom raw edge of the backing and each vinyl strip above should sit just above the fabric lined edge of the strip below. The top 2" of backing will remain uncovered.

Stitch the bottom of each strip to the backing 1/4" from the edge.

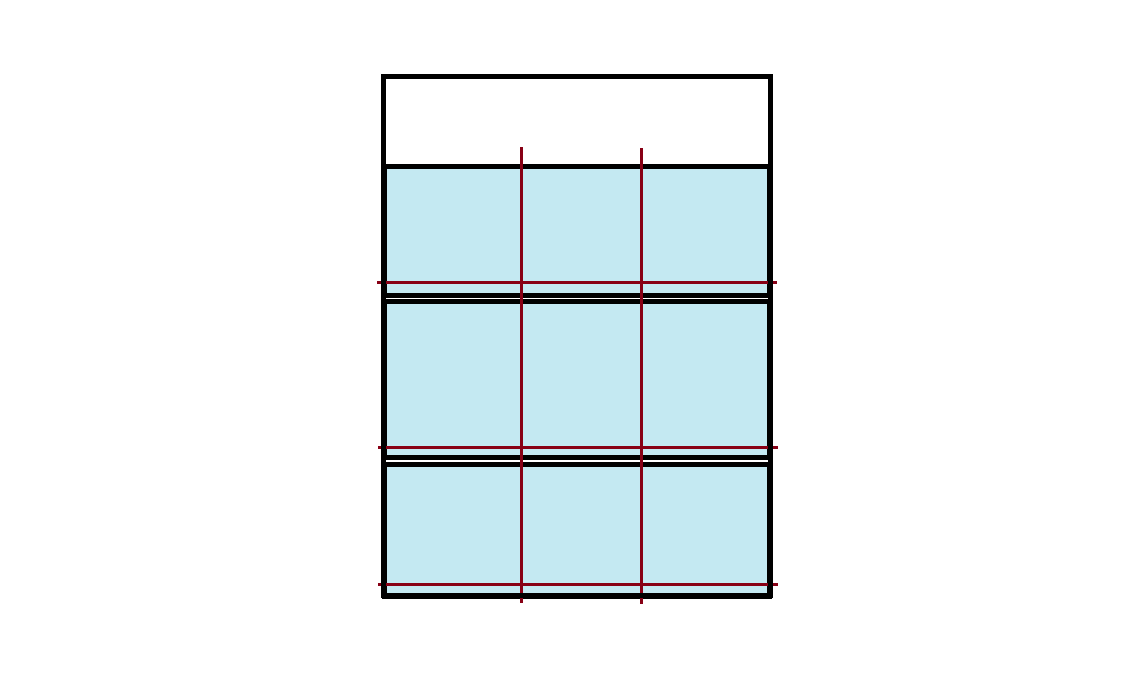
Next, divide the three vinyl pockets into nine by making two vertical lines of stitching. This is when having material with vertical stripes is quite handy. Otherwise, use tailor's chalk or faint marks with a pencil to mark vertical lines at 3 2/3" intervals from the side edges. Stitch from the bottom edge of the organizer straight up to the top edge of the top pocket. Reinforce the top edge of the pockets by taking a couple of back stitches as you sew by.

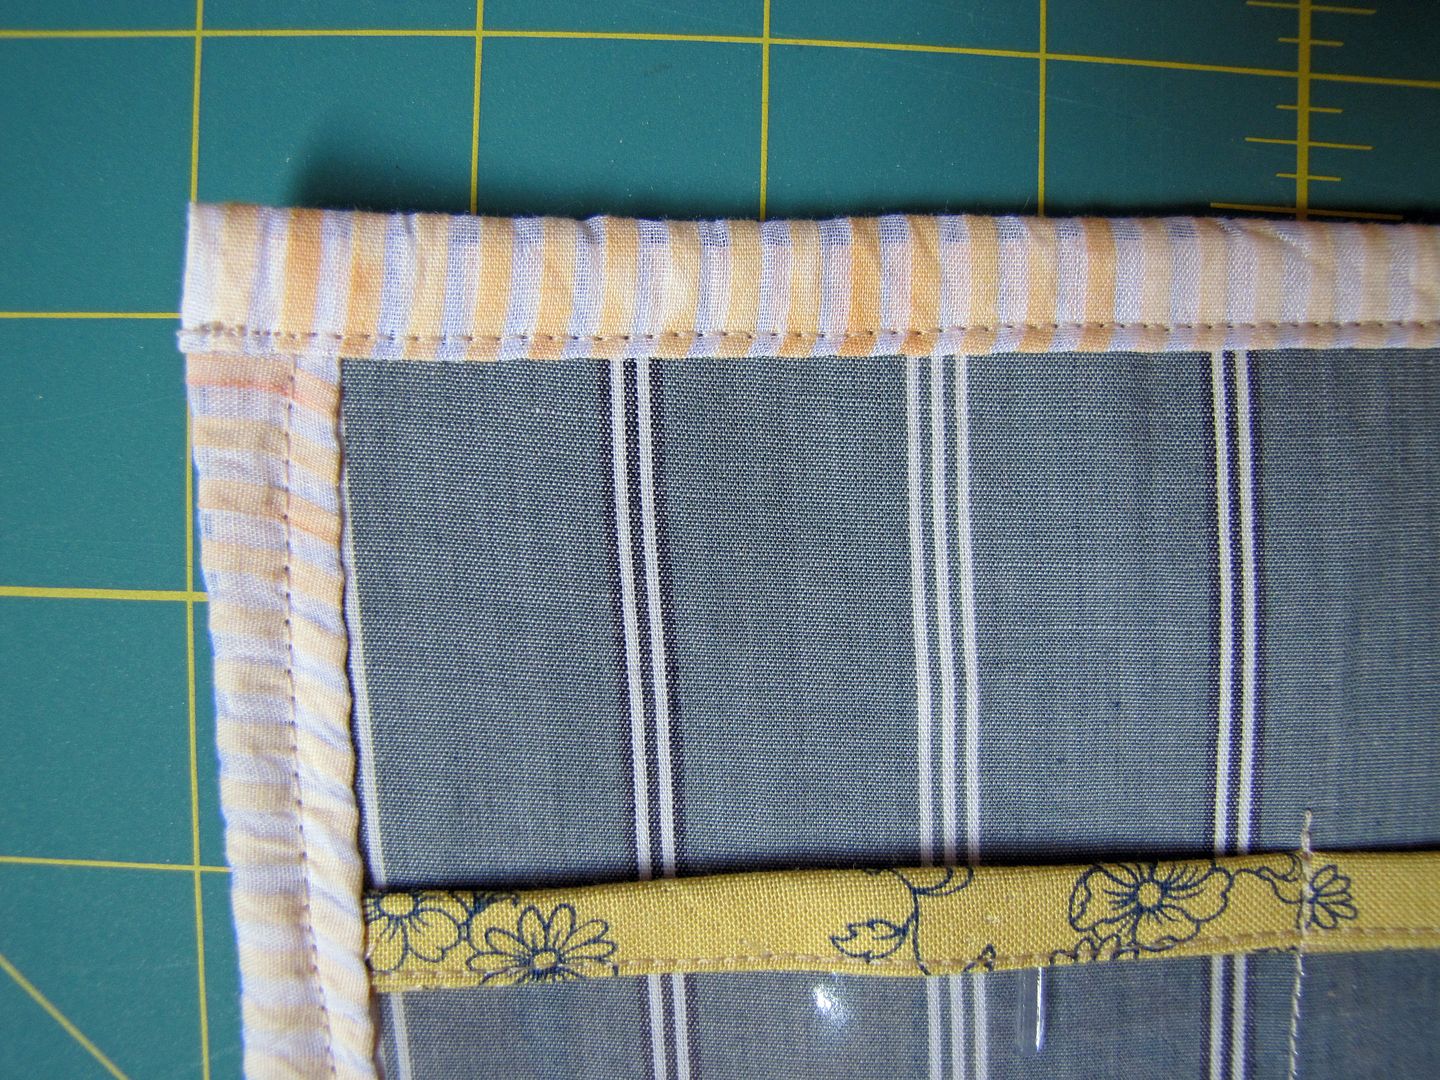
Cut the fabric for the outside frame into two 1 1/2" by 12" strips and two 1 1/2" by 14" strips. Prep each strip in the same manner as the pocket edging. Edge the sides with the two 14" strips. Sew on the top and bottom edging with the 12" strips, leaving a 1/2" of overhang on each end. Tuck in this overhang before your final top stitch to create smooth corners.


Using the manufacturer's directions, attach the eyelets to the top edges of the organizer.


Hang the organizer on the wall by looping the eyelets onto nails or screws. Try lacing the eyelets with ribbons before hanging for a bit extra pretty, if desired. Fill pockets with goodies.


***********************************************

This is a free tutorial and I encourage you to use the information in any way you need to (check the disclaimer at the bottom of the page). If it works for you, please consider supporting my etsy shop by purchasing a Little Print Design pattern or toss a dollar or two in my paypal to show appreciation and to encourage me to offer up even more quality patterns and tutorials.


Thank you!
Questions about the Donation? FAQ here.

1.15.2010

Thank you and Crafterhours

Thank you to everyone who shared measurements with me yesterday! I'm feeling pretty good now about the Smootch Special low waisted trousers for tall and thin kids (which needs a name, btw, if anyone is up for a contest next week) and I shall be busy with that over the next. I'm also working on a pdf version of the Lace Up Dress and that will be available very soon.

And I want to thank Adrianna from Crafterhours, who not only sent me some numbers, but also generously shared with me her pretty dresses based on the peasant blouse tutorial.


I love seeing how a basic pattern is embellished and modified and made into something so much more. That, to me, is where the creativity is in sewing; Not in the building blocks but in the translation.

And I like the way Crafterhours' speaks! Y'all need to pop over to Adrianna and Susan's beautiful blog and check it out, particularly the Milkmaid Skirt tutorial.


Happy weekend all!