
*******************************************************
Hey, do you have too much of this?
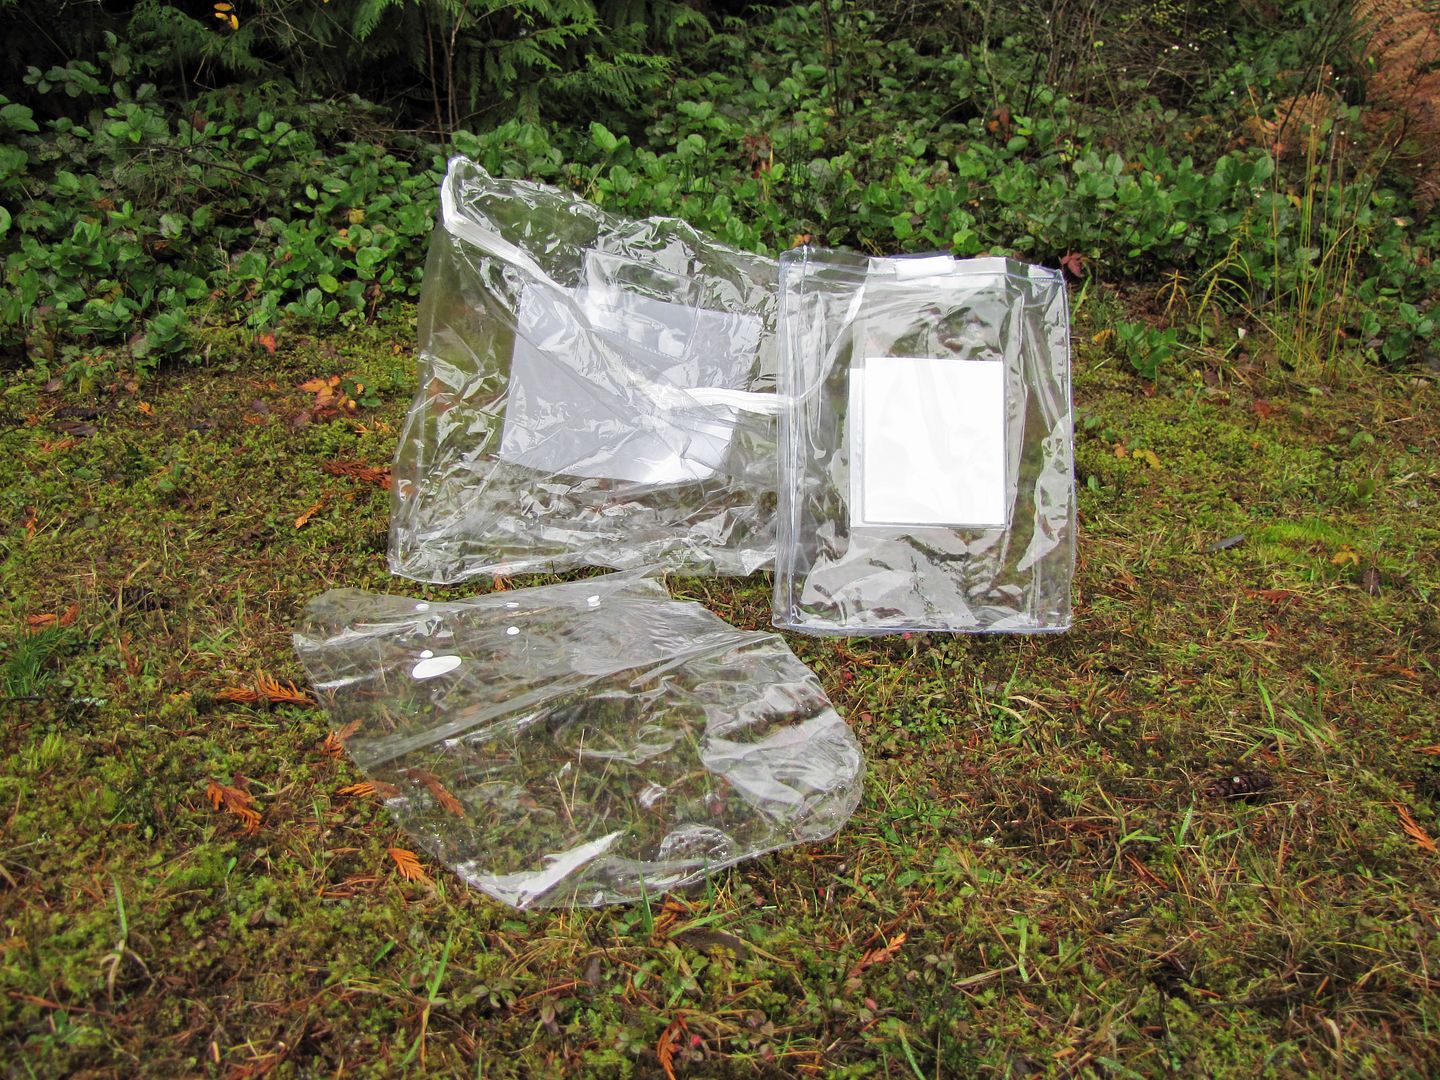
I do. Every time I get something factory new, I always end up with more packaging than product. Not content with just tossing the stuff away, I've been pondering how best to deal with this surplus packaging. Plastic bubble packs are pretty much a write off, though I'm hoping an idea will it present itself in time. Vinyl packaging, however, actually happens to be pretty useful stuff. Many items made of cloth and some types of toys come pre-bagged in their own heavy duty vinyl wrap, often decked out with zippers, snaps or velcro used as closures. This is packaging to be reckoned with and begs to be reused. Still, after storing all my off-season clothing, bagging up every last one of my toiletries, making terrariums, and mining them for notions, I still have a few vinyl packages kicking around.
Time to bring it to the sewing machine.
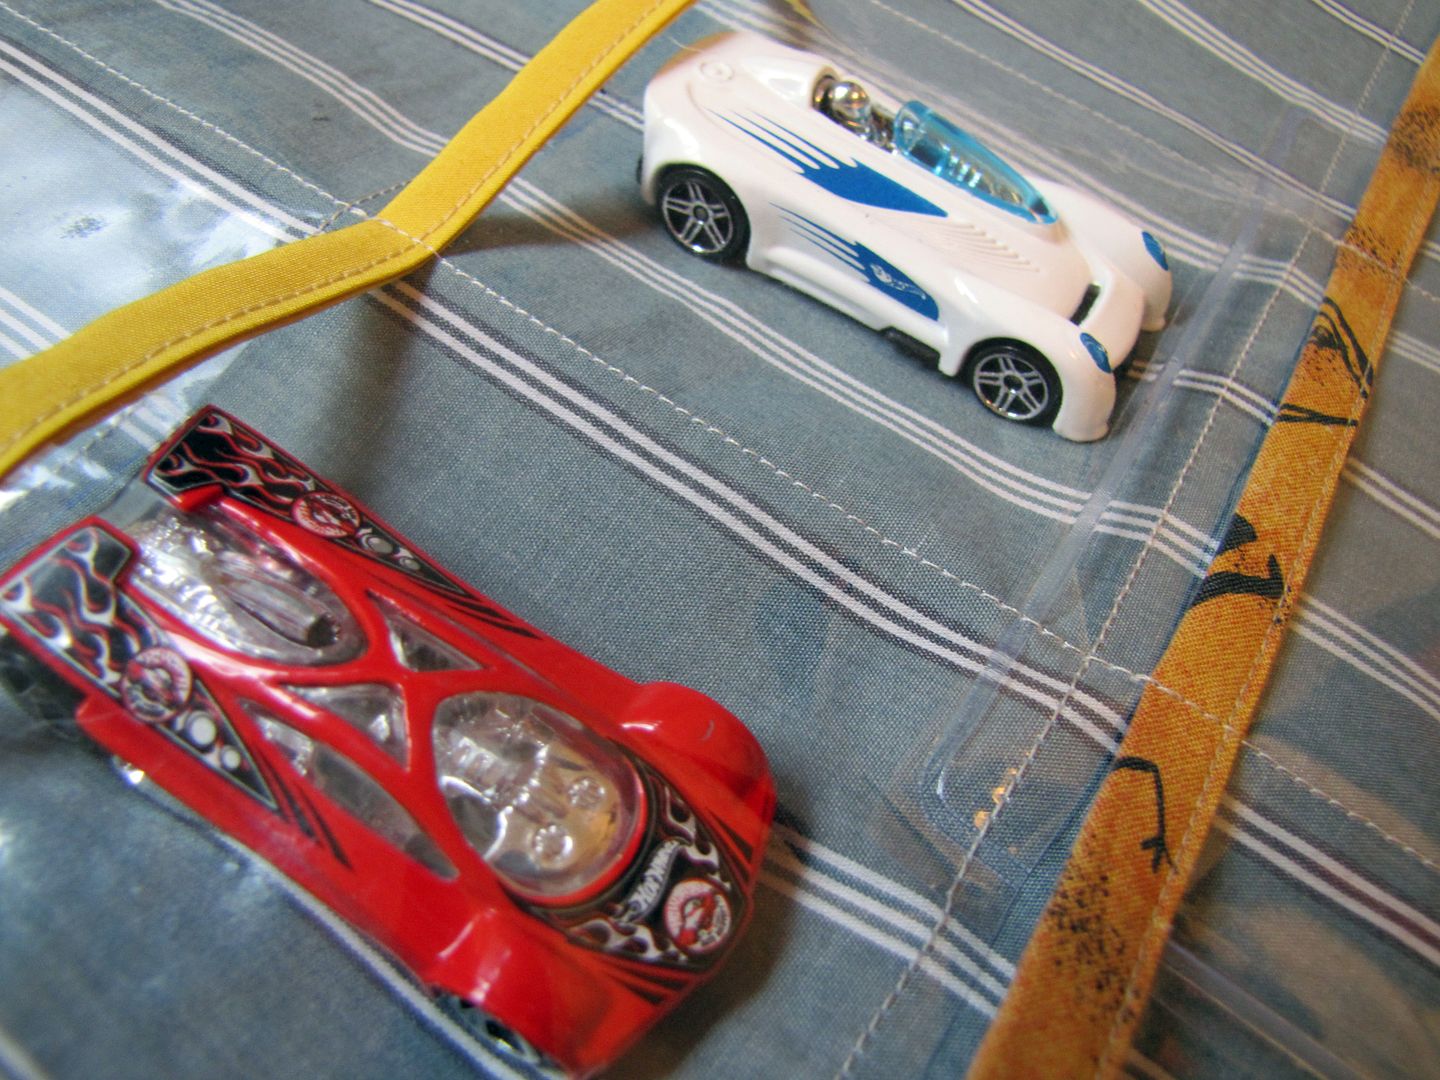
Here's is one way to repurpose excess vinyl packaging.

This little pocket organizer is just the right size for storing the small stuff that gets misplaced like craft supplies and jewelery, or hang it low for the little ones, who love to sort, organize, and generally poke things into pockets.
To make your own clear pocket organizer, gather up your sturdy vinyl packaging, some fabric for the backing (I used an old button down dress shirt), some medium to heavy weight iron-on interfacing, fabric strips (or pre-made double-fold bias tape) for edging both the pockets and the outside frame, and two eyelets for hanging. A grid ruler and rotary cutter is your friend for this project, so bring them out too if you have them.
Begin by cutting the backing fabric and interfacing both into 14" by 11" rectangles. Iron the interfacing to the wrong side of the fabric rectangle, following the manufacturers directions.
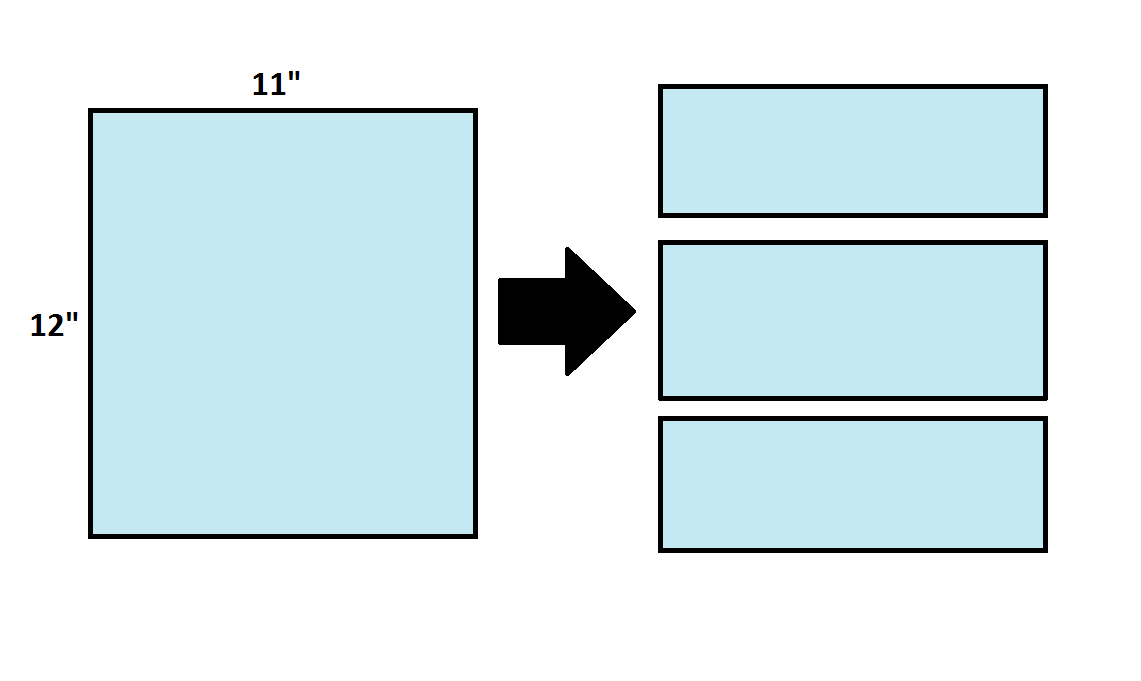
Cut a 12" by 11" rectangle of vinyl. Divide that vinyl rectangle into three equal sections of 4" by 11".
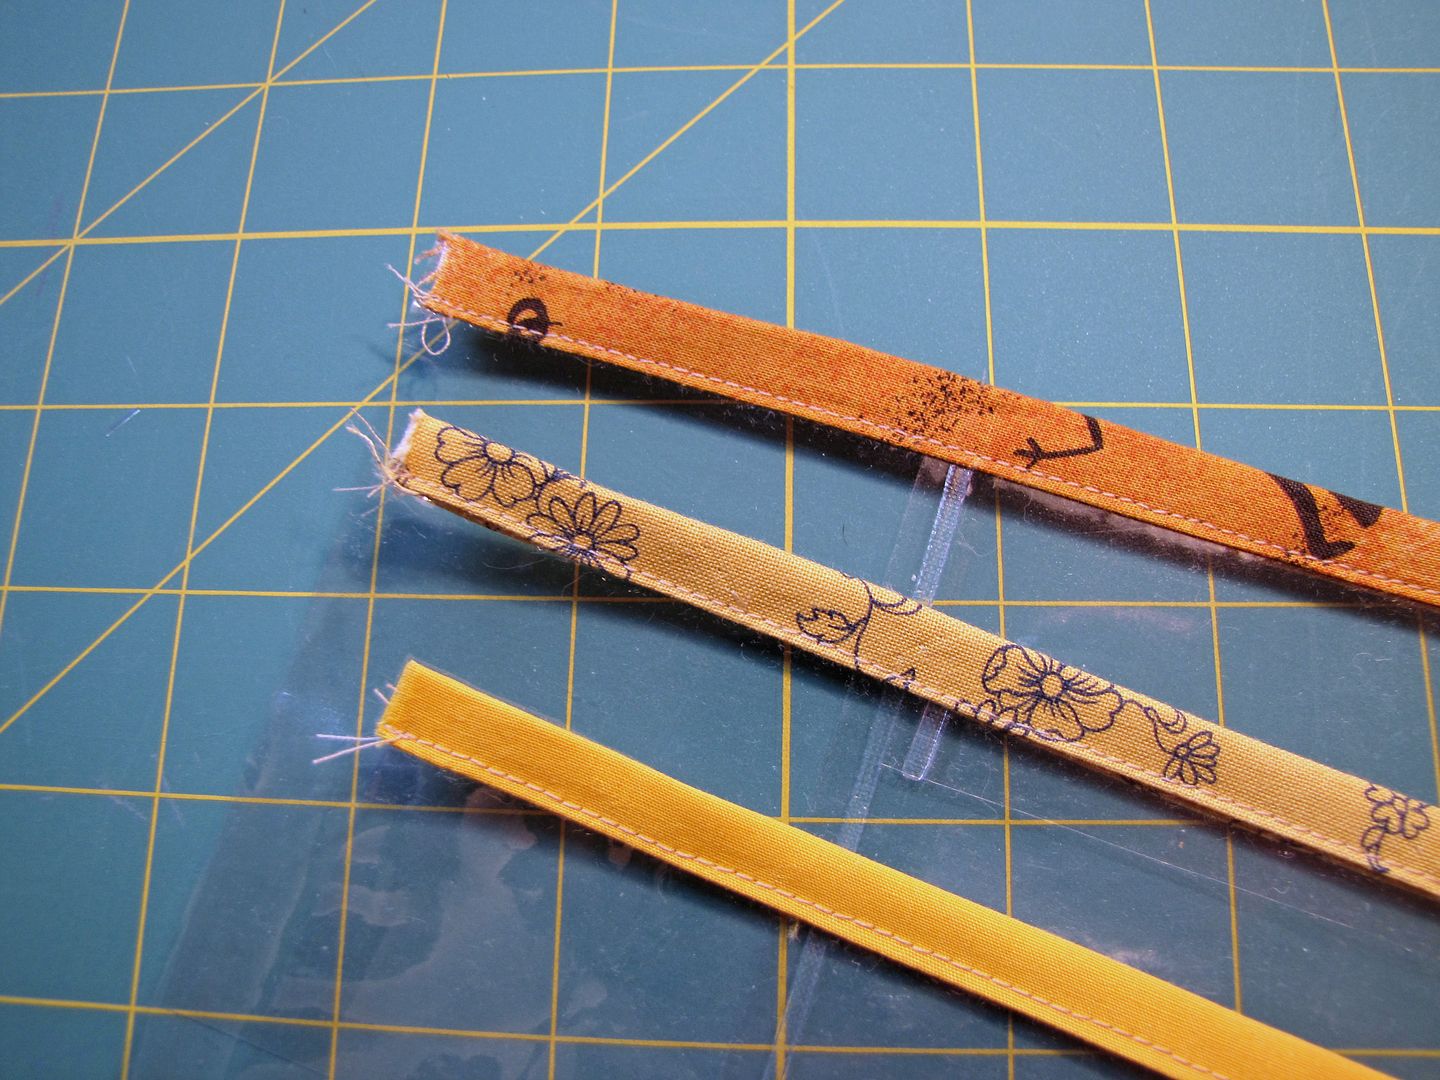
 Cut three fabric strips for edging the vinyl pockets, 1 1/2" by 11" wide (or cut three 11" long pieces of the double-fold bias tape). Prep the strips by folding each them in half length-wise, wrong sides together, and pressing flat. Open up the strip and fold the raw edges in to meet the center fold. Press. Once more fold and press the center.
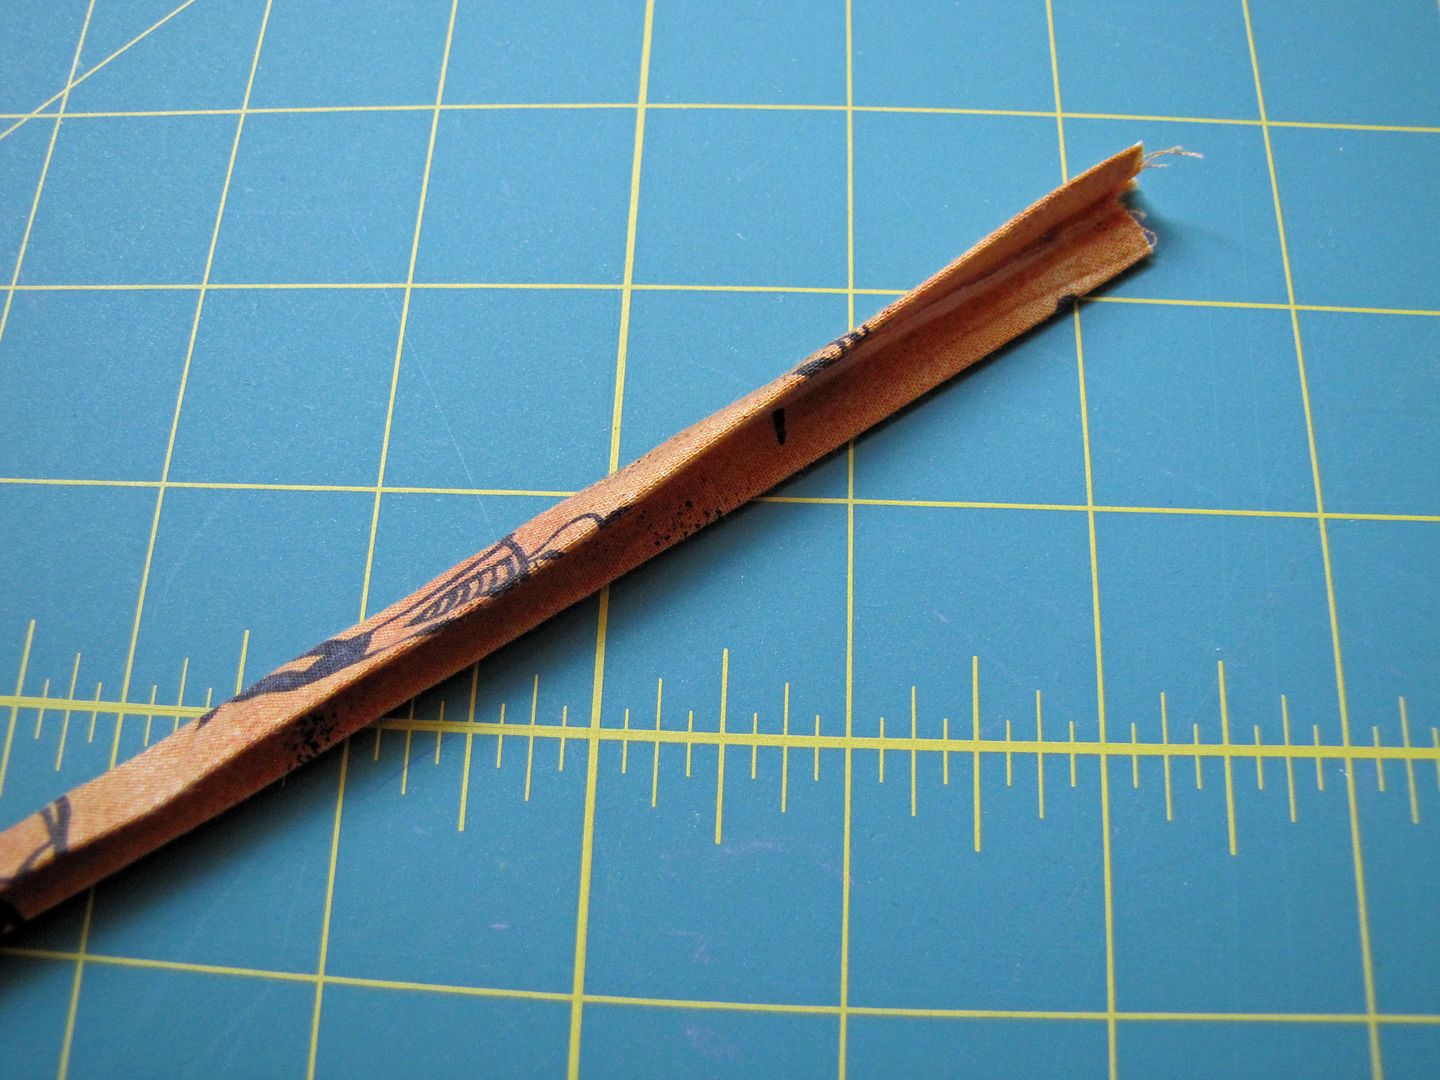
Open up a fabric (or bias tape) strip and align a raw edge, right sides together, with the longer side of a vinyl strip. Machine baste the fabric to the vinyl. Refold the fabric strip over the vinyl edge and stitch fabric to vinyl. Repeat for other two vinyl pieces.
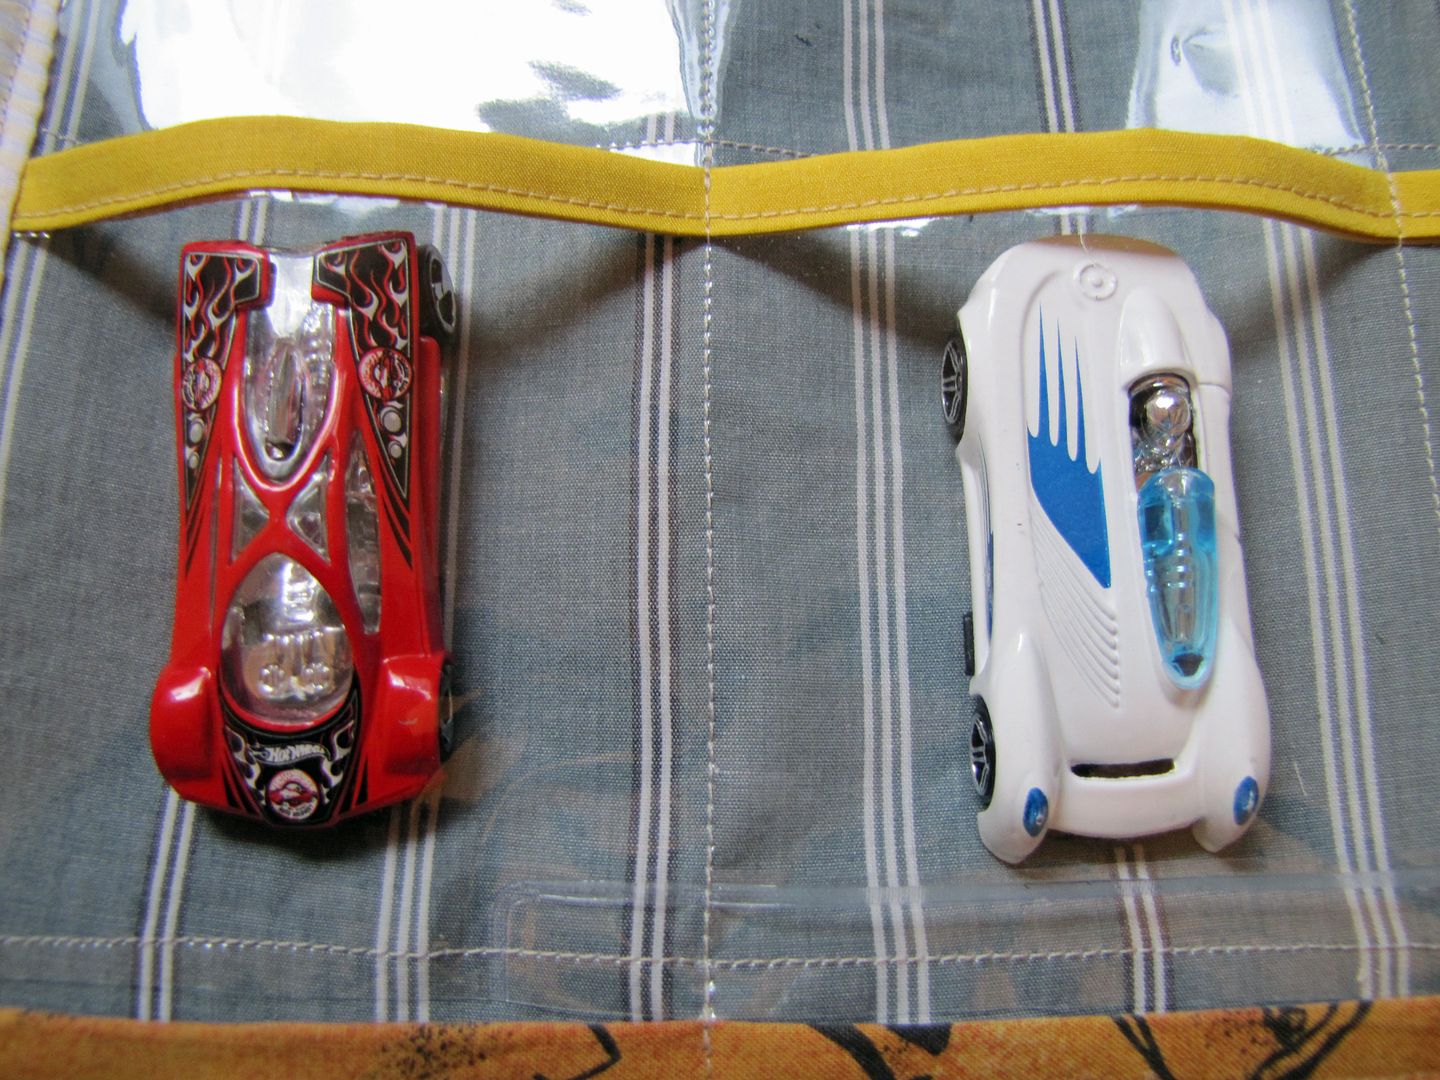
Position the vinyl strips onto the right side of the fabric backing as shown:
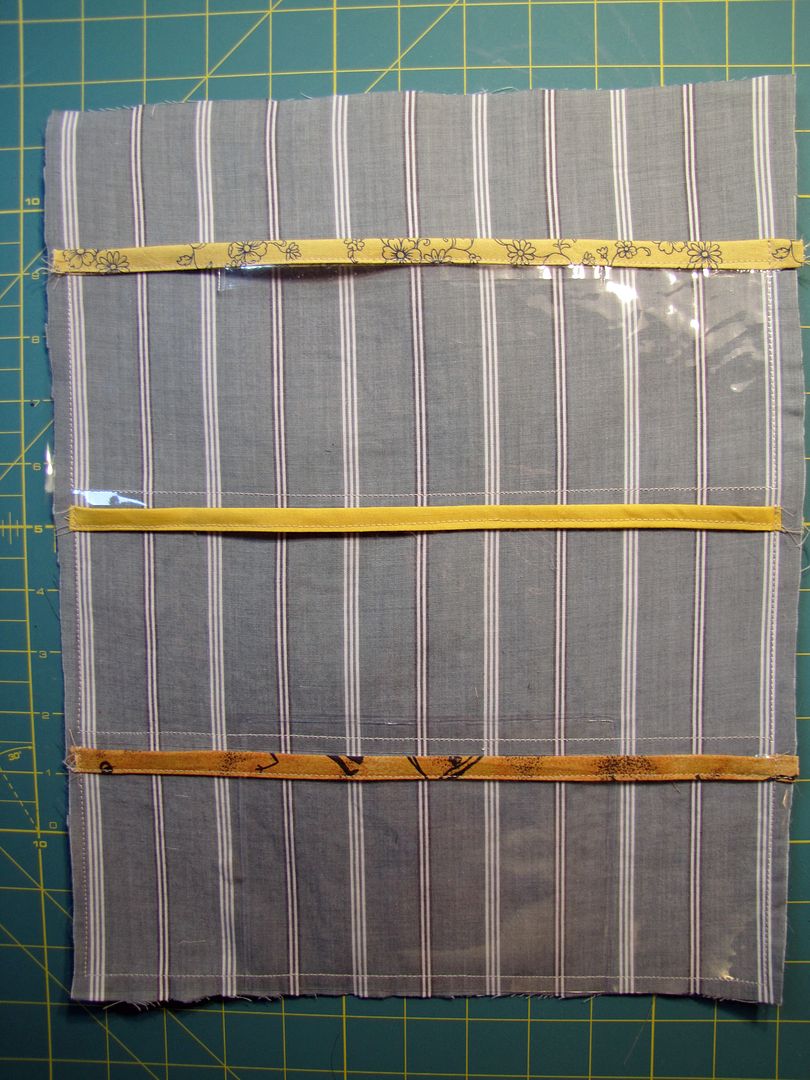
The bottom strip should align with the bottom raw edge of the backing and each vinyl strip above should sit just above the fabric lined edge of the strip below. The top 2" of backing will remain uncovered.
Stitch the bottom of each strip to the backing 1/4" from the edge.
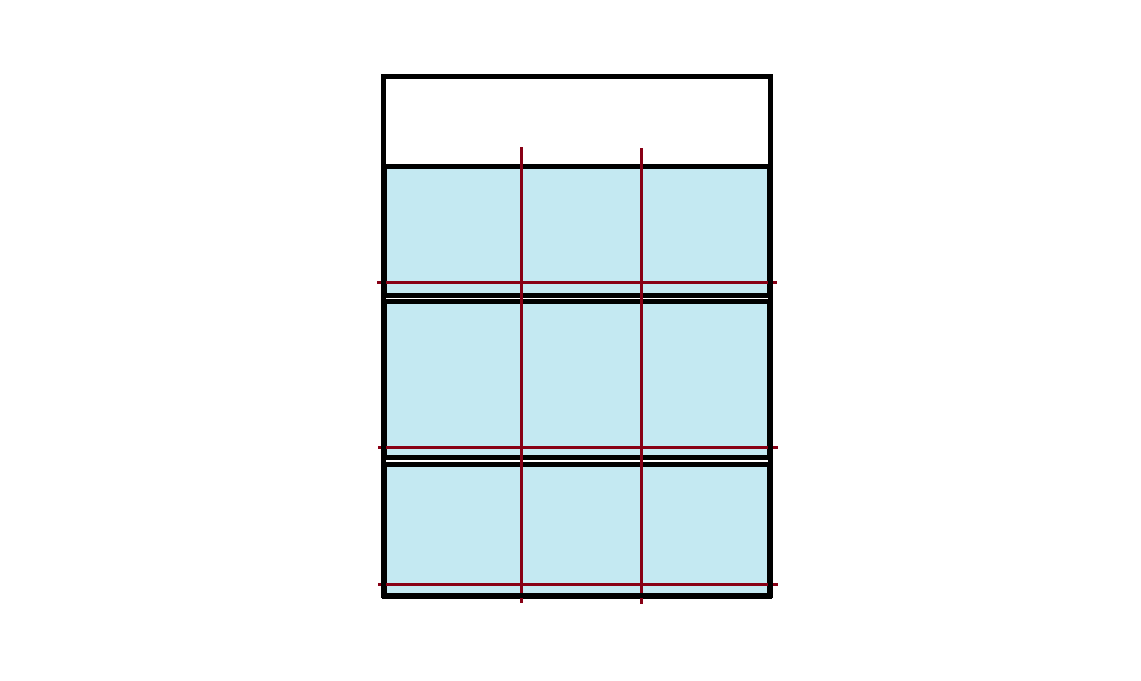
Next, divide the three vinyl pockets into nine by making two vertical lines of stitching. This is when having material with vertical stripes is quite handy. Otherwise, use tailor's chalk or faint marks with a pencil to mark vertical lines at 3 2/3" intervals from the side edges. Stitch from the bottom edge of the organizer straight up to the top edge of the top pocket. Reinforce the top edge of the pockets by taking a couple of back stitches as you sew by.
 Cut the fabric for the outside frame into two 1 1/2" by 12" strips and two 1 1/2" by 14" strips. Prep each strip in the same manner as the pocket edging. Edge the sides with the two 14" strips. Sew on the top and bottom edging with the 12" strips, leaving a 1/2" of overhang on each end. Tuck in this overhang before your final top stitch to create smooth corners.
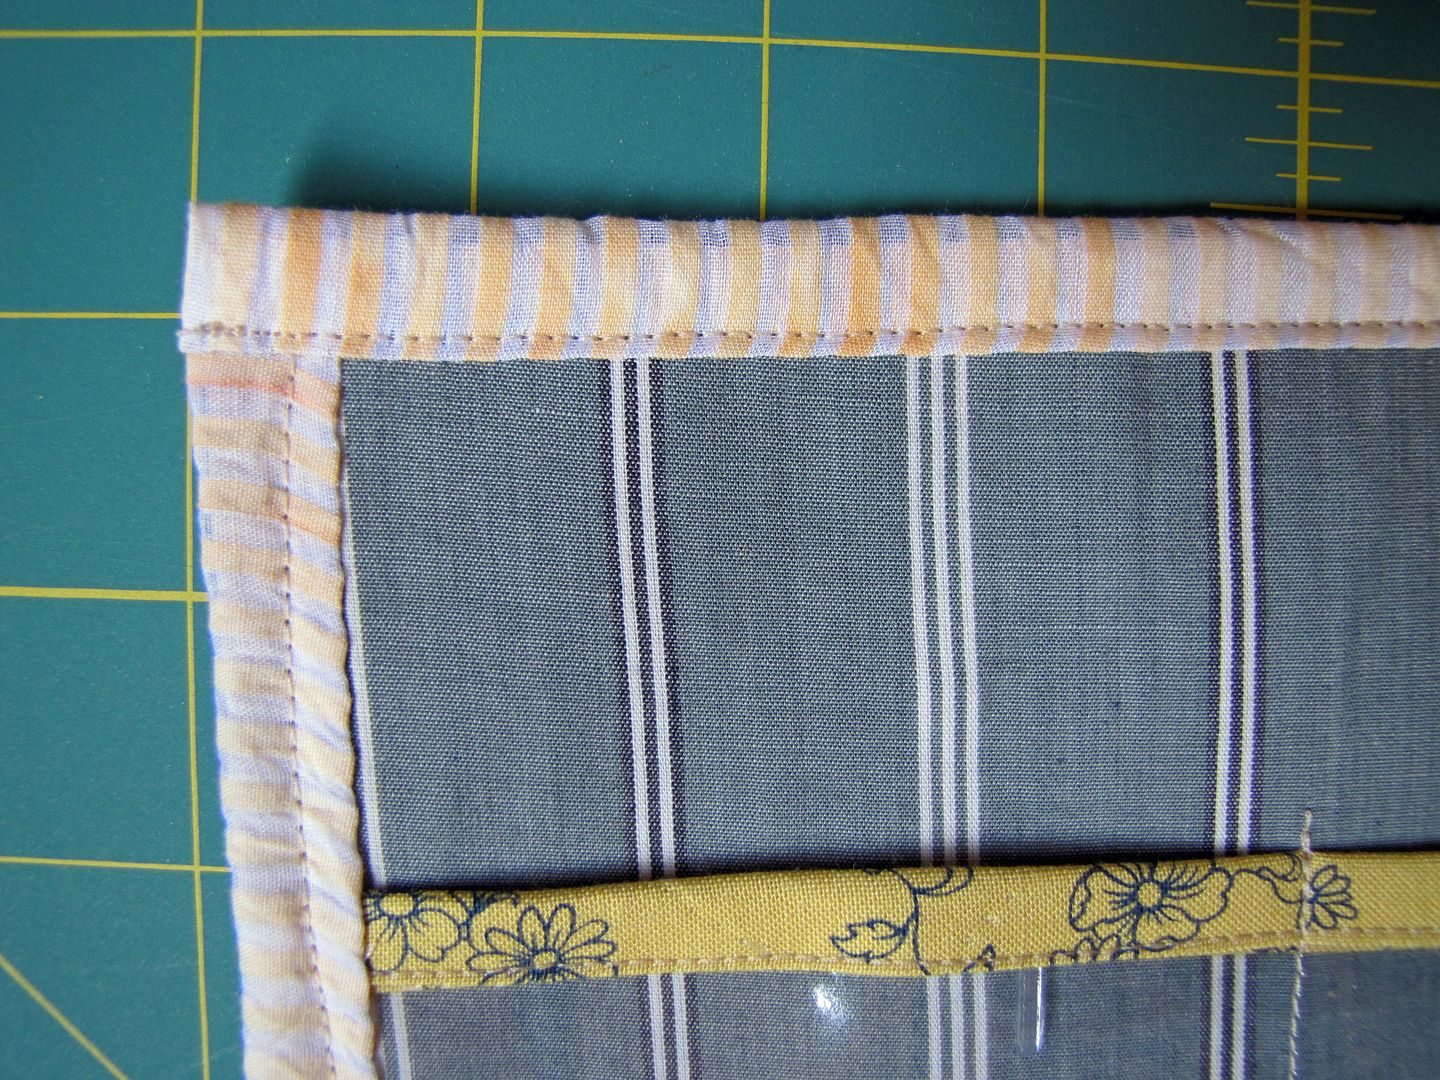
Using the manufacturer's directions, attach the eyelets to the top edges of the organizer.

Hang the organizer on the wall by looping the eyelets onto nails or screws. Try lacing the eyelets with ribbons before hanging for a bit extra pretty, if desired. Fill pockets with goodies.
***********************************************
This is a free tutorial and I encourage you to use the information in any way you need to (check the disclaimer at the bottom of the page). If it works for you, please consider supporting my etsy shop by purchasing a Little Print Design pattern or toss a dollar or two in my paypal to show appreciation and to encourage me to offer up even more quality patterns and tutorials.
Thank you!
Questions about the Donation? FAQ here.
That is a brilliant idea!
ReplyDeleteI love it! I might make bigger pockets and use it for my sewing 'bits and pieces'.
B x
Oh I love it, just created loads of felt food that cries out for being sorted and after Christmas we have loads of packaging lying around. Thank you for an other of your great tutorials.
ReplyDeleteHey, super good idea. I'm going to try it. Of course your brilliance will be credited if it goes well, and you will be blamed if it doesn't;)
ReplyDeleteThanks,
Lisa
http://mamausesneedles.blogspot.com
This is brilliant. Thanks for the repost!
ReplyDeletethat is just super!! I am definitely going to get to work on some of those!!
ReplyDeleteVery cool! :) Hey, you always have the neatest ideas...do you happen to have any ideas for reusing feed bags? May sound silly, but we have ducks and guineas and I have a gazillion empty feed bags that I would love to find something to do with! I am going to use some to line the garden paths this spring...but that won't even make a dent.
ReplyDeleteThis is brilliant. I have made fabric wall pocket organizers, but see through is great for the kiddos toys since they play with what they see. Thanks for sharing!
ReplyDeleteI absolutely love that idea my mouth is wide open and my son wants one for his cars. Great!
ReplyDeletewow this is brilliant! I love it! definatley going to use this idea!! I like B's comment about making the pockets bigger for sewing bits and pieces! Idea logged in my internal storage facility... that would be my very cluttered brain!! hee hee!
ReplyDeleteWow brilliant idea! I just got some new bedding so I got plenty of vinyl to go around! Never though of re purposing it like that.
ReplyDeleteA fabulous idea :) I'll bet tiny fashion dolls and their tiny accessories would love a home like this. Thanks for sharing!
ReplyDeleteI also have some of this vinyl saved up. I used some of it for a I Spy Bag but am always looking for more uses.
Awesome idea! This is going on my to-do list!
ReplyDeleteWhat a great idea - are you a genius or something? - would have NEVER thought of that. Thanks so much for your post - love it!!
ReplyDeleteThis is so clever!
ReplyDeleteThanks all!
ReplyDeleteCaptain's Wife, do you mean feed bags that is sort of woven plastic and laminated on the outside? Like a tarp?
I asked The Man and he had a few ideas, and I think I have a few of my own too, if we are thinking of the right material.
Wow wat a fantastic idea!! I think I'm digging my drawers out this evening. This idea is number 1001 on my To do list.
ReplyDeleteVegbee...yes, that is the type I mean! Would LOVE to hear about your ideas!! :)
ReplyDeletewhat a brilliant idea! I have tons of that lying around and now I have Ideas for how to use it. Thank you!
ReplyDeleteWow, I love the clear vinyl. What a great idea! Thanks so much for this, I'll be linking.
ReplyDeleteSuch a great idea! How do you come up with this stuff? :)
ReplyDeleteWhat a fantastic idea. Wondering what I could put in one....
ReplyDeleteJust wanted to thank you again for sharing your measurements for this organizer. I made one today and my daughter was excited to fill it up with goodies. You can see it here if you want to take a look.
ReplyDeleteSorry to double post. Your tutorial inspired me to make this, so I thought I would share it with you.
ReplyDeletehttp://hippiekender.blogspot.com/2010/01/hair-accessory-storage.html
very nice...
ReplyDeleteI just wanted to share this when I read you were looking for ideas on what to do with bubble wraps. I saw this video on youtube. here's the link: http://www.youtube.com/watch?v=45-qWQvphlE&feature=bf_next&list=SP8660AF21DAC6BB7C&lf=list_related
great blog. i like it. Groeten vanuit nederland. Elizabeth
ReplyDeleteThanks. I have several vinyl zipper bags that I had no idea what to do with, but you have provided an inspiration. Thanks! I may attempt to make the wall hanging, but in the mean time, I think I'm going to paint up a piece of pegboard and use "s" hooks to create a toy catch-all. The bags have the holes for displaying in the store. My bags even have little pockets where the cardstock labels and care instructions were stored. I'll just flip them and have my creative print and decorate the labels. Surfing the internet will land you in interesting places. :) Once again, thanks for the fantastic start to organizing my child's things!
ReplyDelete