One of the greatest things about having a basic doll pattern is the ability to individualize them for their intended child.
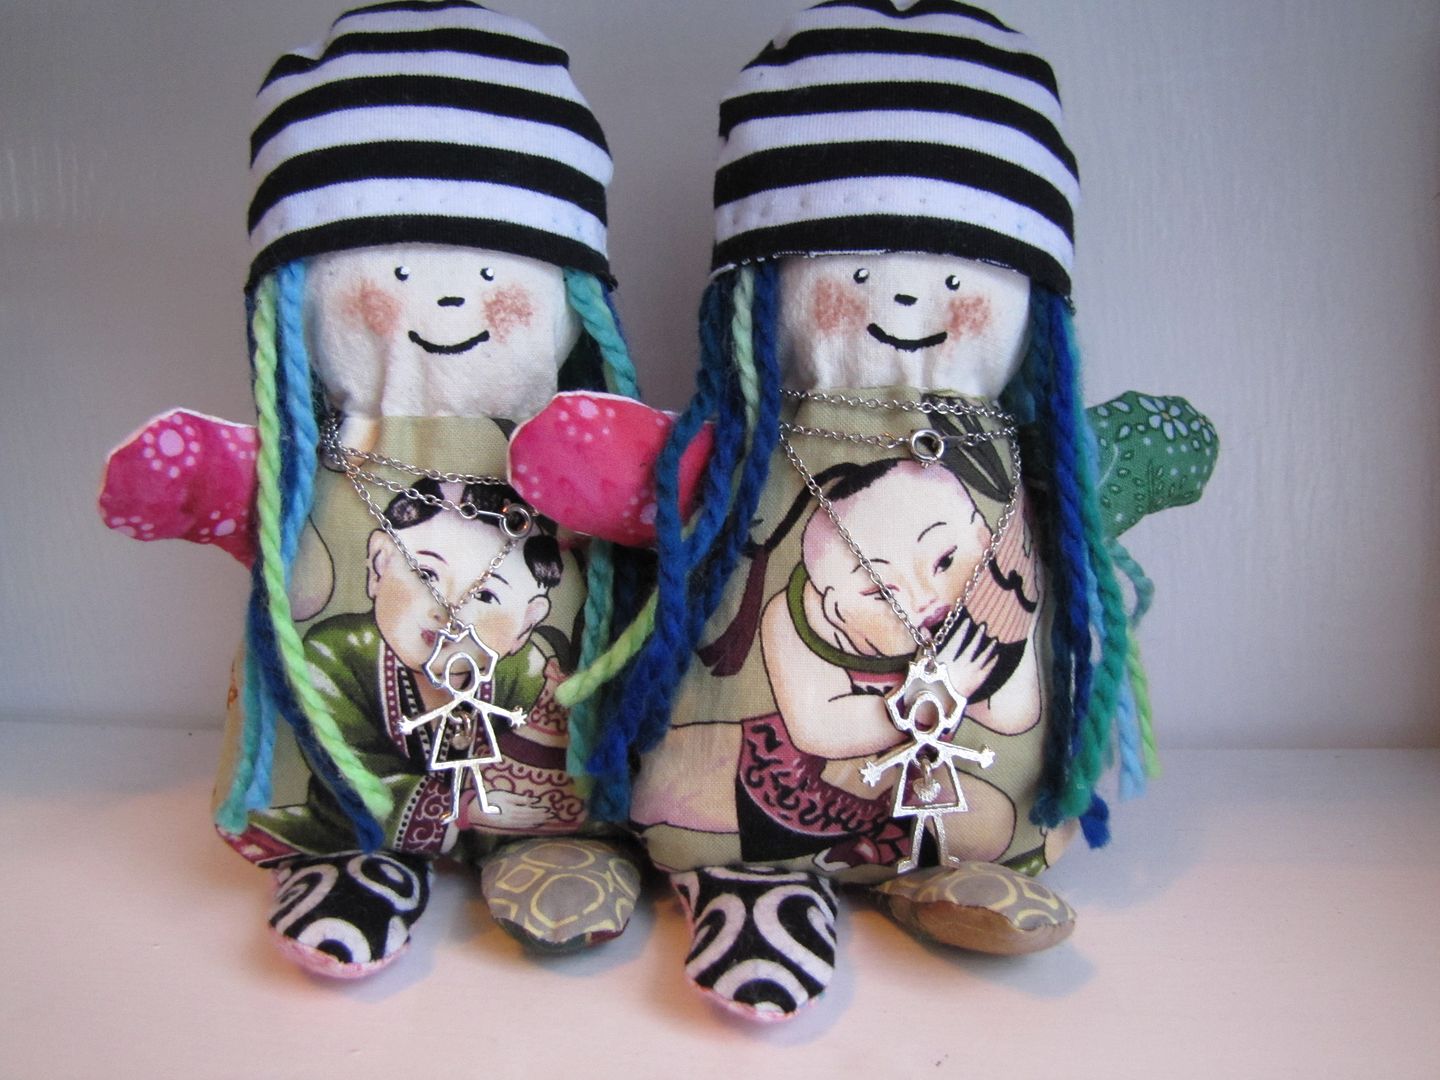
For Smootch and her dear friend I created two dolls exactly the same and wrapped them with 'friendship' necklaces.
For our youngest friend, I made cloth hair and embroidered on a face instead of painting, both safer options for babies. If I had one handy, I would of also added a bell to the inside of the doll, along with some crinkly tissue paper for an auditory and textile enhancement.
For another young friend, I matched the fabric of the doll with the fabric of a dress I made for her.
For your own cloth baby doll, download the pattern here.
Materials needed
Fabric for the doll
Yarn for hair (if using yarn hair)
poly fill or wool to stuff doll
acrylic paint or embroidery floss for the face
Cutting the pattern pieces
Each pattern shape is marked with its location and number of copies to cut. When more than one piece is required, fold fabric in half along the grain and position piece over top to cut mirror images.
For the optional fabric hair, cut out one head piece of flesh fabric, one hair piece in hair fabric, and one head piece in hair fabric.
Assembling the doll
Align two arm pieces, right sides together, and sew around the curved part. Leave the flat edge unsewn. Snip the curves or trim the seam allowance and turn arm right side out. Stuff with poly-fill or wool. Sew closed the flat edge. (If you are having a hard time sewing arm closed, take out a little bit of the filling - over stuffed is not necessarily the most comforting.) Repeat for other arm and both legs. Set aside appendages.
Align the two back pieces, right sides together, and sew closed the top 1" and bottom 1", leaving an opening in the middle.
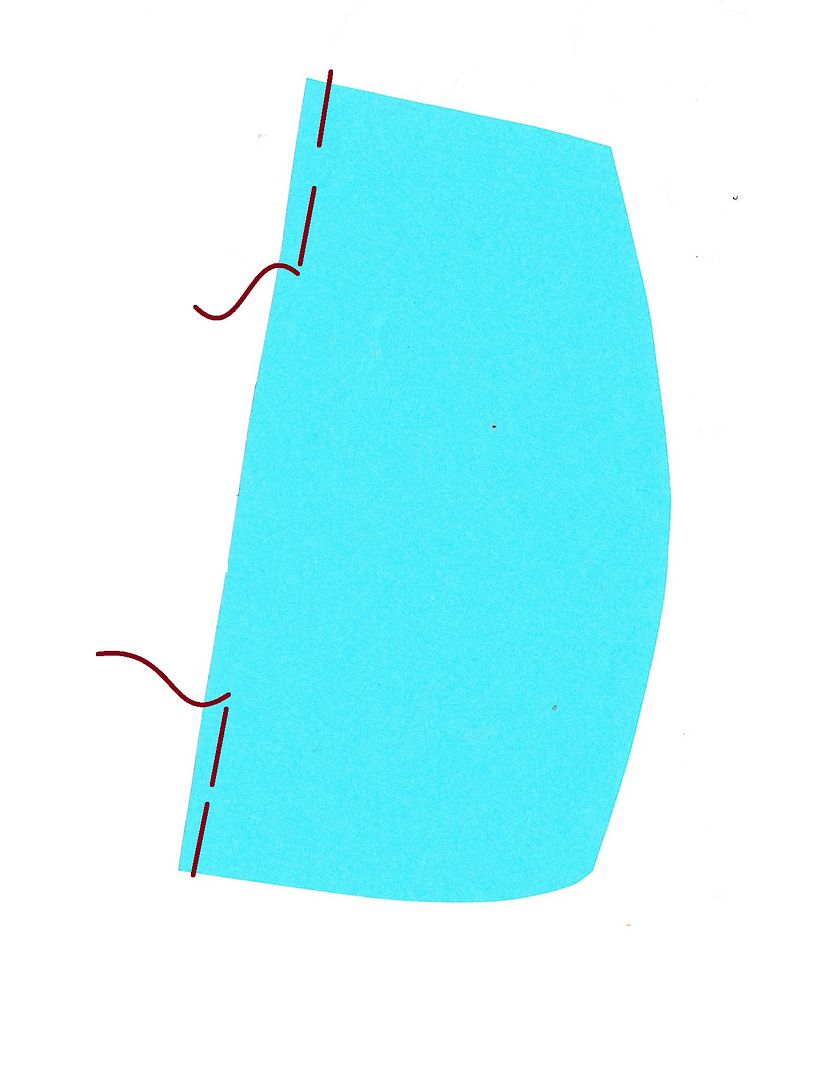
Press back pieces open.
If sewing on fabric hair, position hair piece on top of a head piece and satin or straight stitch hair in place. Repeat for other head piece.
If sewing on yarn hair, cut a number of pieces of yarn at desired length and position along edge of hair piece. Machine stitch yarn to edge of head piece.
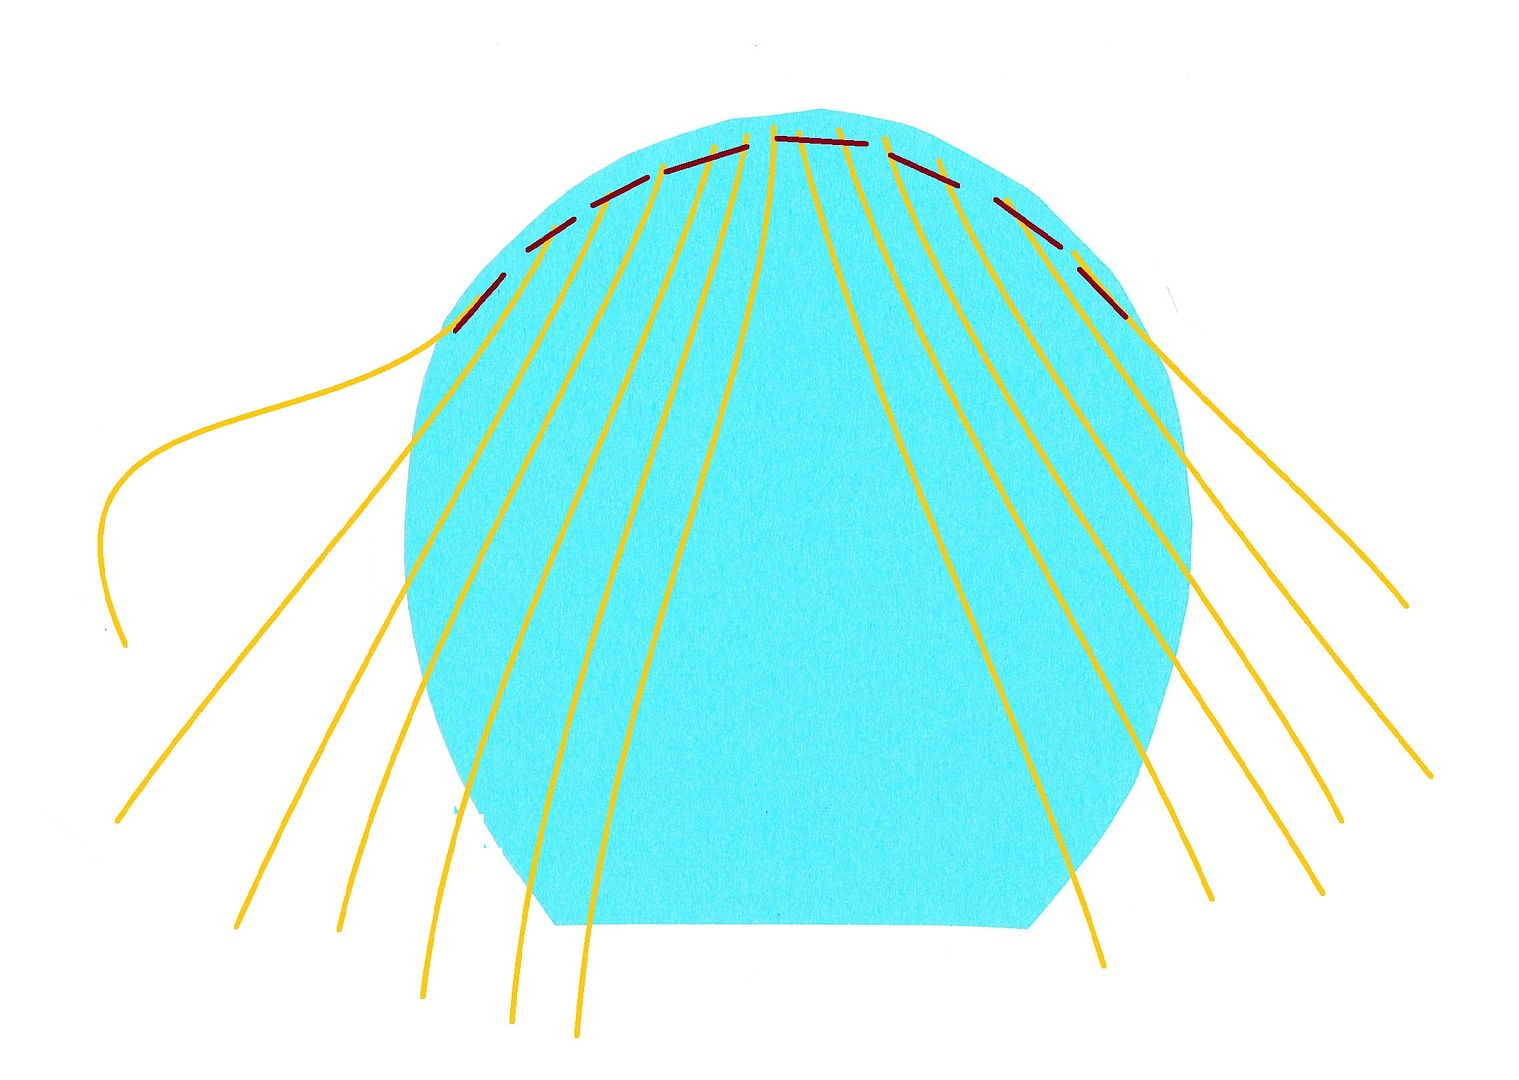
If desired, embroider on face with embroidery floss.
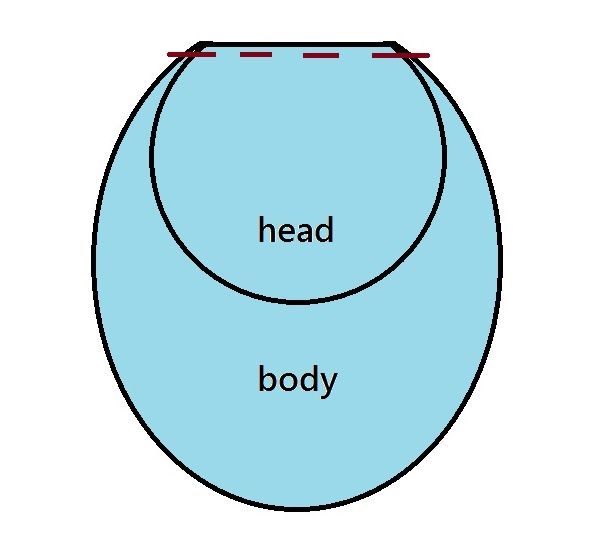
Align the flat edge of the front head piece to the flat edge of the front body piece, right sides together. Stitch in place and press open. Repeat procedure for back of head.
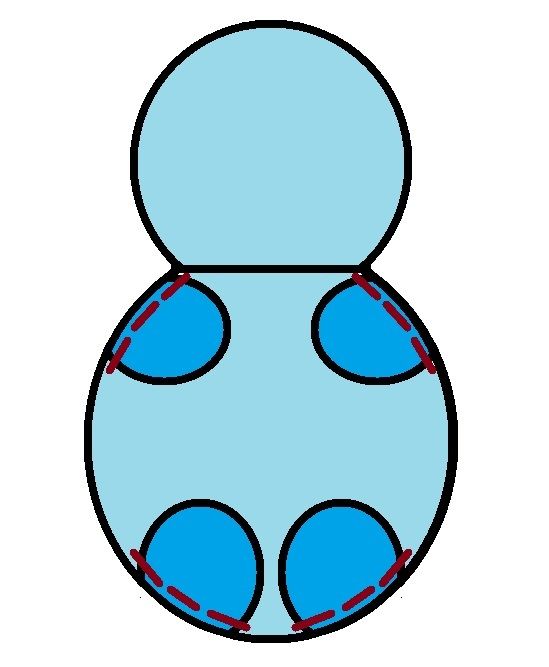
Position the arms and legs in desired locations on the right side of the body front, with the end of the appendages pointing towards the center of the body. Machine baste each arm and leg in place.
Align the front of the doll with the back of the doll, with arms and legs tucked in, and stitch all around the entire edge, head and body. Turn the doll right side out through the hole in the back.
Stuff doll and close back hole with a ladder or slip stitch.
To make a hat for the doll, cut two head pieces from knit fabric, stitch right sides together, and either hem or trim the bottom edge. Place on doll's head and baste around the base to secure to head.
To give a bit more definition to the neck, hand baste around the ditch between the head and body fabric, then pull tight to gather. Knot string and double stitch to secure gather.
Paint face and trim hair if needed. For a bit more colour definition, use face make up (blush and eyeshadow) to add colour to cheeks and mouth.
Have fun making this little baby doll! Please feel free to share by comment on any enhancements or modifications you make to your doll.


I love the idea of friendship dolls! And the hair on the doll in the second picture is great. I wonder if i will sometime get some time to create these little beauties. Thanks for sharing.
ReplyDeleteSo sweet! This may be easy enough for me to try. I take it, through the lack of 1s, that you have a new or healed 'puter?
ReplyDeleteThe Wizardess, yep, just got it back. Flexing my typing fingers and catching up on the blogs.
ReplyDeleteOh internet and functioning keyboard, how I have missed you!
I read your blog all the time but never post. I love your ideasIts funny, just last night i was looking up ideas for rag dolls to make for my girls, Im taking this post as a big hint that im meant to make these dolls. Thank you, this is just the kick in the butt i needed to break in my new sewing machine!
ReplyDeleteThose are super cute! I love the personalization ideas! Thanks for the pattern, I'll be linking.
ReplyDeleteLove the matching friendship dolls! My daughter is really into having matching items with her friends - clothes, jewelry, so why not a little softie?
ReplyDeleteI linked to your tutorial over at Craft Gossip Sewing:
http://sewing.craftgossip.com/free-pattern-little-softie-doll/2011/01/11/
--Anne
great idea with lots of scraps.
ReplyDeletehttp://lilalice.weebly.com/
Thank you! I made three this weekend and they are adorable. :)
ReplyDeleteLindo, adorei! Eu fiz e coloquei no meu Blog, mariagirassolcraft.blogspot.com
ReplyDeleteeu também sigo você porque adoro suas ideias. Faz um tempo que vi umas bonecas suas com colar de pérolas, lindas... Mas não acho agora!
Suas crianças são lindas
beijo
gracias for the information,
ReplyDeleteits really help me, and add my skill..
:D
Your dolls are lovely. Thank you for sharing.
ReplyDeletehave a nice day
Regula