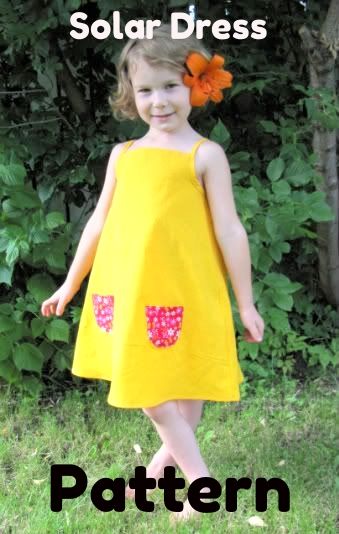
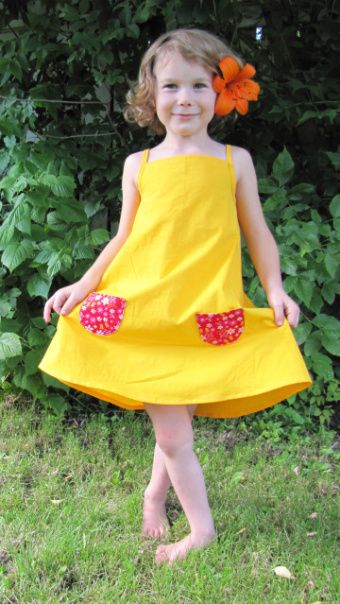
 During a recent little heat wave, the ease and functionality of the basic sundress - no ruffles, no layers, no sleeves - become rather urgent. Believe it or not, but there are very few 'plain' dresses around here. Smootch's taste tends to run towards drag queen and I try stay out of wardrobe decisions. The high temperature, though, wore Smootch down and a dress without any extras to trap heat and a wide enough base to get a little breeze going was requested.
Happy to oblige, little lady.
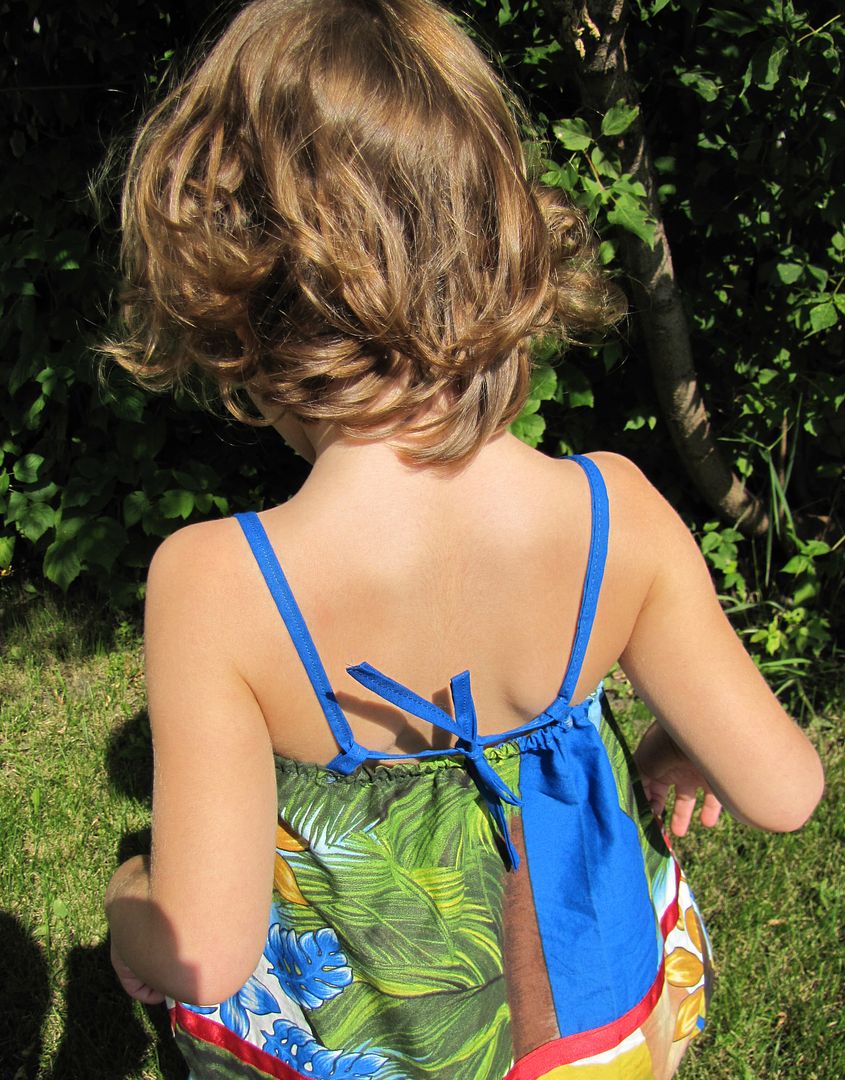
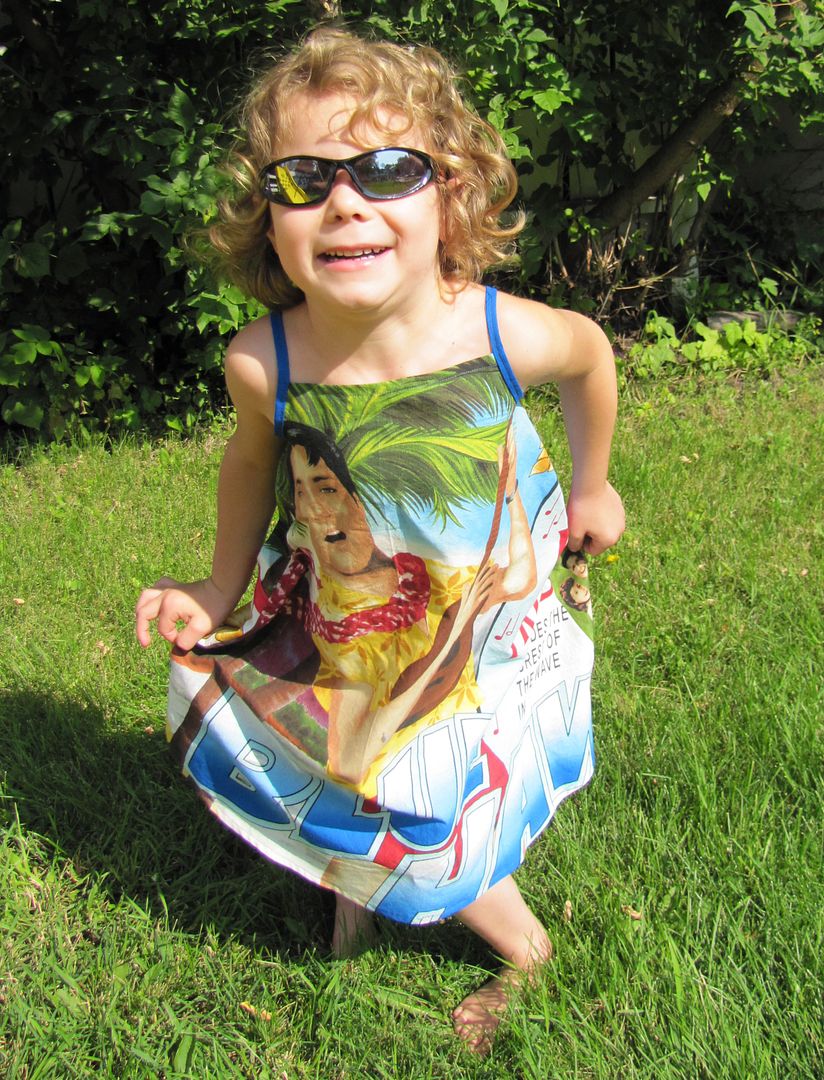 This dress is a simple as I could design, while keeping my mind on wear-ability beyond these few weeks of summer weather. I like a loosely fitting bodice area, with room to grow, and adjustable straps that allow for shirts underneath without getting all bunchy and awkward are nice too. A plain Jane front allows for pockets and embellishments to be added later to make something old seem new. A classic A-line shape works great as a pinafore over fall and winter tees and sweaters.
I'm feelin' pretty good about this one.
Which is why I thought I would make it available as a free pattern for y'all.
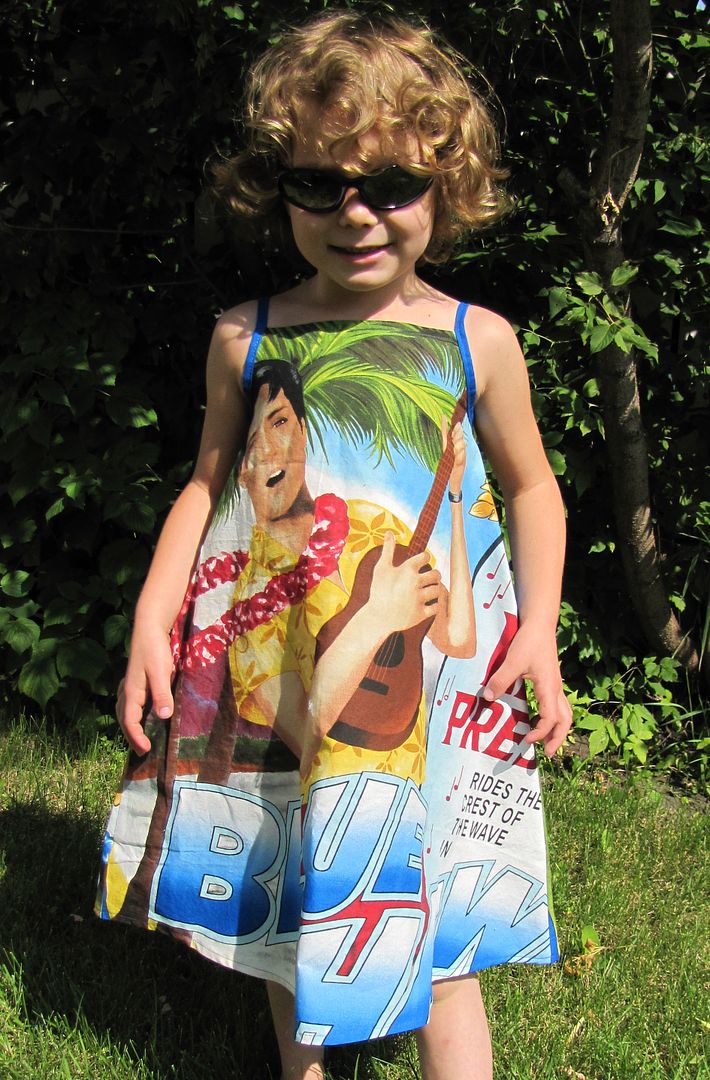
The Solar Dress comes in sizes 2/3, 4/5, and 6/7. The sizes are approximated to the US standard sizes (such as you would buy in ready to wear). To give you some idea, Smootch is a petite almost six year old, wears a US 5, and is wearing the Solar Dress size 4/5. Of course, the dress is quite forgiving size-wise, being of simple design, so do not get too hung up on the exactness of it all. (The designer certainly didn't :D)
To assemble the dress, in addition to light or medium weight fabric (try cotton or linen) and coordinating thread, you will also need some 1/4" elastic or clear elastic.
Now before you go clicking the link to get the pattern pieces, I'm going to warn you that the file is rather large. Sorry. I got carried away when drawing out the pattern and coloured the whole thing in.
We got playing.
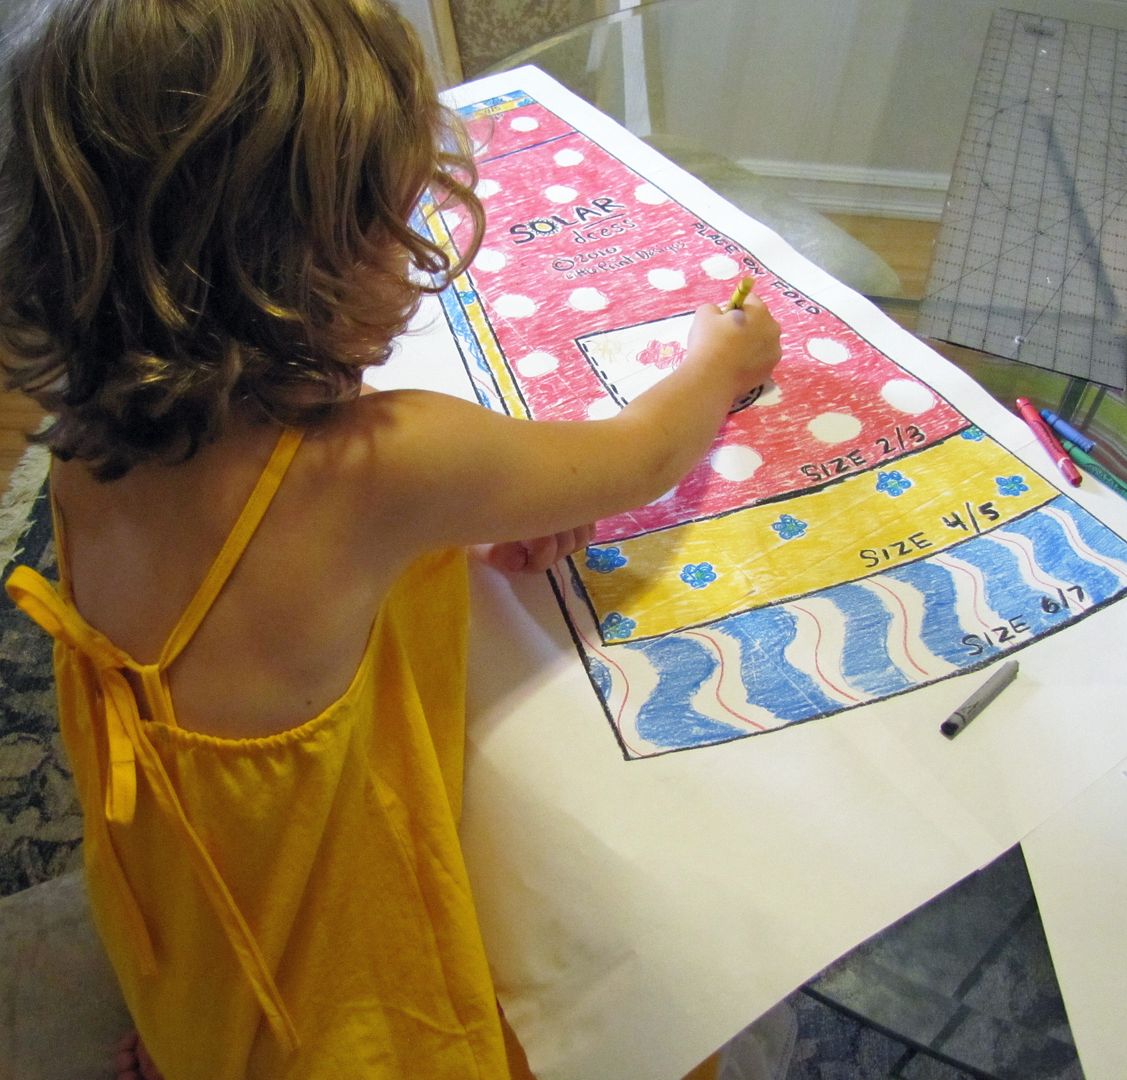
(Print in 'fast' and 'grayscale' when printing if you don't want to blow out your ink cartridge. If you guys have too many problems with the file, let me know and I will draw up a basic version, sans all the colours.)
Click here to download Solar Dress ePattern.
Print the Solar Dress pattern at a 1:1 scale (or 'no scaling') for correct size.
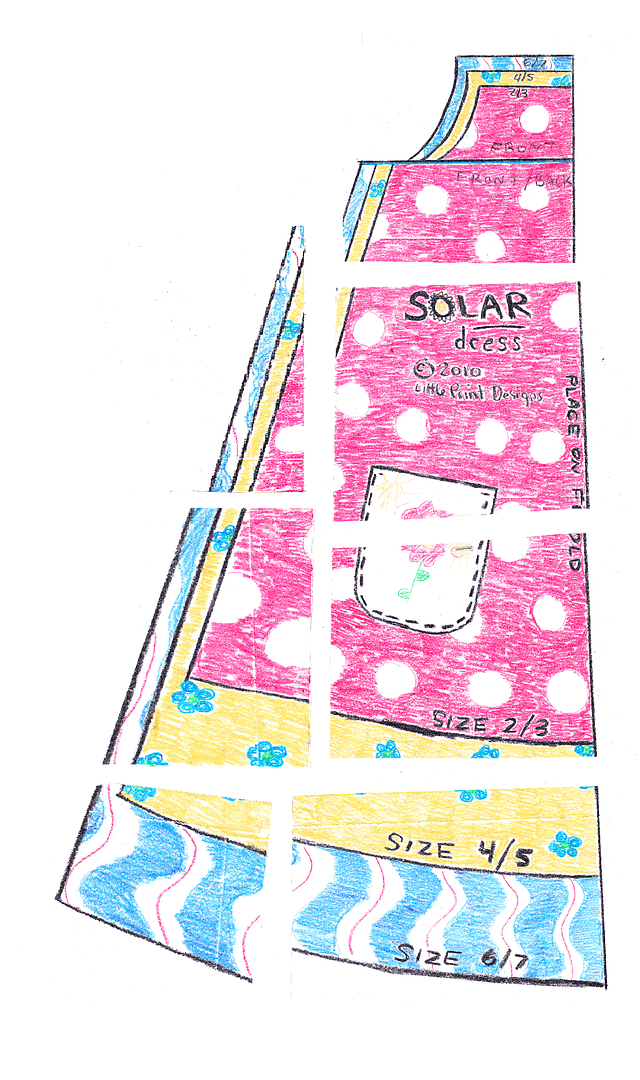 Assembling the Pattern Puzzle
The first thing to do is assemble the ePattern.
Cut out each piece from the file and assemble the pieces as roughly shown in the illustration on the right.
Align each piece flush as indicated by the lines and colours (it'll all look right as you put it together) and tape together.
The pocket piece is intended to be traced onto another piece of paper, using the drawn pocket as a guide for shape and placement. You could actually cut it straight out the the assembled pattern, however, if you do not mind a big pocket shaped hole in the middle.
Cutting the fabric
To begin, determine your desired size and either trace onto a separate paper or cut along the appropriate line as indicated on the pattern piece.
To cut out the front of the dress, place the full pattern along fabric folded grain-wise, folded edge of fabric aligned with long side of pattern marked 'FOLD'. Cut out piece. (PATTERN INCLUDES SEAM ALLOWANCE - DO NOT ADD SEAM ALLOWANCE WHEN CUTTING OUT FRONT.)
To cut out the back of the dress, fold the paper pattern piece on the dark line running from arm base across chest. The back shape is cut from this dark line and below (the top inch or two is eliminated). Folding saves your pattern, paper, and time, not having to cut out an entire new piece for the back along. With the pattern folded, align in the same manner on folded fabric as you did on the front. As you cut ADD ONE INCH OF ADDITIONAL MATERIAL ON THE TOP OF THE DRESS. This is adding some fabric to put in the elastic back, not accounted for in the pattern.
Additional pieces of fabric needed are bias cut strips for the straps and ties. If you would like to use store bought bias tape, that is excellent, use a double folded version, or you can make your own by cutting stripes of fabric 1 1/2" wide at a 45 degree angle from the fabric grain. Use an iron to press a double fold into the strips and conceal the raw edges. Do not sew the edges closed just yet.
The two straps made of bias tape need to be about 25" to 35" long, depending on your desire for short or long straps and size of dress. For bottom loops to tie straps to, cut two additional pieces of double fold bias tape each about 2" long.
Cut out four pieces of pocket.
Assembling the dress
Start by finishing the top edge of the dress front with a double folded hem.
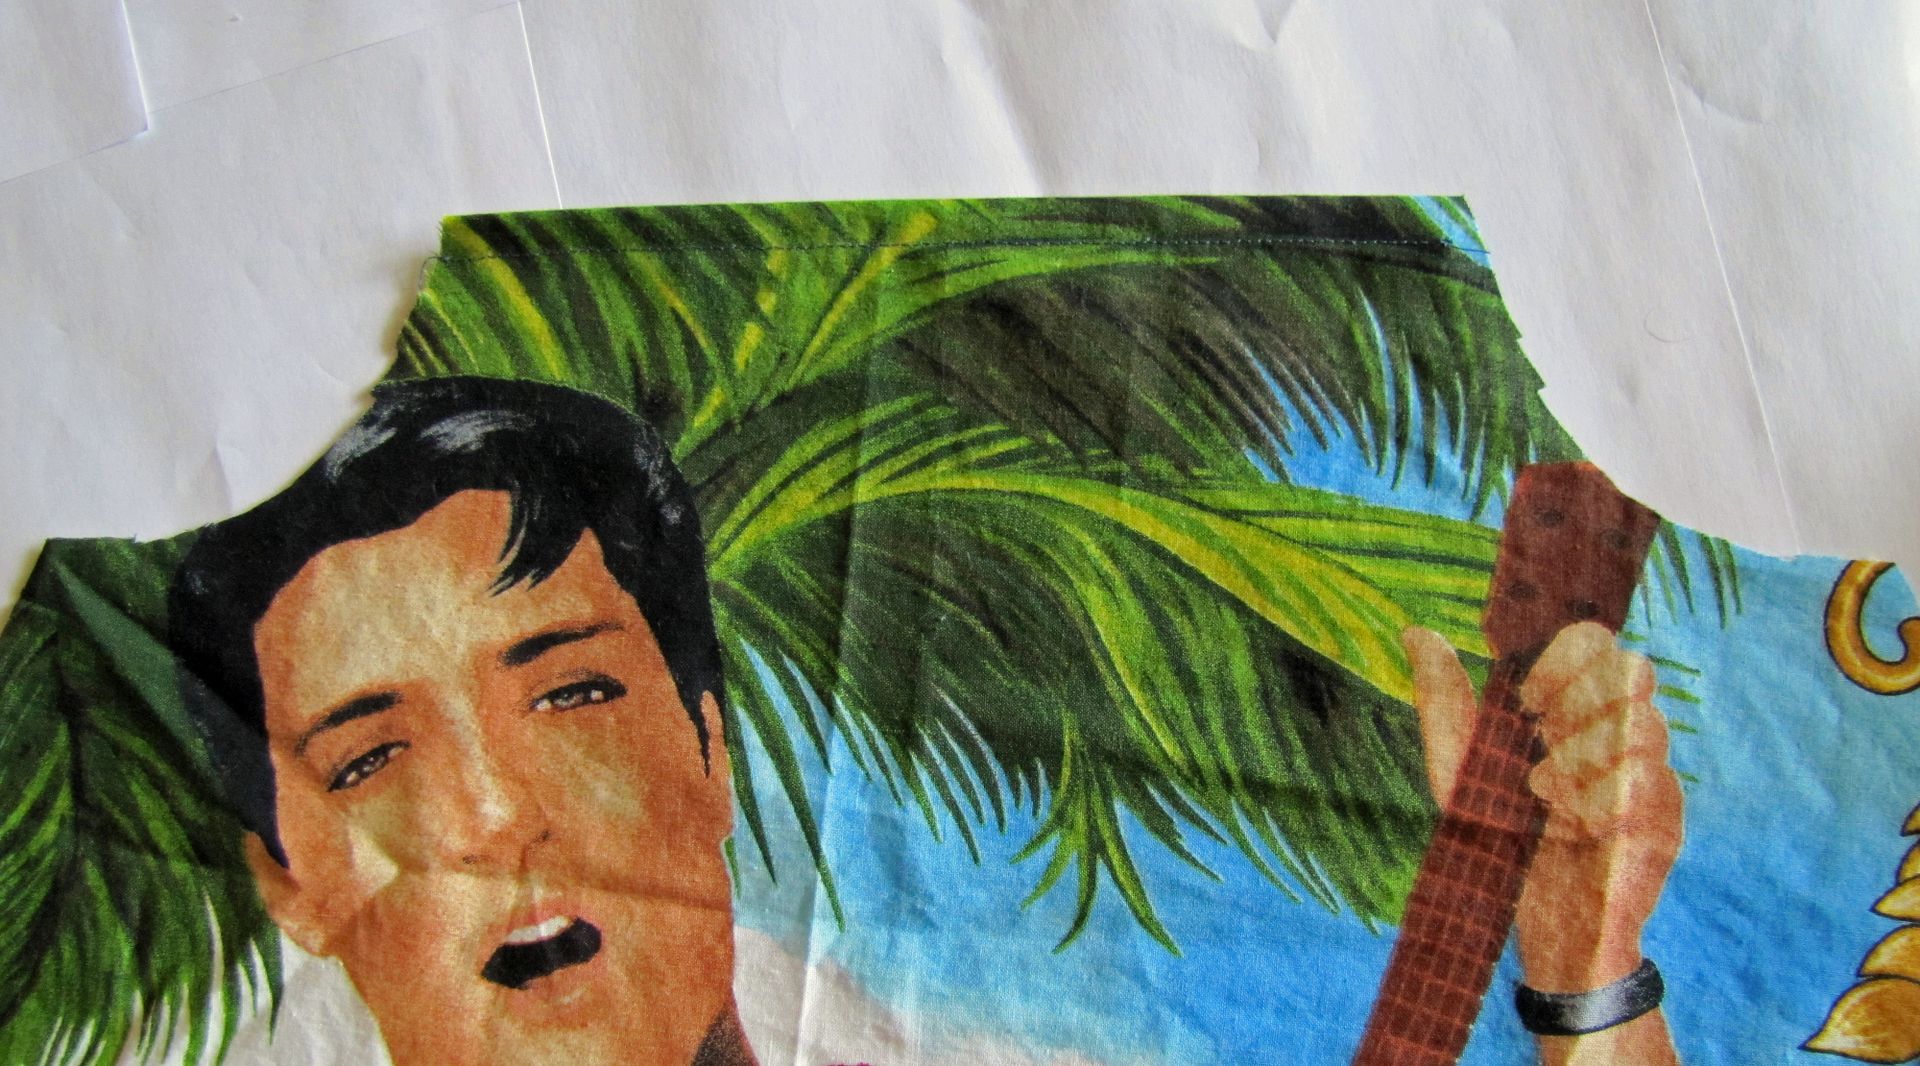
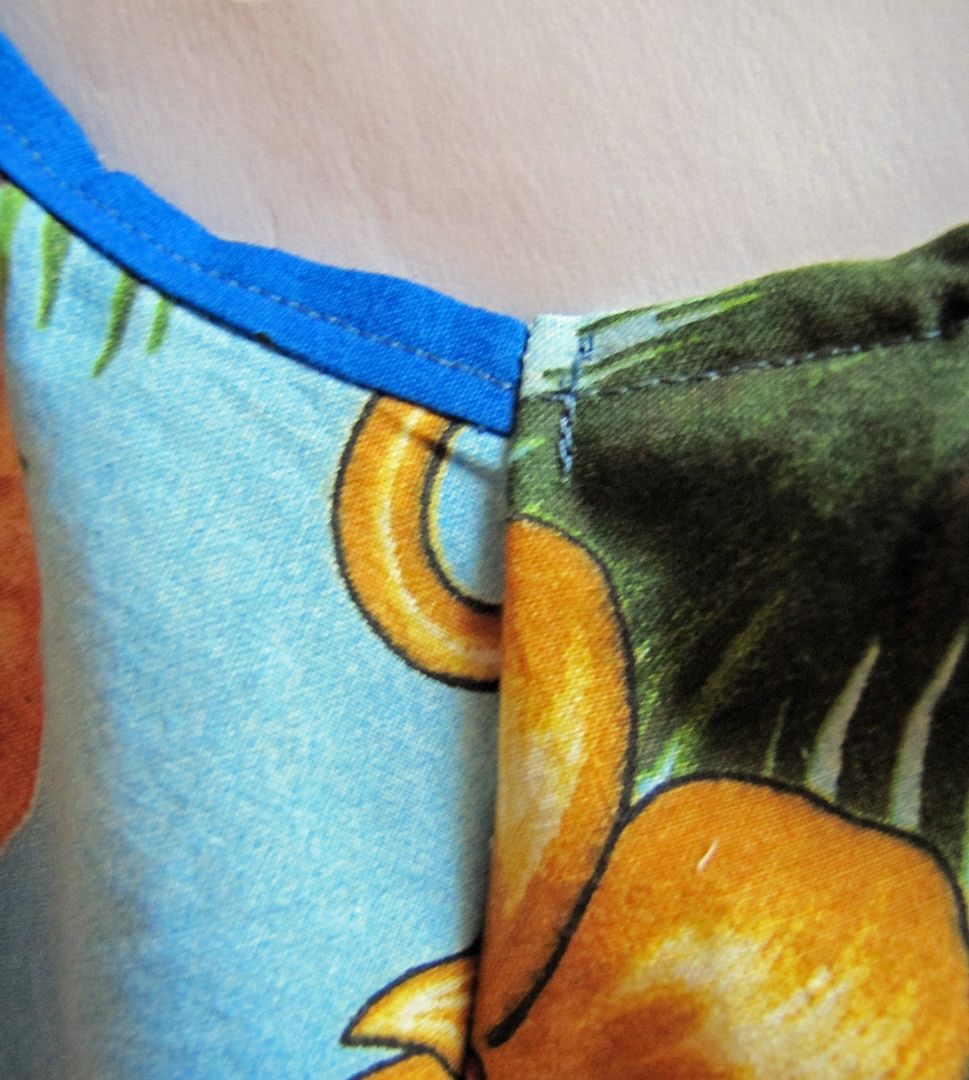
With your bias tape straps, fold one end of each strap to conceal raw edges. Open up bias tape and align the unfinished end with the arm curve on the front piece. With the tape still open, machine baste the raw edge of the bias tape to the edge of the arm curve (see this bias tape discussion for more information).
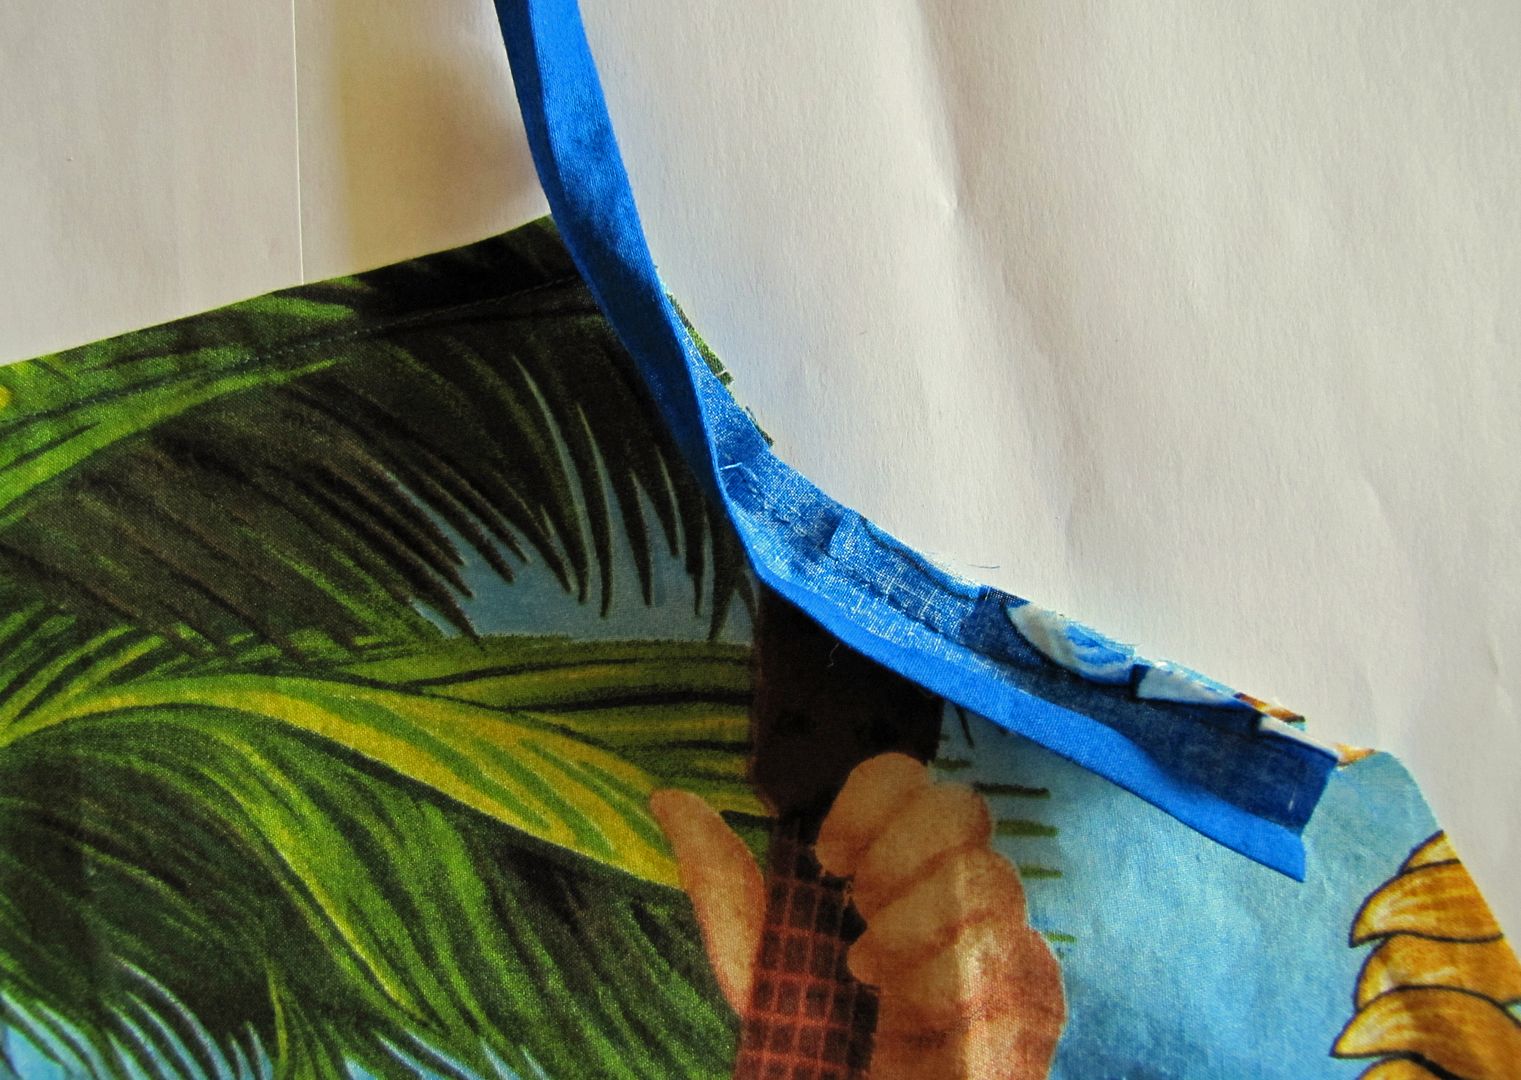
Fold closed the tape over the edge of the arm curve. Stitch close to the edge of the tape along the entire length, finishing the arm curve and closing the strap. Repeat for other strap.
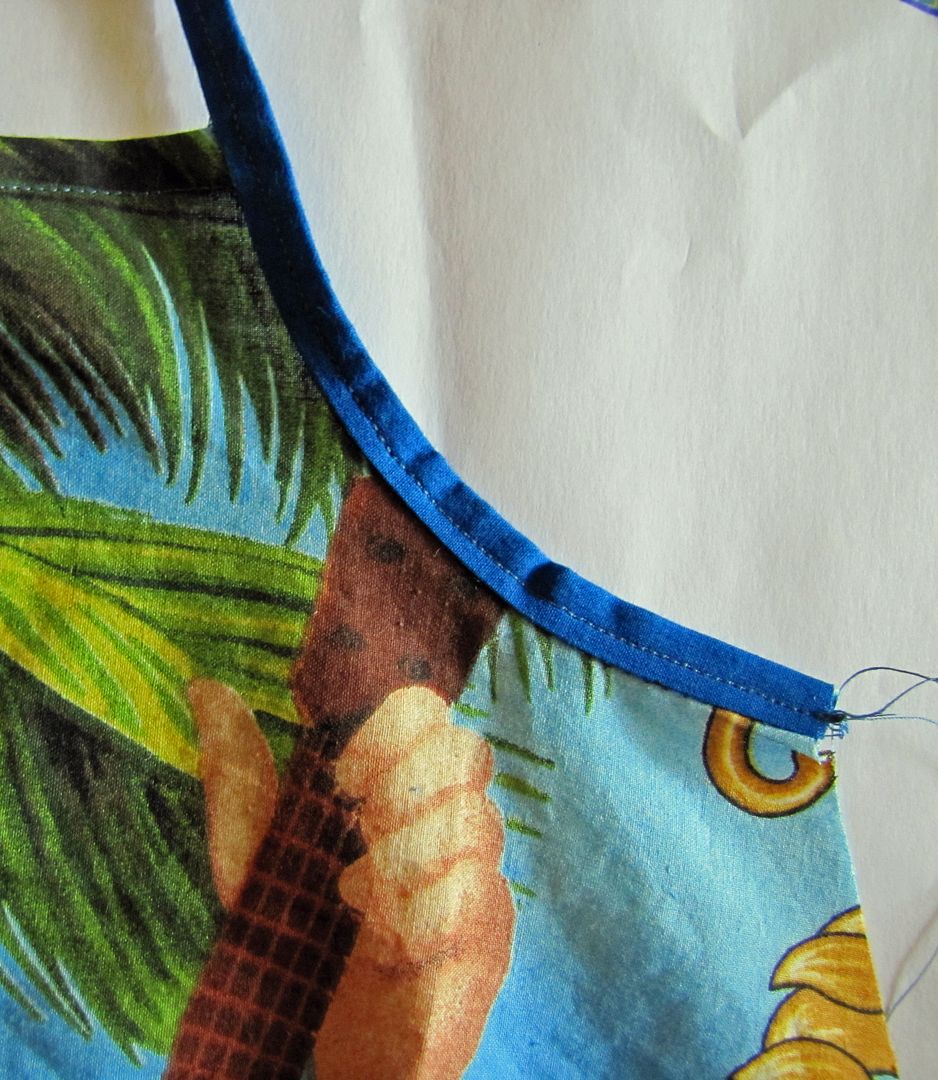
(Okay, confession: I'm not actually using bias tape above because of the limitations of the fabric panel I chose. It looks not so smooth - your bias tape will look nicer, trust me.)
Sew a pocket by placing two pocket pieces right sides together and stitching together the curved sides, leaving the straight top open. Turn the pocket right side out, fold the raw edges in on the straight side, and press flat. Stitch the straight side closed. Stitch on the pocket, in the position indicated on the pattern paper, by stitching the curved sides to the dress close to the edge. Be sure to secure the top edges with a few extra stitches for extra strength where it is likely to be pulled on often. Repeat for other pocket.
The top of the back is finished with a piece of thin elastic sewn in. Cut a length of elastic 8" to 10" long (depending on size used). Whether using clear elastic or regular 1/4" elastic, stretch it out along the length of the top raw edge on the back and machine baste the elastic directly to the dress, stretching while sewing.
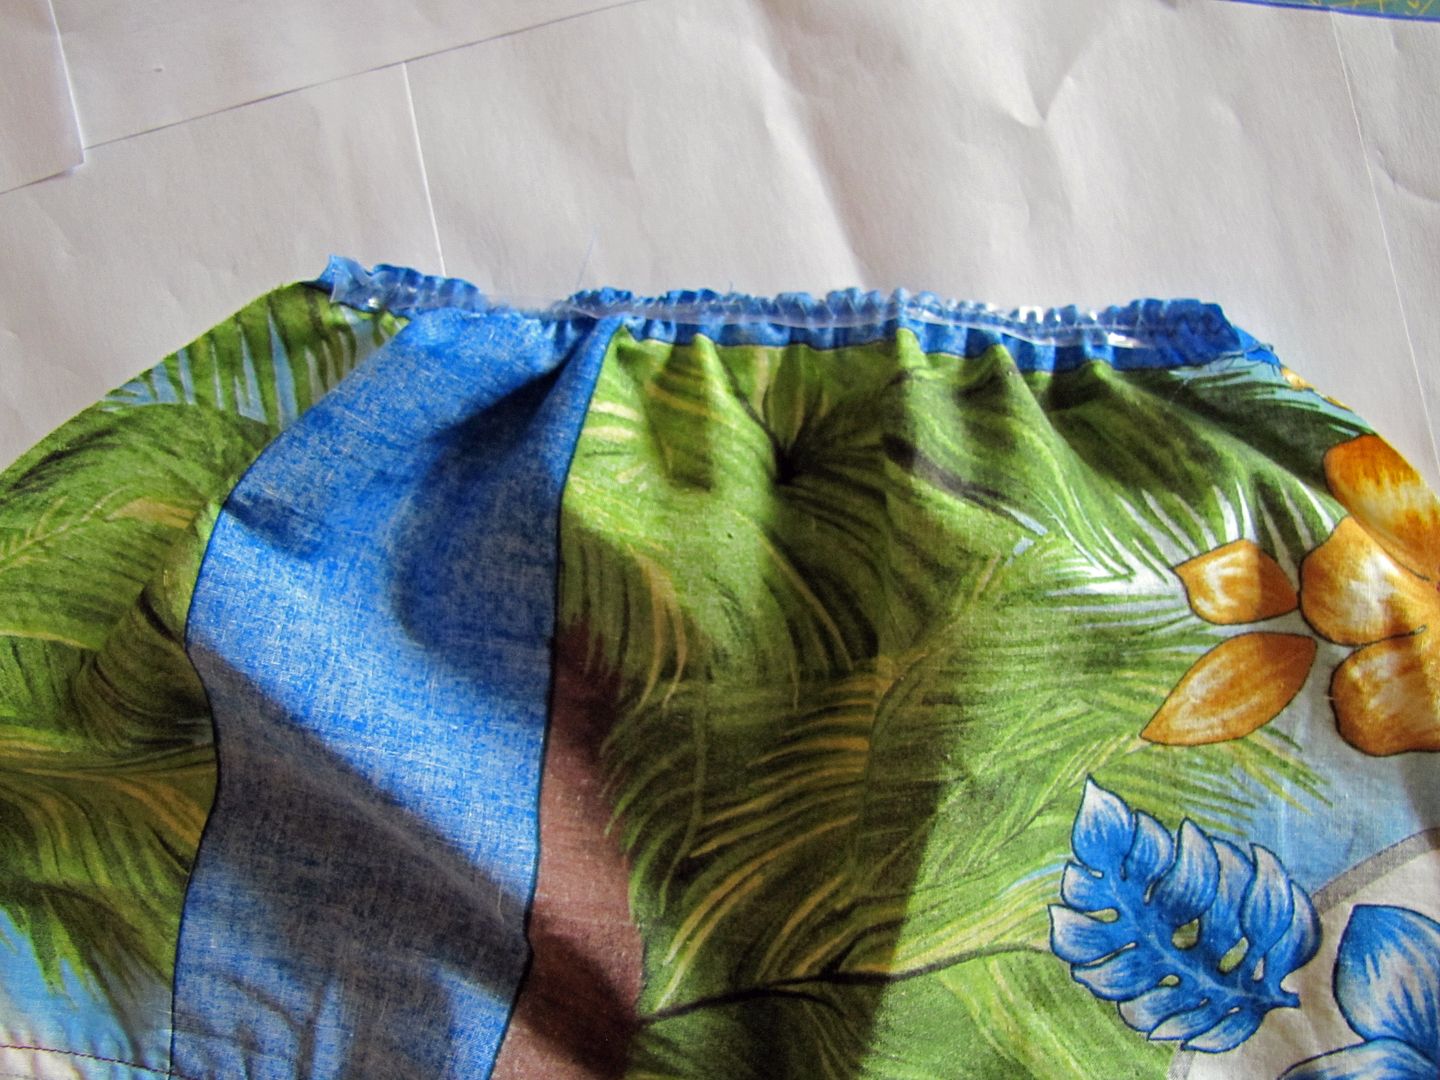
Fold down the elasticized edge into a double fold and stitched closed, again stretching while sewing (this can be tricky, I admit. Pins help :)
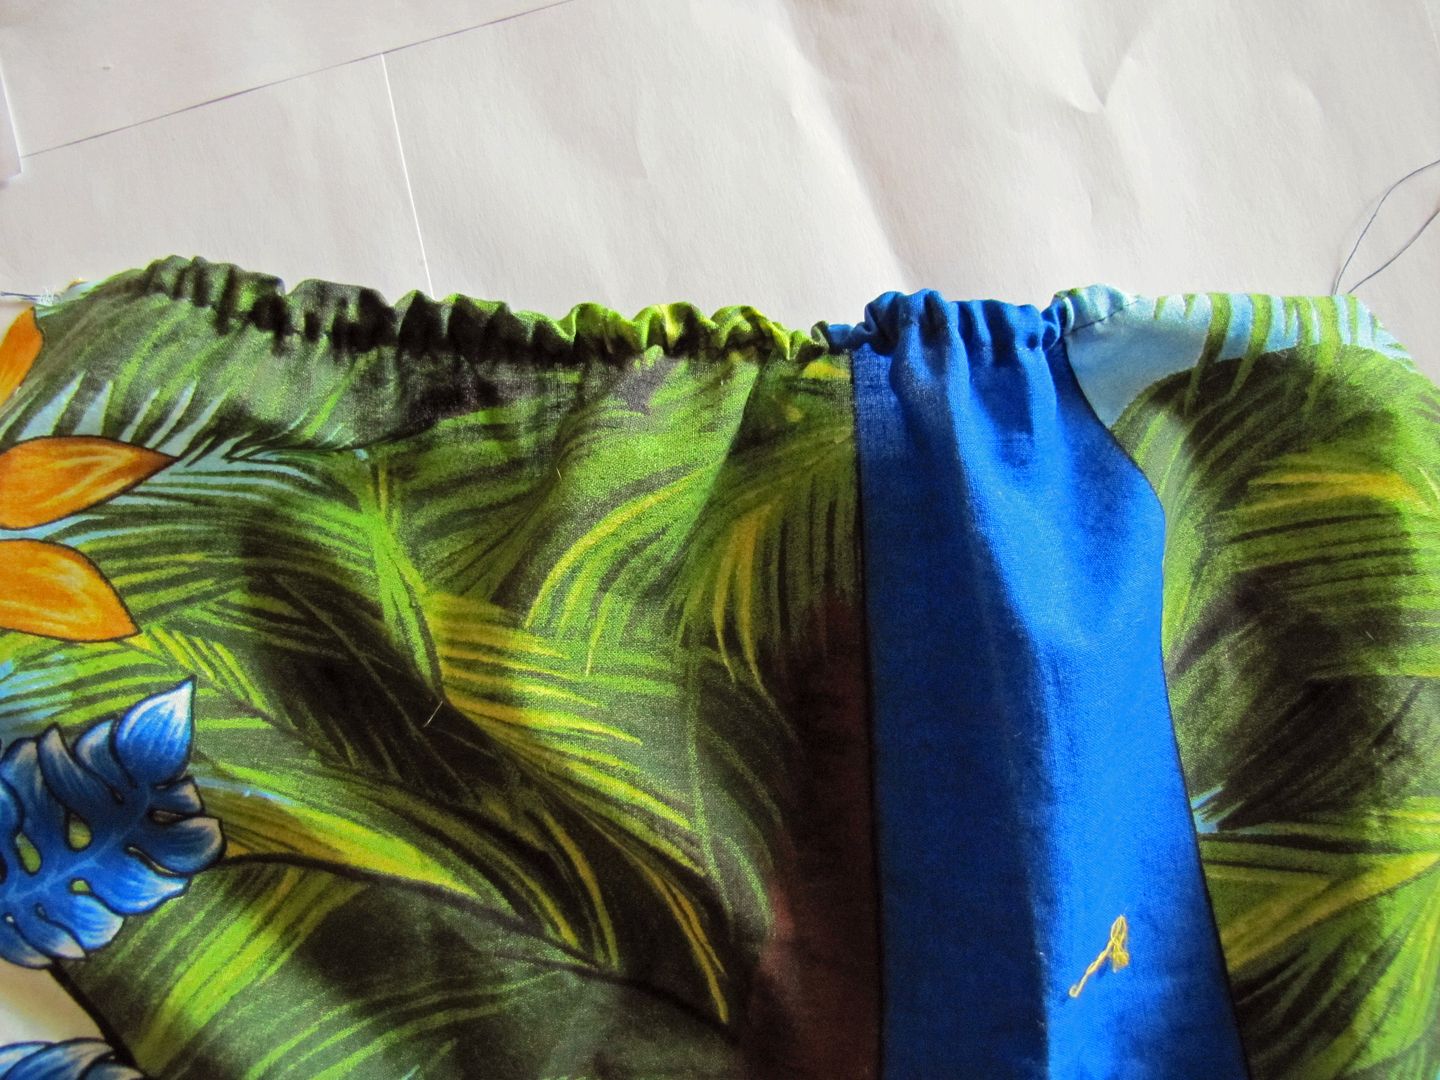
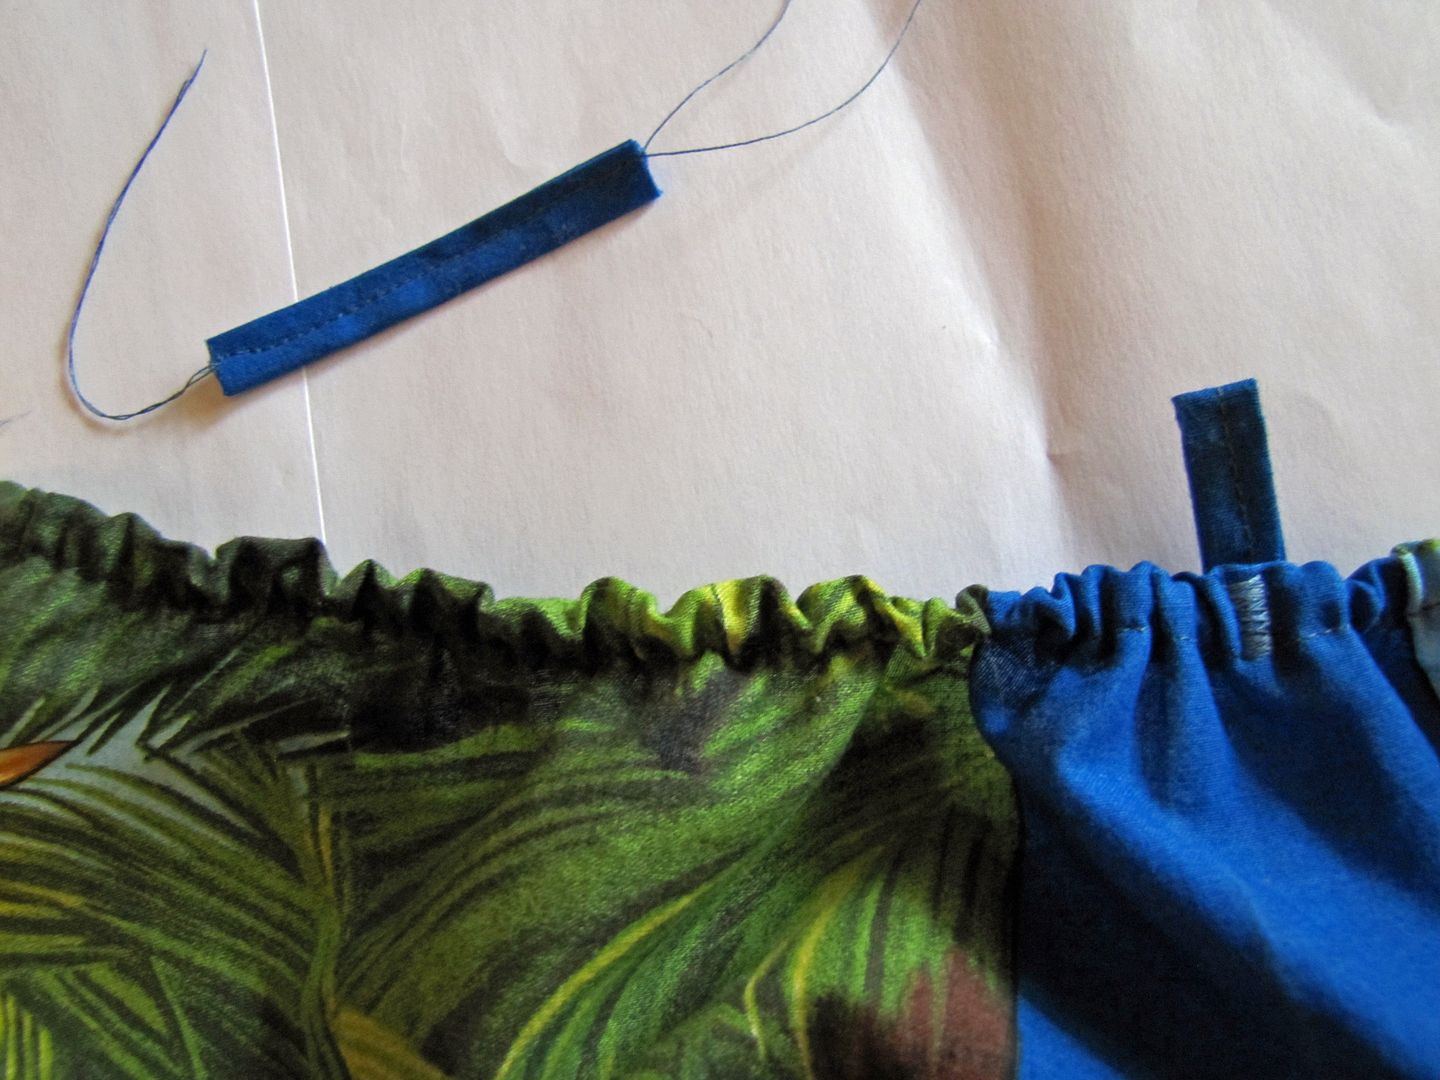
For the back loops, sew closed the 2" long strips of bias tape. Fold loops in half and stitch to elasticized hem, each approximately 3" from the side edge. Or whatever seems like a good distance.
With all straps and loops in place, and the top edges of the front and back pieces finished, you can now stitch the front to the back, right sides together, along the entire length of both sides (stitch from the top down) using a 3/8" seam allowance. I like to stitch the seam flat at the top edge under the arm to avoid irritating sticky-outty seams.
Finish the bottom hem and you've also finished the dress. To do up the straps, run the ends of the straps through the loops and tie together in the middle.
I realize my instructions here are not nearly as detailed as they usually are. I am a bit time poor this week and since we are running out of warm weather, I thought it best to just toss this out and see what happens. If you have questions or need clarification, comment or email me and I will add it to the instructions.
I hope you and your girl enjoy this dress and the lovely, sunny weather!

Oh my gosh, it is so cute & simple! Thanks for sharing it with us!
ReplyDeleteThis comment has been removed by the author.
ReplyDeleteThat's just lovely! Thanks so much for sharing this freebie.
ReplyDeleteLovely, have no girls though.......wish it were my size :) Heat indexes her in NC are 105+ YIKES
ReplyDeleteI guess I could make one for my niece, this will go in my to-do file for sure.
Thanks for sharing
M
Your girl is so creative! I love the coloring of the pattern :) My son, would not even take the time to draw circles let alone color an entire piece with such care and creativity. Thanks for the dress pattern, my daughter will love it!
ReplyDeleteYou rock! I have been excited all week with the anticipation of this dress pattern. Thank you!
ReplyDeleteIs that Elvis? Awesome! I might make one for my best friend's daughter. She has a birthday coming up!
ReplyDeleteOhhh, I am LOVIN' that Elvis fabric! Perfect for this dress!!
ReplyDeleteI linked to your tutorial over on Craft Gossip Sewing:
http://sewing.craftgossip.com/free-pattern-solar-dress-for-girls/2010/08/12/
--Anne
Super cute dress! I will have to make one of these for my daughter soon - I want to sew again, but right now my project is whole-house cleaning/organizing! LOL
ReplyDeleteThank you! I love this cute and simple pattern. I am totally drooling over the awesome fabric. What a lucky little gal.
ReplyDeletethe dress is lovely! (I love yellow) Thank you for sharing, with the heat here, it's come in handing!
ReplyDeleteStunning, stunning, stunning!
ReplyDeleteWe are gradually, gradually creeping out of winter here so will tuck this one away for February.
Clever you! (looove the Elvis fabric, too)
Just adorable! Now I need to find me some of that Elvis fabric!
ReplyDeleteLovely!! THanks for putting it up!!
ReplyDeleteThanks for the pattern! Here's a picture of what I made: http://mamakirana.blogspot.com/2010/08/solar-dress-indietutes.html
ReplyDeleteWow dress is sooooo nice thanks for sharing you are VERY clever.
ReplyDeleteOh wow! This is sooo cute! Thank you so much for the wonderful pattern. I'll be spreading the word.
ReplyDeleteLoving it!!! I downloaded the PDF, and then copied your instructions and saved them in a separate word doc. I can't wait to make it - maybe this week while my husband is out of town, and it won't matter if I leave my projects all over :)
ReplyDeleteTHANK YOU!!!
ps - thanks for the great sizes, too. I like how you did them.
Wow, such a cute dress! Simple yet really nice - thank you so much for sharing your pattern with us:)
ReplyDeleteThank you a lot!
ReplyDeletewe miss just the sun...
Oh Vegbee, you never fail to disappoint. Since our move to the deep South we are in need of dresses like this from May til September. And then, of course, layering ensues and we get a year round piece.
ReplyDeleteThanks!!
Miss Monkey Mae
Thank you so much for this pattern! This will be perfect for my two girls. Had to chuckle at the "sticky-outty" seams...that's a problem here, too.
ReplyDeleteThanks again.
That is beyond cute and the dress is cute, too!
ReplyDeleteWhat a great pattern! Thanks for sharing; it's so nice to make little play dresses for my girl to twirl and dance in!
ReplyDeleteCute dresses! I just love Elvis, maybe I should get some Elvis fabric and make one! :D Thanks for sharing! :) -Kristi
ReplyDeleteThank you again for such a cute dress. We down under can save this for when the heat finally gets to NZ ... rock on summer.
ReplyDeleteI do have one question - I have tried using clear elastic and it sticks to my presser foot or gets caught in the feed dogs when I try to sew it. I tried paper, couldn't get it to stay put, thought of interfacing but couldn't see enough through it to stitch everything true. Now I'm thinking I could get a teflon-y foot for my machine but I was wondering if you have a clever way of doing this instead?
So cute! That dress is so perfect for the summer heat. And O.M.G. ELVIS! Love that Blue Hawaii fabric. That's one of my favorite Elvis movies.
ReplyDeleteEcho, that is a truly odd thing. I've never had a problem with the clear elastic sticking to the presser foot (I sew with it up on top so I can that is aligned properly). Have you tried using a machine baste to stitch it on (the dogs moving quicker)?
ReplyDeleteYou can always secure the ends and make a double fold with the elastic sandwiched in between too.
For this dress. though, I'd just stitch in regular elastic. There really isn't any benefit to clear elastic here.
I'm not sewing much these days, but I just wanted to say how plain old NICE I think you are for inventing the pattern and giving it away.
ReplyDeleteAnd your daughter is adorable!
Thank you for sharing this pattern. I am looking forward to trying it out. I am a beginner, so not sure how I will go. I have cut out the ePattern and my daughter already loves her 'Paper dress' LOL So I guess I can't go wrong. :)
ReplyDeleteThanks again!
I finally got around to making this dress today for my little miss. Here's a link to my blogpost where there are pics of it :) thanks for the great, easy and quick pattern :D
ReplyDeletehttp://amyssewing.blogspot.com/2010/10/day-off.html
thanks for this, i made one today...so easy and quick and four year old loves it.
ReplyDeleteits on my blog
www.danieljacquililly.blogspot.com
What a lovely dress, thank you so much for sharing the pattern and for the tutorial too. My niece will be 4 very soon and I think this is what I'm making her, I've been hitching to make some clothes so this is perfect to get me started.
ReplyDeleteThis is perfect! Its just what I was looking for with spring just around the corner. Thank you for the free pattern.
ReplyDeleteI have been searching and searching for not only an easy project, but a pretty summer dress for my girls. This by far has been the cutest and looks like what I've been trying to come up with!!!
ReplyDeleteJust finished this dress and love it! Check it out on flickr - http://www.flickr.com/photos/laurajanesharp/5656425853/in/photostream
ReplyDeleteA very clear tutorial - hardly changed anything at all. Thanks so much for sharing!
Thank you so much for the great pattern. I finally got a little time (and a clean kitchen counter) to work this up for Wub. http://futurejackorchloe.blogspot.com/2011/05/been-while.html She looked charming and cool. I've already cut out another to sew. Thank you again for sharing.
ReplyDeleteThank you for the pattern! I have decided to try to make my girls a lot of their clothes this summer and I think this will be one of the first I will try. Maybe I missed it, but could someone tell me how much fabric I would need for each size? I want to order some fabric online and want to make sure I get enough!
ReplyDeleteThanks!
Lindsay,
ReplyDeleteIf you have two pieces of fabric that is 30" wide by 32" long you'll have enough to sew up the largest size.
Sometimes your fabric is 60" wide, sometimes less, you can look at the dimensions and figure out what length you need to order.
good luck!
I just wanted to thank you for having all of your instructions on here. A friend of mines BFF past away and left behind 3 beautiful children behind. One of them the cutest little girl you've ever seen. All of a sudden they can't find ANY of her cute little dresses and her father wants her to be uber cute. So I've been asked to make a ton of dresses for her. And your patterns and ideas have been an immense inspiration and help. THANK YOU!!!!
ReplyDeleteAwesome pattern (like all your stuff ;)) thanks soo much for sharing! I just made a couple for my daughter and her friend ... i'll link to you if I ever get around to blogging about it xx
ReplyDeleteHere's my version: http://www.sarahewhite.com/?p=1149 Adorable! Thanks for sharing.
ReplyDeleteThank you for sharing!
ReplyDeletehttp://blog.mizoal.de/2013/07/sommer-sonne.html
Thank you for all you do! All your blog photos are so amazing and professional looking. You must be a photographer too!
ReplyDeleteThank you so much for this pattern. I made 2 this morning and my daughter loves them. I love how fast they are to make : )
ReplyDeleteThank you so much! This is perfect for my little girl, since she's a bit small for her age.
ReplyDeletewhere do I find the pattern I clicked on down load the patter and got lots of adds for a canvas place but no sign of a pattern
ReplyDeleteAnon,
ReplyDeleteWhen the link is clicked it should bring up a query to open or download a PDF file. I just checked it here and it works. You may want to look into some virus interference on your computer.
-Charity
I recently discovered your blog and made the peasant top. So cute! Thanks for the tutorials. I was hoping to make the solar dress as well, but the link takes me to a blank page with this message: Published file is removed and is not available anymore.
ReplyDeleteAny chance you'll post the pattern again?
Link to the pattern is fixed :)
Delete-Charity Indietutes