
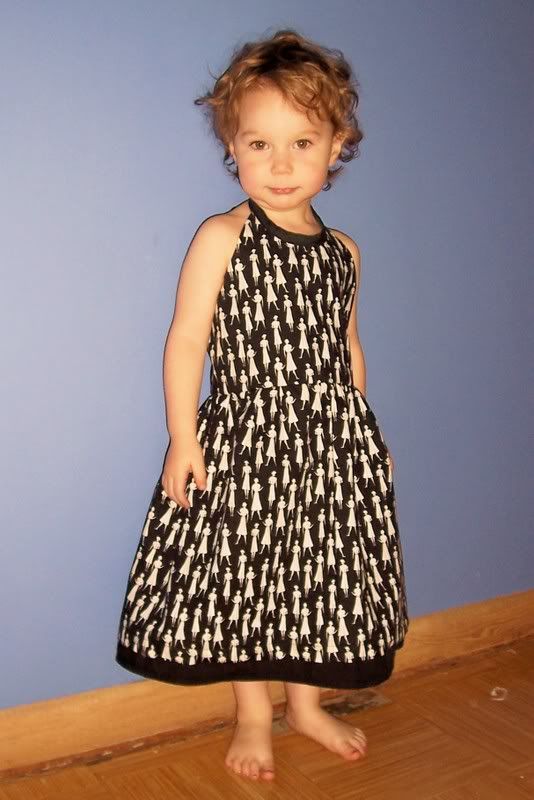
 The other day Smootch was digging around at the back of her closet and came out with a sundress I made, oh, almost two years ago now. It still fits, a bit snug, but still. When I made the dress I posted a quick (and not so good) tutorial over on Craftster.org, but I thought I'd enhance it slightly ( or a lot) with some illustrations for you good folks.
 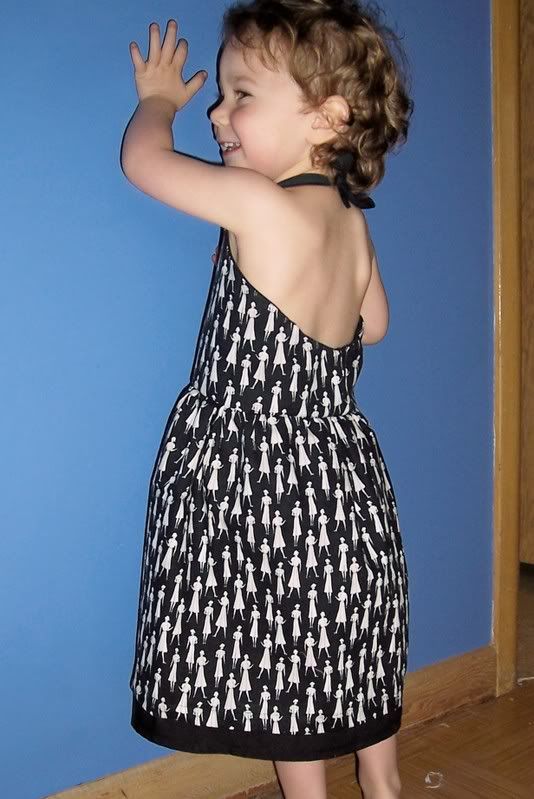 This halter sundress uses two fabrics, a shell fabric and a lining fabric. The skirt is actually two pieces, with the lining fabric forming a slightly longer underskirt.
 There are two ways I've done the straps (that I've been happy with anyway). The first is the basic two straps tied together behind the neck. Another simplier way is to use a single piece of bias tape and sew it onto the finished neck curve (see topmost picture). I will give instructions for both.
Creating the pattern:
This is the shape for the top in aout a children's US size 2/3:

To make your own I suggest drawing a 10" by 11" grid and approximating the shape you see above. This size will allow a maximum of a 21" waist.
For larger sizes, increase the width as needed by cutting the pattern piece lengthwise (as shown below) and taping the two pieces onto a seperate piece of paper with the additional width needed between them (align the bottom edge for proper positoning). 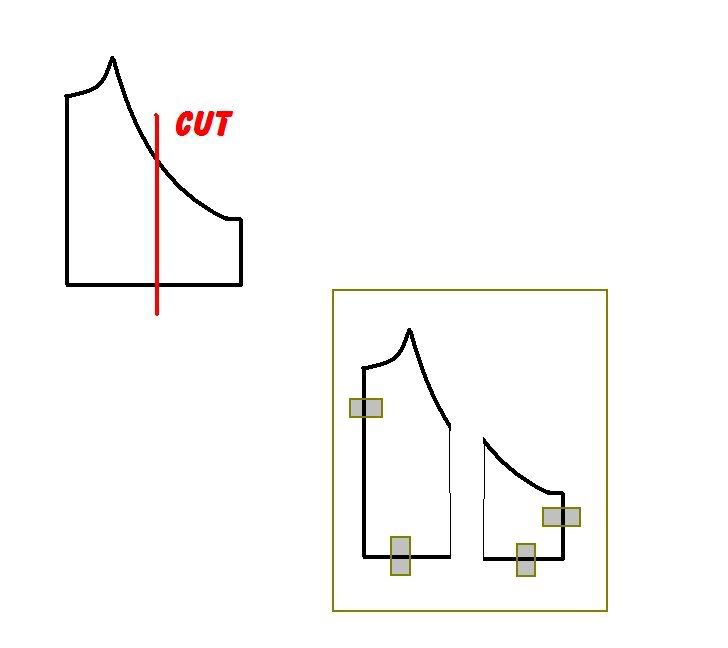 Trace around the original pieces and draw an approximated curve between the taped on pieces. Remove the original pieces and there will be your newly widened bodice.
To increase the length, add the length to the bottom of the piece. If it is to be a big increase, you may have to lower the curve of the arm also.
Trace around the original pieces and draw an approximated curve between the taped on pieces. Remove the original pieces and there will be your newly widened bodice.To increase the length, add the length to the bottom of the piece. If it is to be a big increase, you may have to lower the curve of the arm also.
It's best to try your pattern piece on your recipient (if you can get them to stand still) before your start cutting.
Cutting the fabric:
Once your bodice pattern has been created, place pattern piece on fold and cut one of shell fabric and one of lining fabric.
Cut two straps (1.5" x 9" ish) OR have a strip of coordinating double-fold bias tape nearby.
For the skirt, cut a rectangle of shell fabric by shell rectangle, multiply the waist measurement by 2 for the width. Measure from the waist down to determine the desired length (my size 2/3 is about 14" long).
Cut another rectangle of shell fabric for the underskirt, using the same width as the shell rectangle, and adding 2" to the length.
Constructing:
If using cut material for straps, press a double fold in the straps length-wise and secure by top stitching. Pin the straps onto the right side of the shell bodice in this position: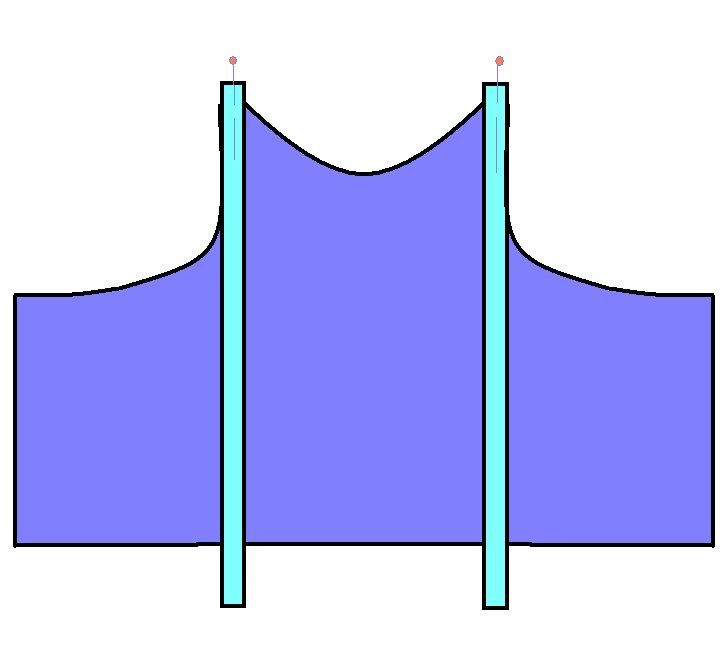 With the pinned straps in place, align the shell and lining bodice pieces right sides together. Stitch around the neck and sides, reinforcing the strap area.
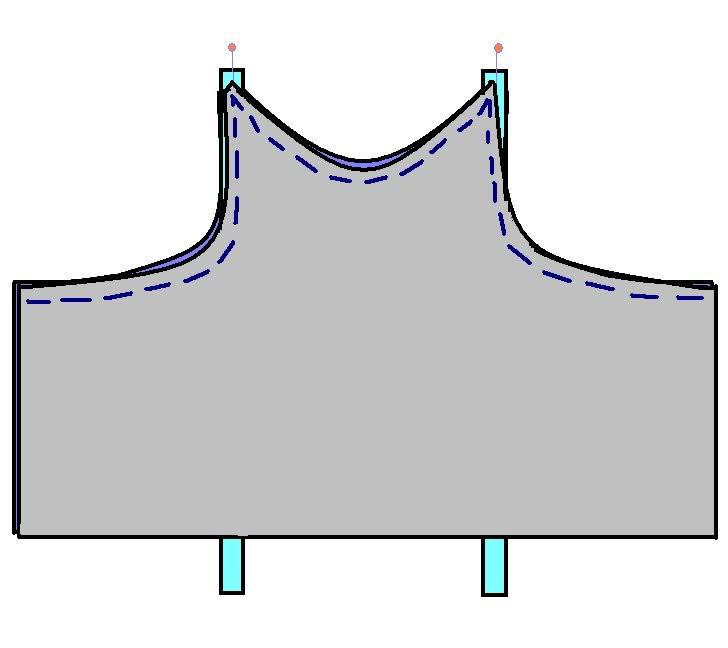
With the pinned straps in place, align the shell and lining bodice pieces right sides together. Stitch around the neck and sides, reinforcing the strap area. Turn bodice, right sides out, and press.
Open bodice again and align right sides of the back of the bodice. Stitch the back closed.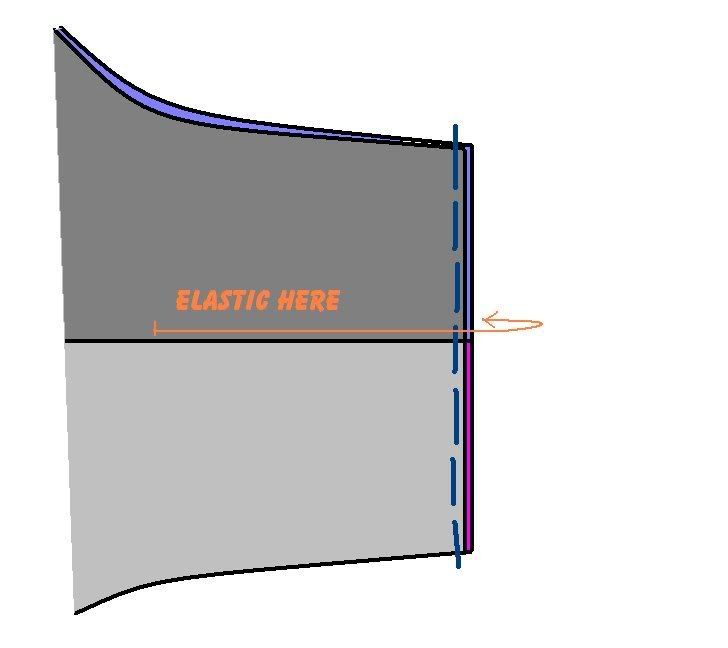
To keep the back of the bodice from gaping open, stitch a line of elastic thread on the wrong side of the lining fabric as close to the seam between the the shell and lining fabrics (see above illustration).
Machine baste the bottom of the bodice closed.
If you are using a single strip of double folded bias tape ties, attach the mid-point of the bias tape to the neckline.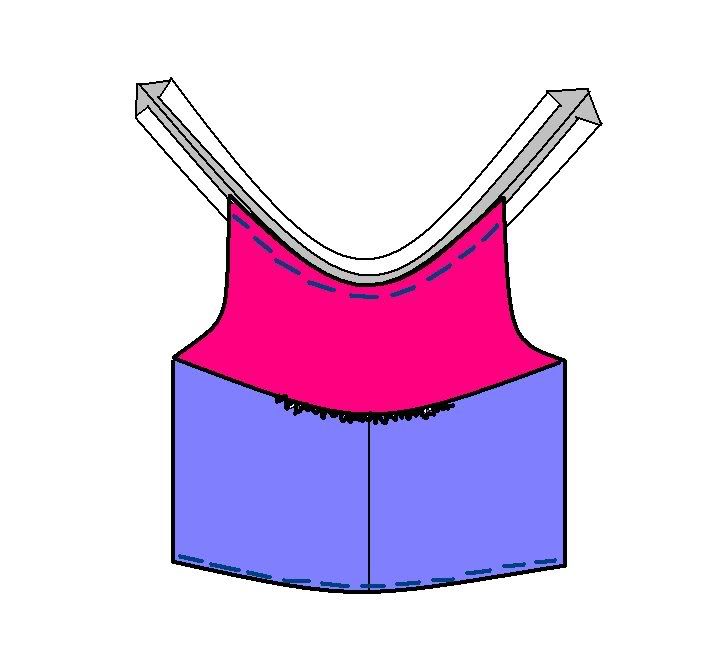
Finish the strap by folding the bias tape over and top stitching the length.
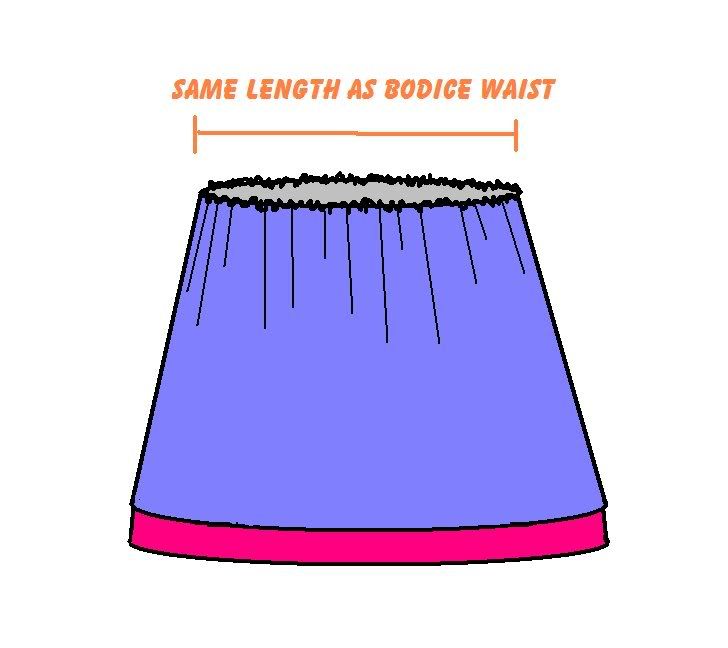
To create the skirt portion, sew the short sides of the shell rectangle right sides together to make a tube. Repeat for the lining rectangle. Place the lining skirt inside of the shell skirt, with right sides of both facing outwards, and machine baste the tops of the skirts together to make a skirt and slip. Gather the waist into the same measurement as the waist portion the the bodice (I recommend clear elastic).
Stitch gathered skirt and bodice top right sides together.
Hem skirts.
Enjoy!

*************************************************************
This is a free tutorial and I encourage you to use the information in any way you need to (check the disclaimer at the bottom of the page). If it works for you, please consider supporting my etsy shop by purchasing a Little Print Design pattern or toss a dollar or two in my paypal to show appreciation and to encourage me to offer up even more quality patterns and tutorials.
Thank you!
Questions about the Donation? FAQ here.
Oh gosh. I love this! I already have all these fabric ideas.
ReplyDeletePlus, your daughter is just the cutest!
Thank you for the tute!
Thanks for sharing! REALLY cute - both your daughter AND the dress! Can't wait to try this myself : ) BUT I have no daughters and I don't wear dresses .... my poor dolls! LOL!!
ReplyDeleteSo cute. I'll be making one for Lilly :) will post and let you know when I have. I love your tutes! And i love your copyright too. I feel the same with what I share.
ReplyDeleteSuch a gorgeous dress. You're so generous to give these tutorials. Thank you.
ReplyDeleteThat is so clear and fundamental. I'm going to work on one right now.
ReplyDeleteOh this is so adorable!! :) I love it. I think I'll be making a few of these for summer dresses. :)
ReplyDeletehugs
Kristin
http://reclaimingthehome.typepad.com
What a gorgeous dress! I can't wait for summer! Thanks for this tutorial - I shall endeavor to try it and hope I turn out a dress that looks as nice as yours. Also I wanted to say I left an award for you on my blog.
ReplyDeleteGreat tutes! Thanks for sharing.
ReplyDeleteEllen
Thanks for updating this pattern. I loved it the first time...I actually remember it from Craftster. Your daughter has gotten so big and is such a cutie pie.
ReplyDeleteThis looks like such a cute dress! Also I really appreciate how you try and explain altering patterns a lot of the time. My only problem is that you always show examples of making them bigger, I need them smaller, and I don't know how to do that either... help?
ReplyDeleteAgain, really cute though, I'd love to make it (after I get through the pile of projects I'm half started with already - who knows, maybe my little one will be in a 2T by then lol)
thanks all!
ReplyDeleteCourtney,
to make the pattern smaller than just move the two pieces in rather than out. Same concept, just squeeze rather than expand.
does that help?
Thank you for your generosity with this pattern!
ReplyDeleteYou've made me long for summer my dear! Thanks for updating your fabulous dress pattern for us!
ReplyDeleteOh! So nices dresses!!!
ReplyDeleteThank you for all your tutos!
I Love this dress. I cant wait to make one for my pumpkin. I have just one question. My sewing machine murders clear elastic. Do you have any suggestions on how I can keep that from happening?
ReplyDeleteHeather,
ReplyDeletemurders clear elastic? How do you mean? If it's actually breaking the elastic, I would look at using a new sharp. Make sure you are sewing with the elastic on top so it isn't catching on the feed dogs. I would also check to see if the elastic is too old. It gets cloudier the older it is, and can become quite difficult to work with (the recover is not as good either, which can be a serious pain).
Let me know if any of those ideas help, or if not, I can do a bit more brain storming.
Great tutorial - love this dress! Thanks for reminding me that summer is only a few more months away!
ReplyDeleteExcellent dress! I just had to comment and show some love for a beautiful, simple and girly dress! This gives me an idea to make myself a dress!
ReplyDeleteso sweet, so easy, thank u
ReplyDeleteI can't wait to make this dress and put it on my daughter aka the Little Monster! Looks simple enough, thanks for the photos because it really helps! Maybe you can do a guest spot/tutorial on my blog! Thanks for the creativity inspiration!
ReplyDeletehttp://sweetttawanda.blogspot.com
amazing! I linked at somedaycrafts.blogspot.com
ReplyDeleteHoly cuteness! I wish I had a daughter, but my neice might appreciate it in a few years. (or just make one for myself.
ReplyDeleteThanks
Thank you again for sharing. Although I have plans to make the dress exactly(ish) the way it is, this time I only used the top part I wanted to make a maxi dress and the halter top was exactly what I had in my mind's eye.
ReplyDeletehttp://futurejackorchloe.blogspot.com/2011/06/two-two-two-posts-in-one.html
Wub loves it.