
Here is an idea to make those maternity tops not only wearable after the little mite arrives, but actually quite useful for nursing. Since I have no before picture, you'll have to believe me that until recently, this was a maternity tee shirt:
The tee shirt has two front flaps that are attached to double fold bias tape that come around behind and tie at the back.
To convert your maternity tops to a wrap around tee, you'll need your maternity top in knit material, another tee shirt or bit of knit fabric (for the underneath panel), single fold bias tape and double fold bias tape.
(Truthfully, you could make a wrap tee with any overlarge tee shirt, but you would also have to adjust the shoulders and sleeves for a proper fit. With the maternity shirt, the shoulders, sleeves and arms should already be well fitting, and the extra fabric at the front is used to create the wrapped portion.)
A quick note on sewing knits. Use a ball point needle on knits. For this project, a woven material (the bias tape) is being sewn on also, for which you want to switch to a sharp needle. When sewing the two different materials, position the knit material against the feeddogs, with the woven material on top. When pressing (ironing) knit material, do not rub the iron along the material. Press the iron straight down and lift up again. For the most part, hovering a steaming iron closely above your seam will pull the stitches and fabric straight and there will not be much need to directly apply the iron to the material.
I recommend trying on your shirt a few times during construction to see how it will drape on your body (or, if you are lucky enough to have a dressmaker's dummy, this is a good time to use it). The instructions here are a guideline for you to follow, but there are no measurements. With refashioned clothing, your best guide is your body. Rely less on my diagrams and more on your instincts - you know your body best.
Now, let's chop something up!

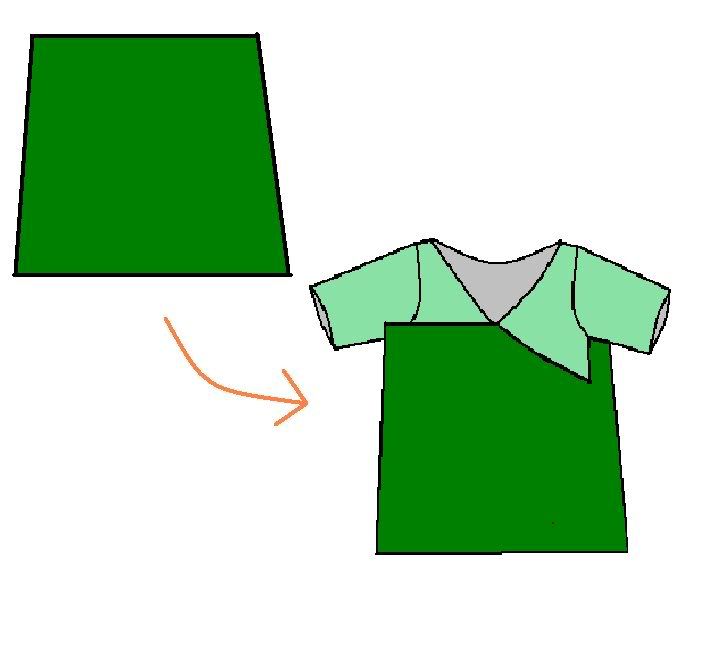
Here is your maternity tee. Note tent-like properties.
Take your scissors and cut a more flattering line (use a good fitting tee from your closet as a guide) down one side of the shirt. On the other side, split the seam with your scissors to almost the armhole (don't cut the armhole!) and cut the flattering line on the back only. On this second side, leave the front of the shirt uncut. This will be the front wrapping flap.
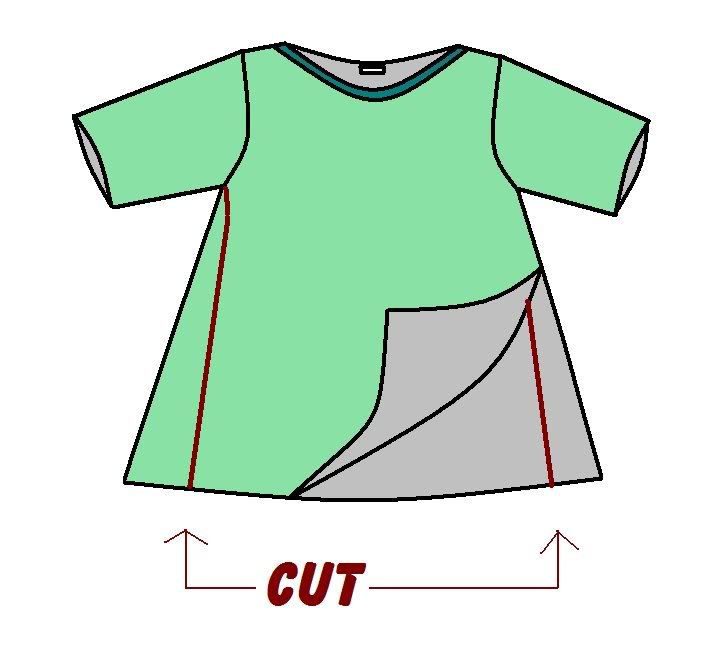
Next, cut off the neckline ribbing and seperate the front wrapping panels in a general V neckline shape. Use the diagram below as a guide.

Still with the scissors, shape the bottom of the front flap with a curve (see diagram below). The idea is to have a curved shape but still cover up the belly area. While you are at it, cut off the bottom hem all around the shirt. Also make a cut on the back front flap on the side to make to bring it in line with the cut side on the back.
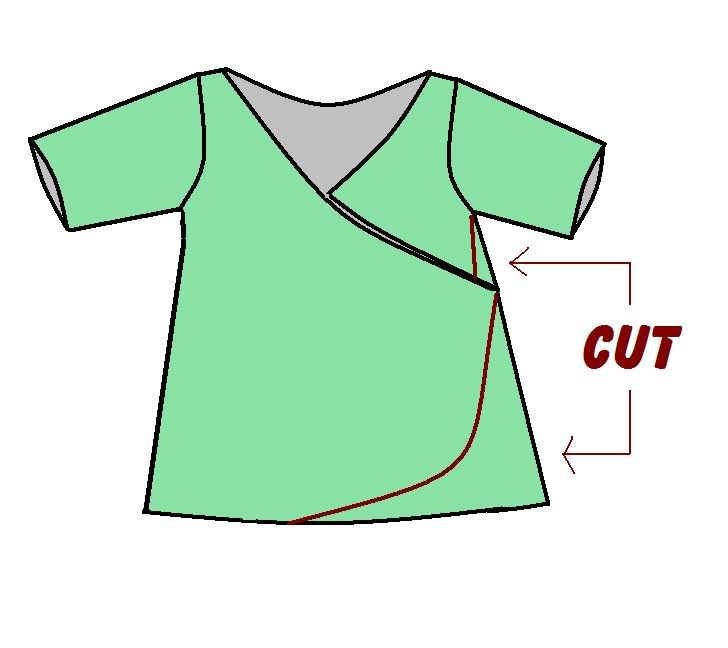
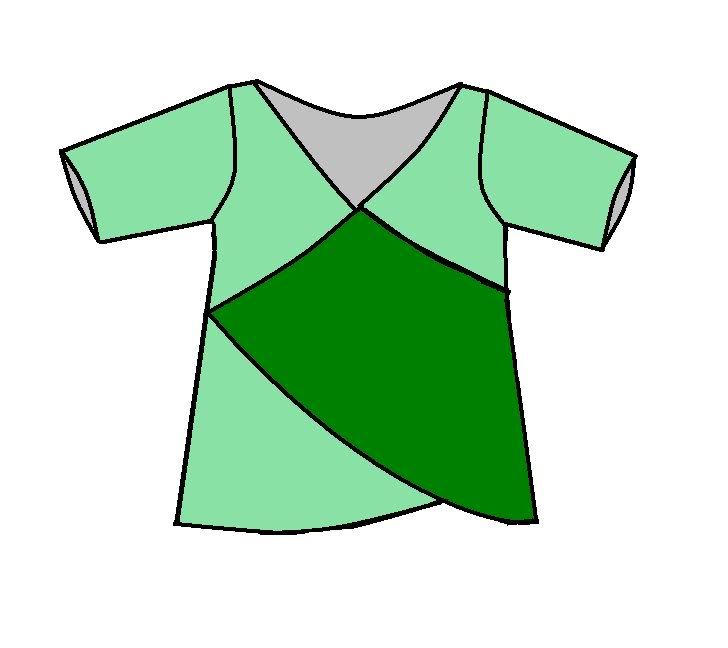
Cut off a large panel from your additional tee shirt (or piece of knit material) to use for the back front flap. Following the diagram below, slip the panel under the cut half flap (the portion to be the back part of the wrapped front). Use a piece of chalk to trace the curve of the half flap, trace out the sides (as shown by the back of the shirt, and draw a curved front down to the bottom hem. This will be the extra material to form the under flap of the wrap. Make sure to add a seam allowance to the top curve and side before cutting.
Sew the panel onto the back flap. Sew closed the flap sides to the back of the tee.
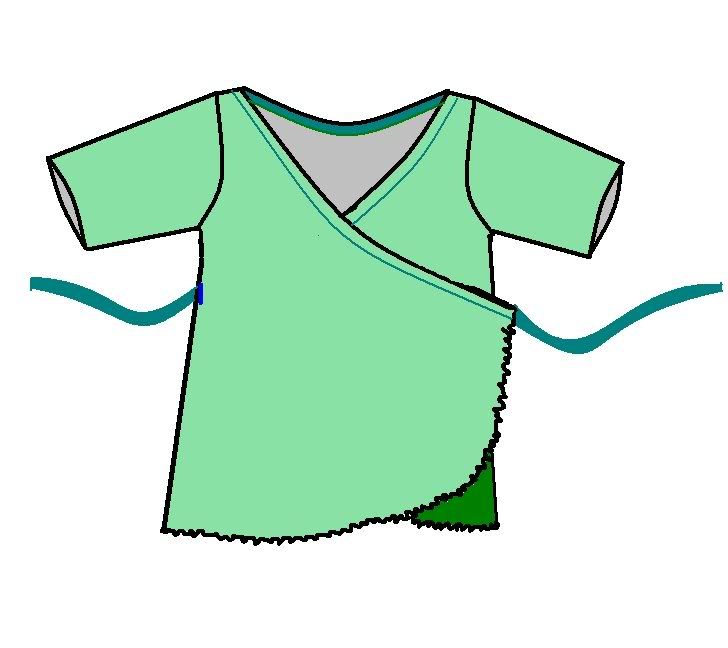
To stabilize the neckline, sew your single fold bias tape on the inside of the neck. Attach the single fold bias tape by opening up the tape to the raw edge and sewing that edge to the neckline all the way round, right sides together. Fold up the tape again and press the tape on the inside of the neckline. Secure by top stitching all around the neck.

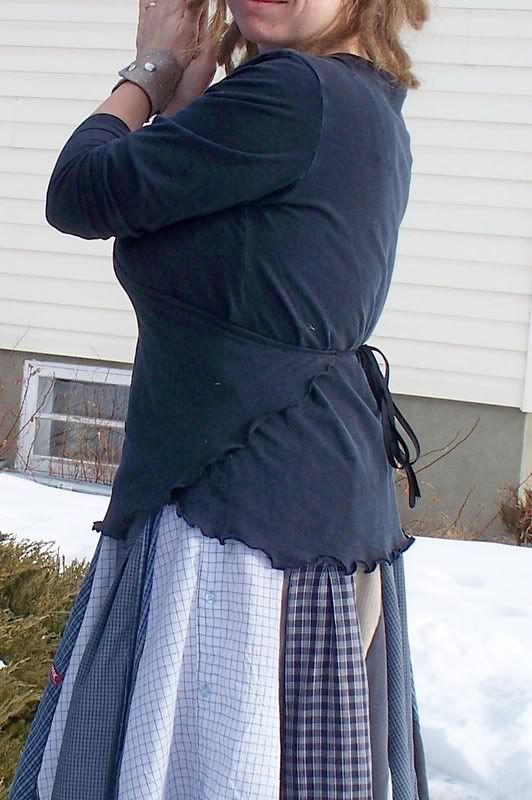
Use the double fold bias tape to make two straps for tying by top stitching the length of the tape closed. Sew two bias tape straps onto the pointy edges of the flaps. Put a small button hole in the knit at the side of the top flap (where the bottom flap tie meets the shirt) to allow the bottom tie out.
The bottom of this top is finished with a lettuce edge. Lettuce edges are easy and attractive way to finish knit (in my humble opinion, anyway).
Lettuce edging is created by stretching the knit edge while sewing a zig zag stitch over the edge. The ripple is created by the stretch being held by the stitches. The zig zag stitch length should be just a bit smaller than your usual stitch, but not too tight (such as with a satin or applique stitch). To stretch, use both hands and pull the material apart as it is fed into the machine.

Lettuce edge all around the bottom hem, except where the bottom flap goes underneath the top flap. Keep doing a zig zag stitch on the hidden portion of the bottom flap to finish the edge, but do not stretch the material to prevent a noticable line underneath.
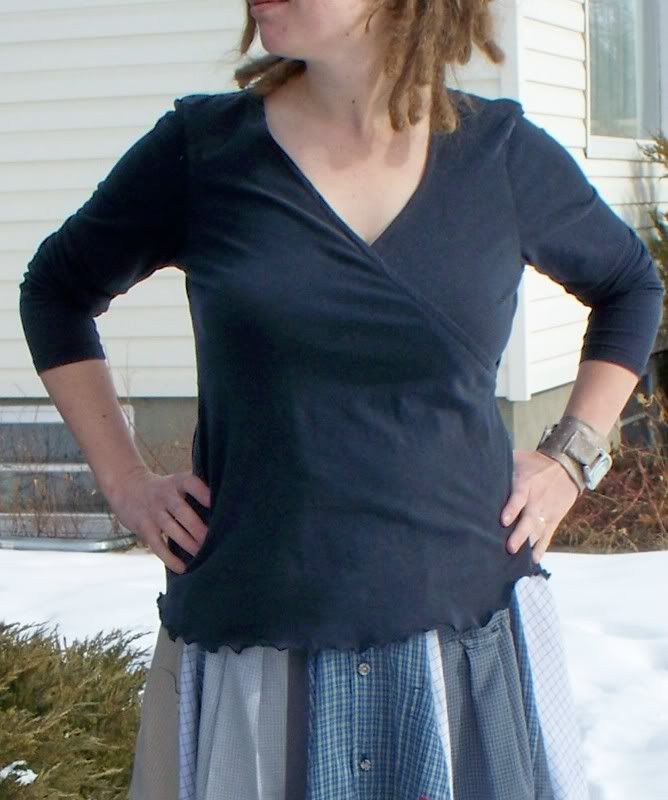
Done! Wrap tee around your body. Open for babies.
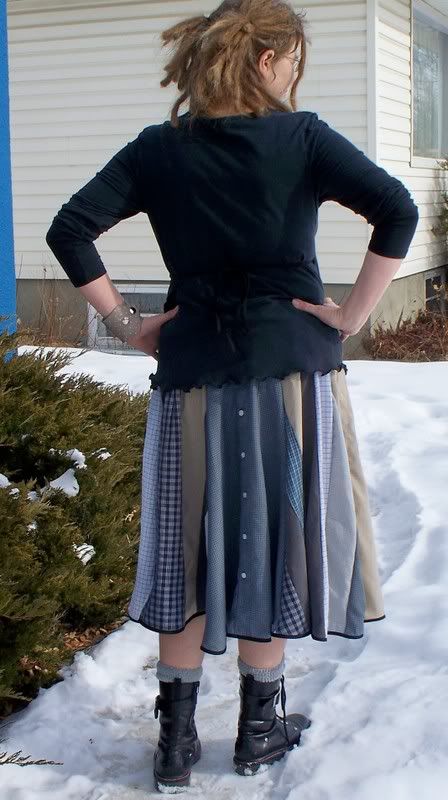
Standing in the snow in your new wrap tee is optional.
(the circle skirt from button down men's shirts is the next tutorial in the hopper... coming soon!)
**************************************************
This is a free tutorial and I encourage you to use the information in any way you need to (check the disclaimer at the bottom of the page). If it works for you, please consider supporting my etsy shop by purchasing a Little Print Design pattern or toss a dollar or two in my paypal to show appreciation and to encourage me to offer up even more quality patterns and tutorials.
Thank you!
Questions about the Donation? FAQ here.
Love it! The skirt is also really great. I loved both when I saw them on Craftster!
ReplyDeleteThank you so much!! This is perfect.
ReplyDeleteI totally hear you about still wearing maternity clothes post-partem! I had my soon three weeks ago, and I still very much look six months pregnant. I guess that is to be expected since I gain sixty five pounds with the little one.
ReplyDeleteYour shirt is awesome! I love the effect that you created when you stretched the knit fabric as you zig zagged. I'd love to try this out. I may have to go find some second hand guy's tees for really cheap.
I love this idea!! I posted a link to your tutorial at Craft Gossip Sewing Blog:
ReplyDeletehttp://sewing.craftgossip.com/tutorial-convert-a-maternity-tee-to-a-nursing-tee/2009/03/08/
--Anne
I don't know which I like more - the chic top or the fab skirt. Can't wait for the skirt tutorial now! Thanks for another very helpful tutorial. Tent-like properties - you're so funny!
ReplyDeleteThis is freaking fabulous!!!!
ReplyDeleteThat's fantastic! I'll be linking to this. I'm so glad I found your site!
ReplyDeleteI just discover your blog and thank you for all you give. I don't all understand but i will work my english right now !
ReplyDeleteFrom Lyon (France).
Can't wait for the skirt tutorial. I am totally bookmarking you.
ReplyDeleteAnna S.
Thank you for this tutorial! Even though I had my twins almost six months ago, I am still in that weird transition phase between maternity tops (a bit too big) and my pre-pregnancy tops (a bit too snug). I am definitely going to give this a try!!
ReplyDeleteOh, oh, oh! I LOVE this! You know I lurk ans you know that I can't sew....hence just a lurker, but THIS makes me SOOOOO green with envy for not knowing how to sew! I have so many knit tops that would be wonderful made into this pattern! Thanks for sharing! I am also waiting for some new videos from your baby girl!! Haha! Still love the Safety Landing! Take care!
ReplyDeleteWarmly,
Leslie
This is a great idea. I want to give it a try, but I was wondering about the additional T-shirt or knit fabric. Did you have one the same color, or doesn't it show?
ReplyDeleterenata, the additonal material shouldn't show, it'll be tucked under the top flap, but just be sure it's best to have it in the same colour.
ReplyDeleteThanks!
ReplyDeleteI don't speak very well english, I understand a little.... but all is so clear on your blog, that is a real pleasure to visit it!!!!!
ReplyDeleteThanks! I am going to try some of my hubby's teez thst her daznt wear anymore ;-)
ReplyDelete