
 Look no further, Fair Maiden, then the place where you already are.
 Hmmm... that sounds like some sort of zen gobblity-gook. I'll just go ask mama instead.
 ******************************************************************
Shall we?
This tutorial is based on my Revolutions Frock pattern in response to a few queries for more info on the yoke construction. The yoke is not a difficult maneuver, but it can be a bit tricky the first time you approach it. Sometimes you have to take a step that doesn't come relevant until nearly the end of construction, such as sewing in some guideline stitches for later. I suggest finding a bit of time to sew the yoke when there are no children around clamoring for your attention. And there should also be cookies. Maybe some wine. Anyway.
It's not necessary to have the Revolutions Frock pattern to use this tutorial. It will help anyone gain a general understanding of yoke construction (though, depending on your closures, it does vary) and, hey, you can always use it to construct your own pattern too. There is some information on making a yoke pattern here.
Let's get going!
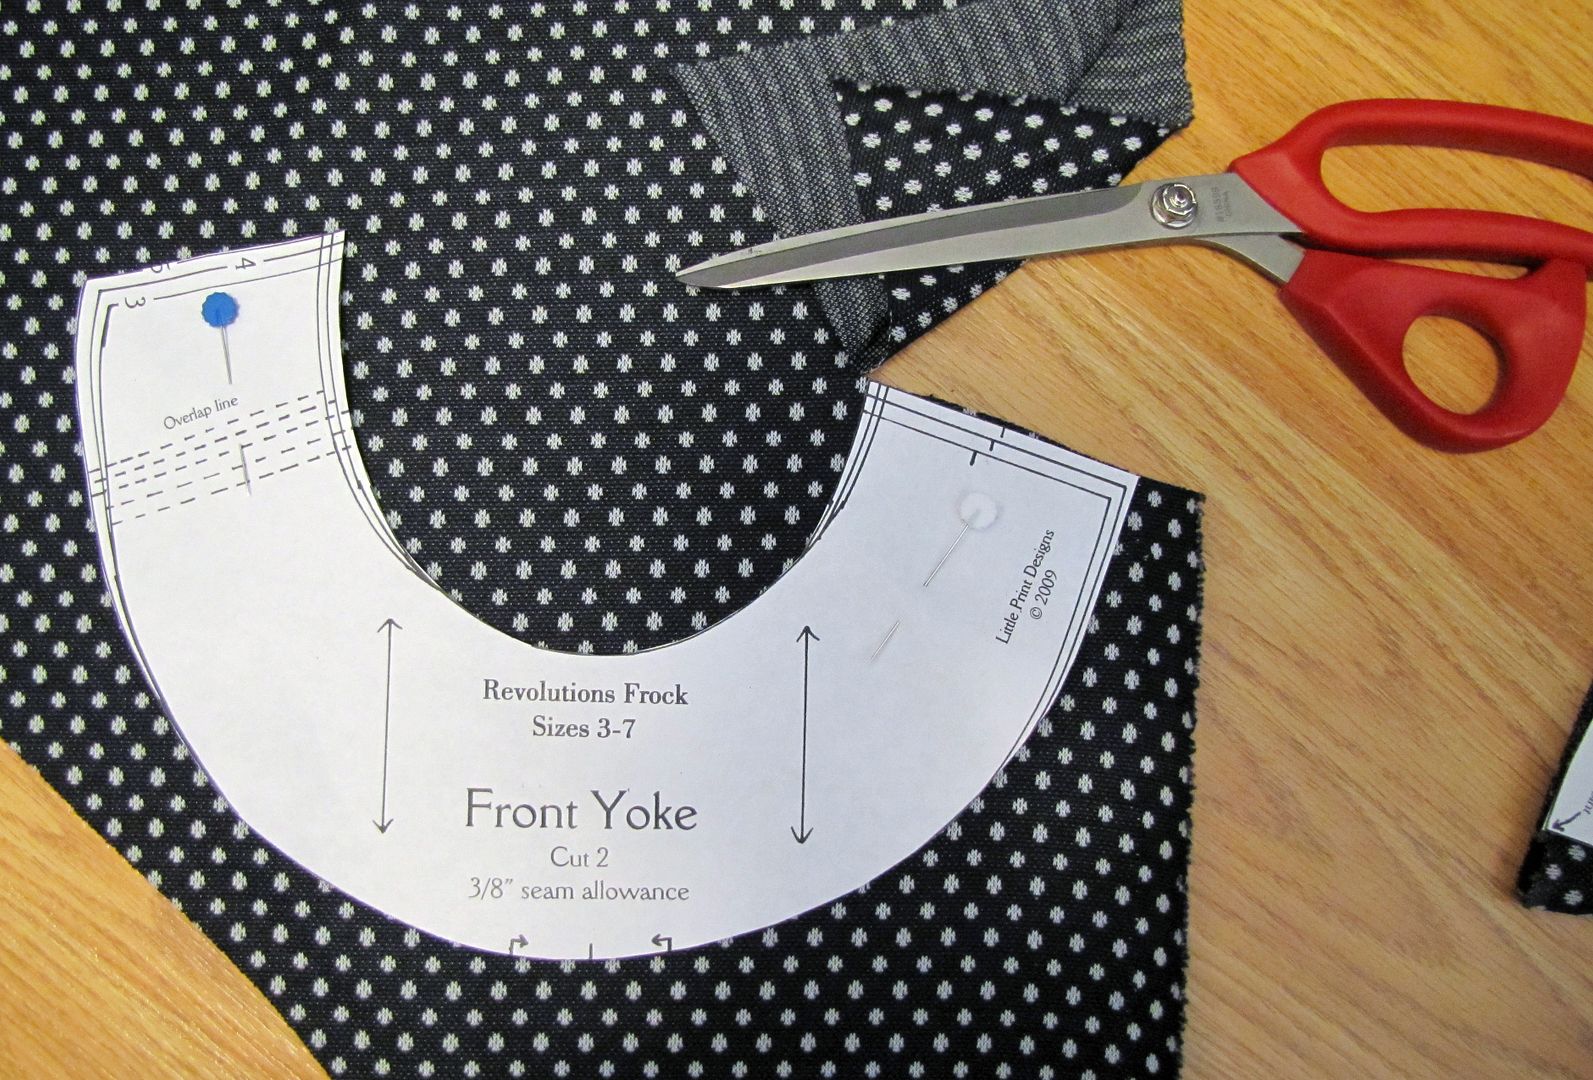
Cutting the Yoke
The yoke is cut from two pattern pieces. Both ask you to Cut 2. For the Front Yoke, fold your fabric (wrong or right sides together) to cut two mirrored pieces.
Transfer the center mark onto your pattern pieces with chalk.
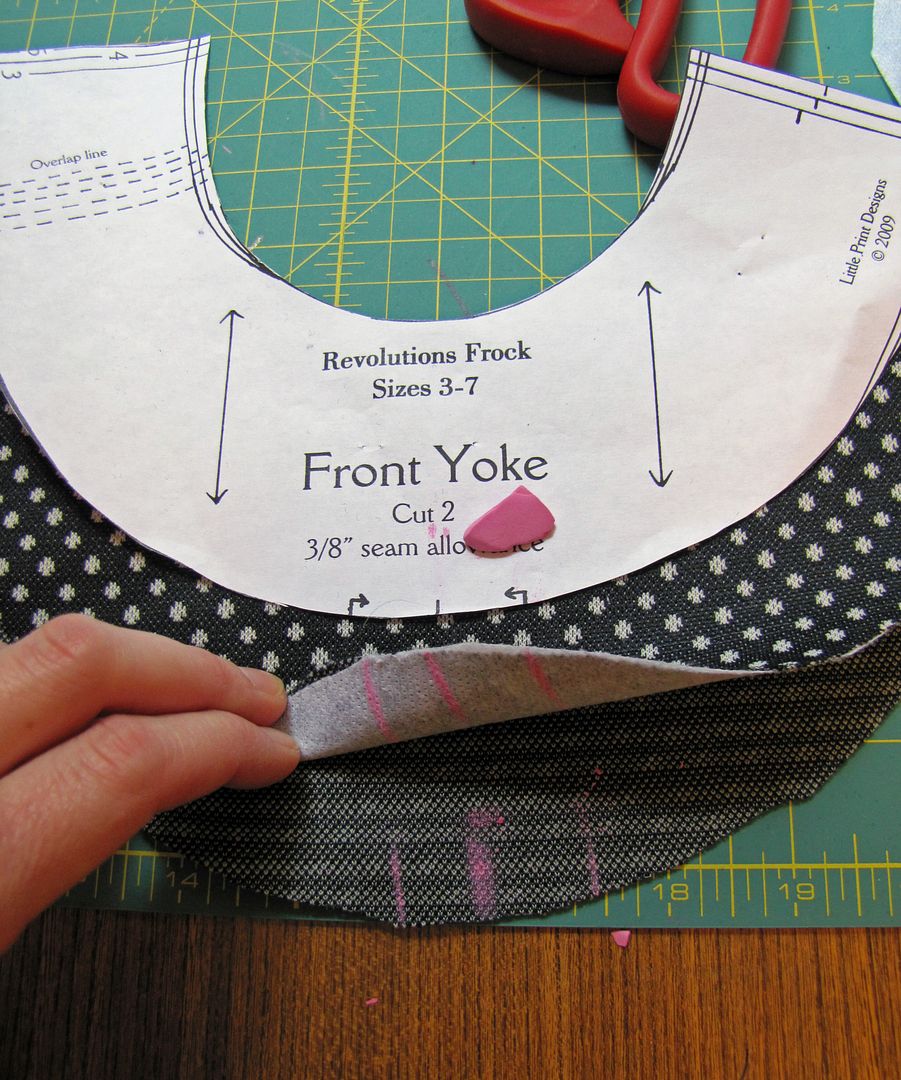
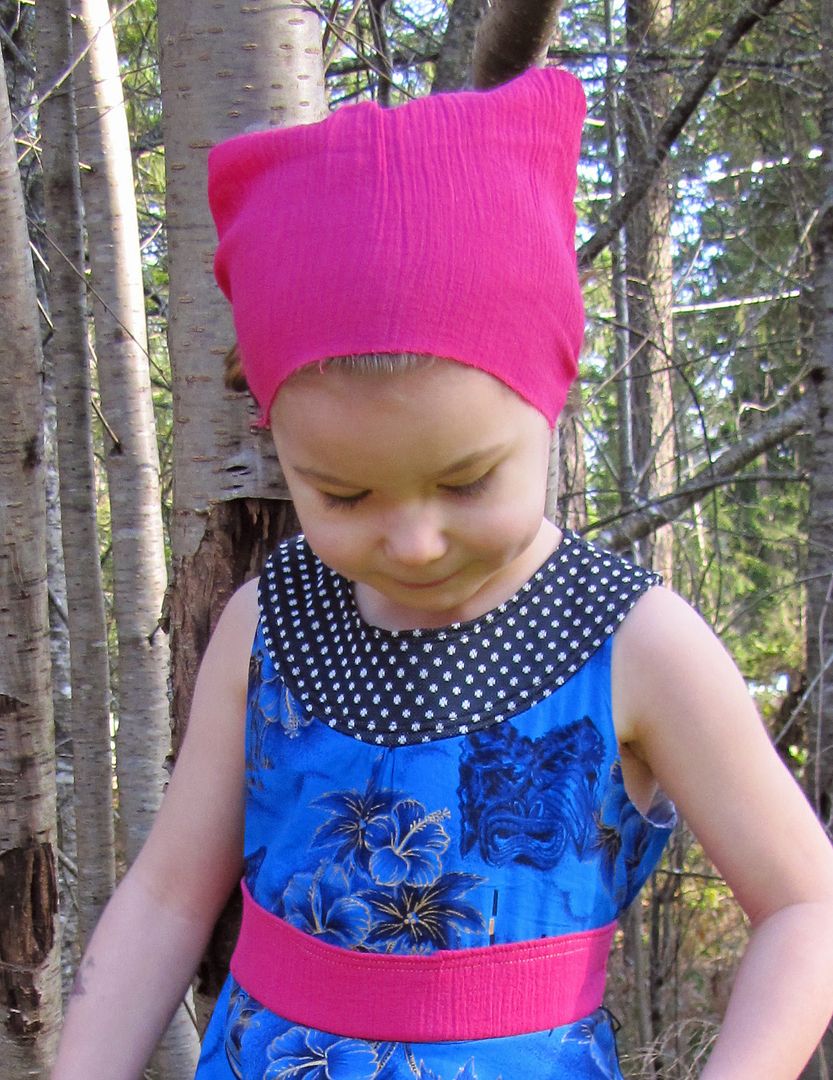
My fabric here in is actually a knit fabric that I have stabilized with a lightweight fusible interfacing to make it act like a woven material. You can see interfacing side is where my center mark is put (yes, there are three lines; ignore the outside two).
The Back Yoke is cut on a fold, which makes it symmetrical, so you do not have to worry about making a mirrored piece. Either make one fold and cut out twice or double fold and cut once.
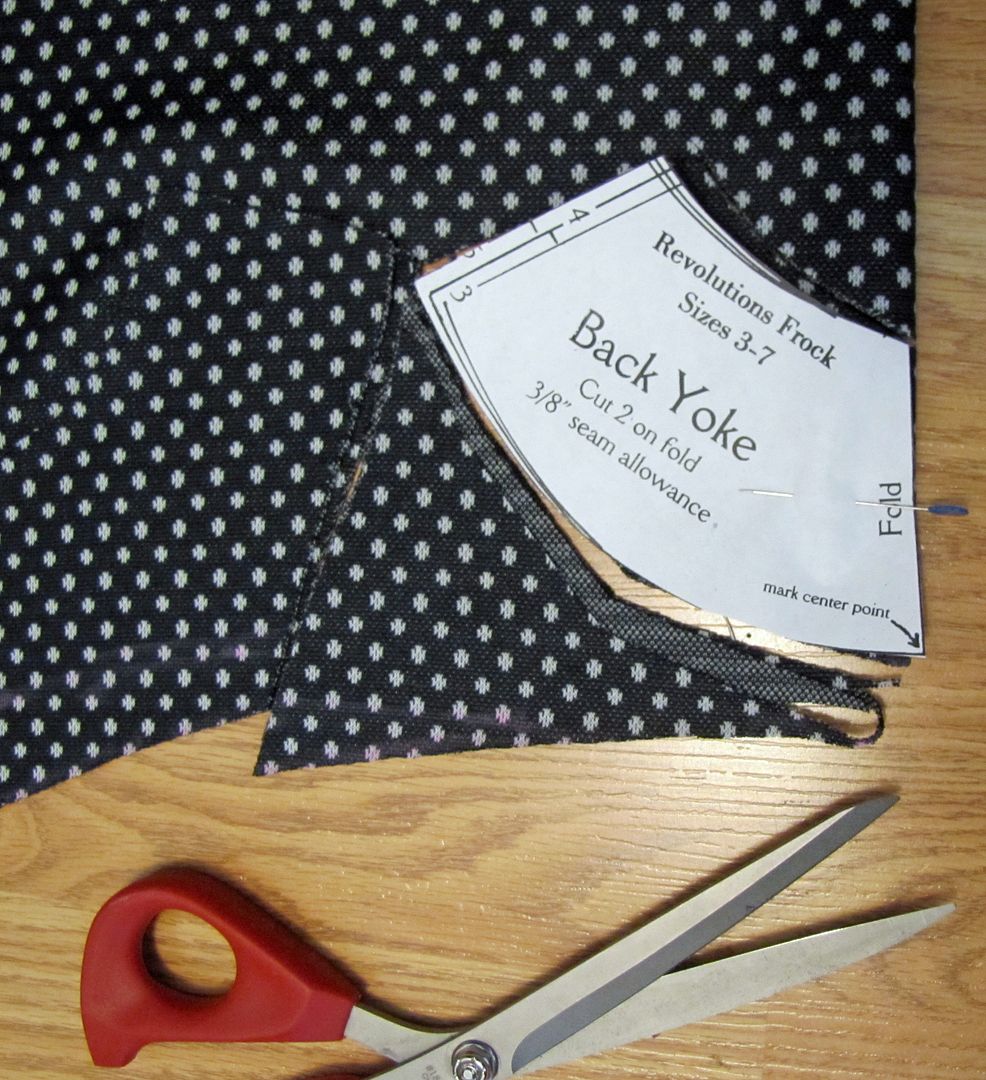
Use the pattern piece is mark the center.
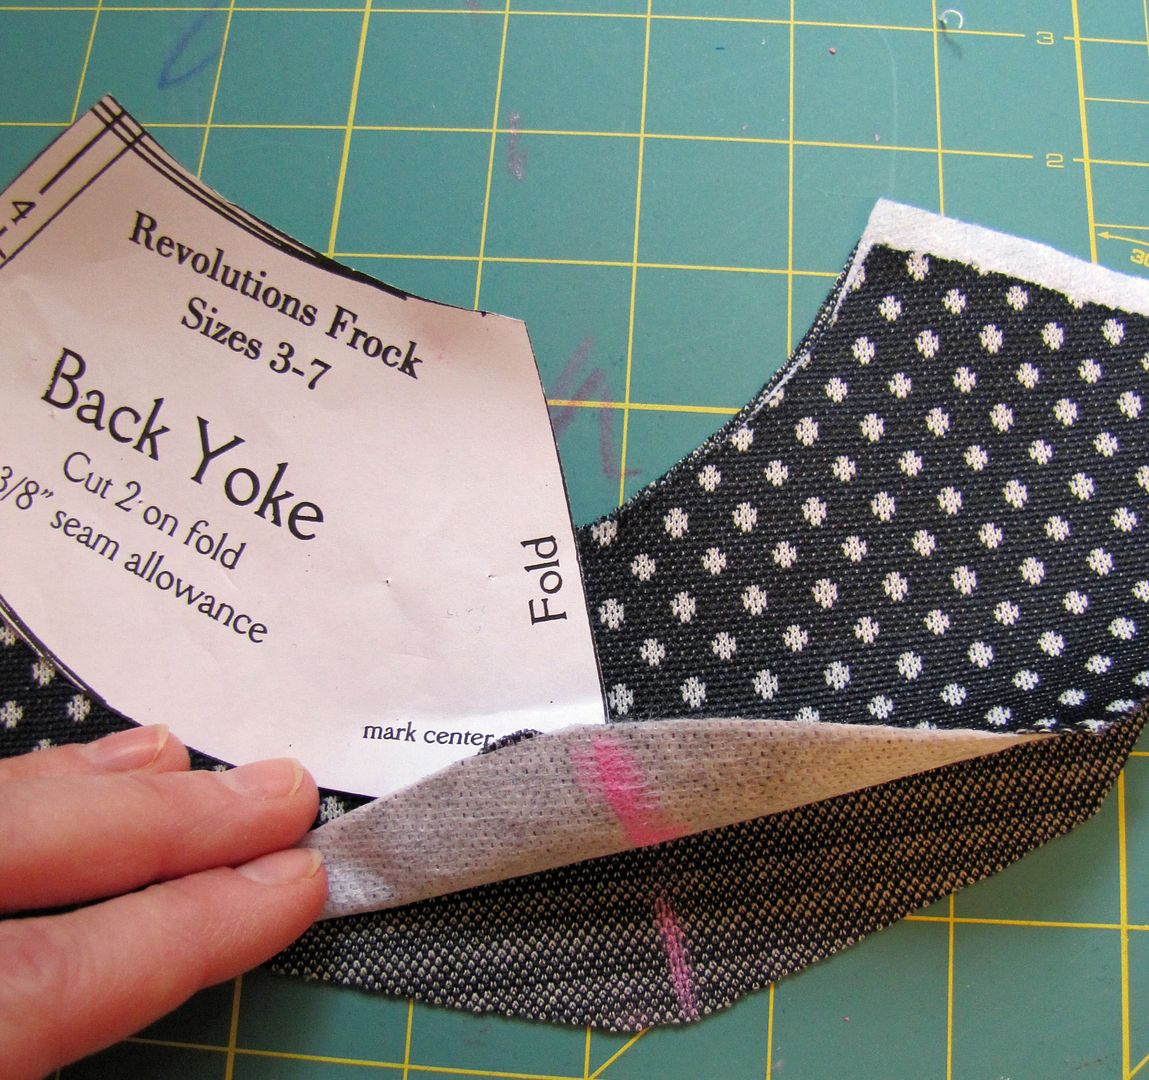
And all together (the white bits are just the fusible interfacing that has gone over the edge):
Sewing the Yoke
The instructions say,
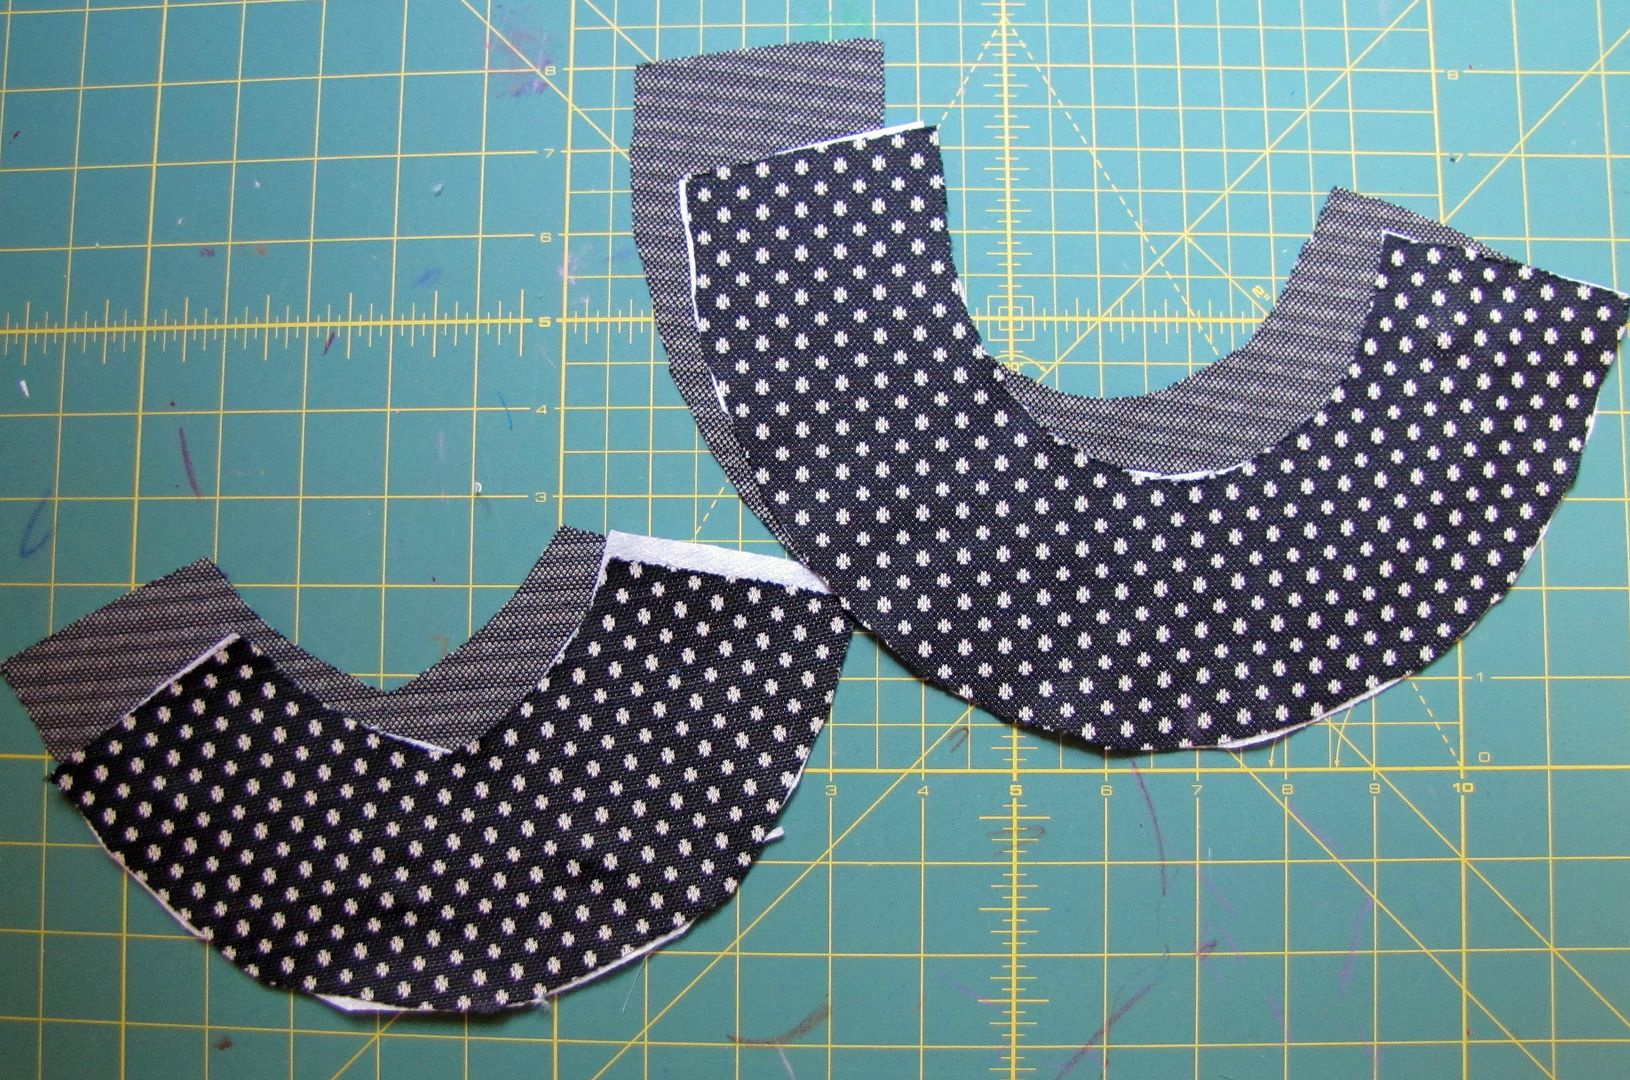
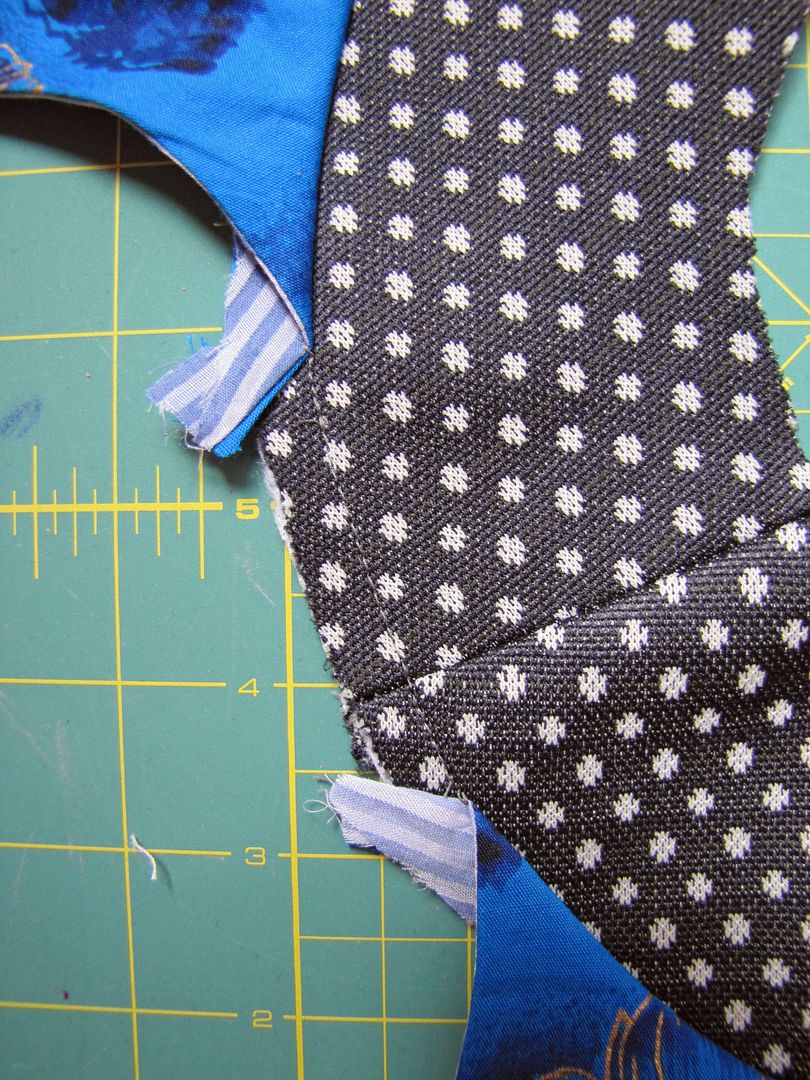
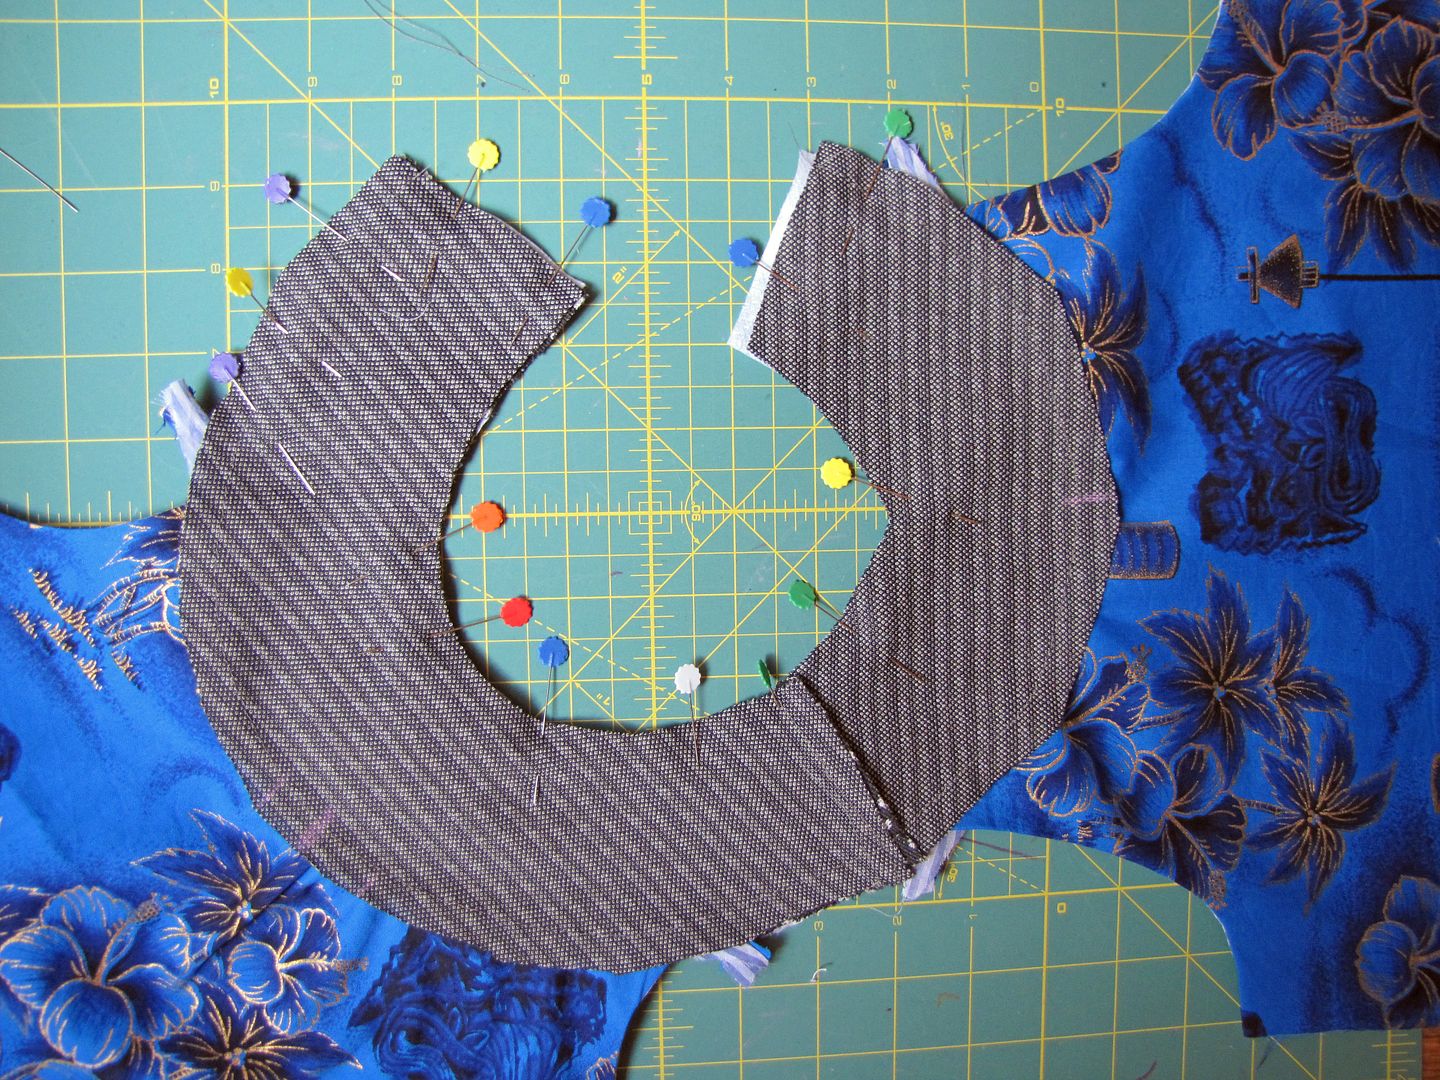
Align the shoulder mark on one back yoke piece with the shoulder mark on one front yoke piece, right sides together. Stitch shoulder. Open seam and press. Repeat for other front and back yoke pieces.
That looks like this:

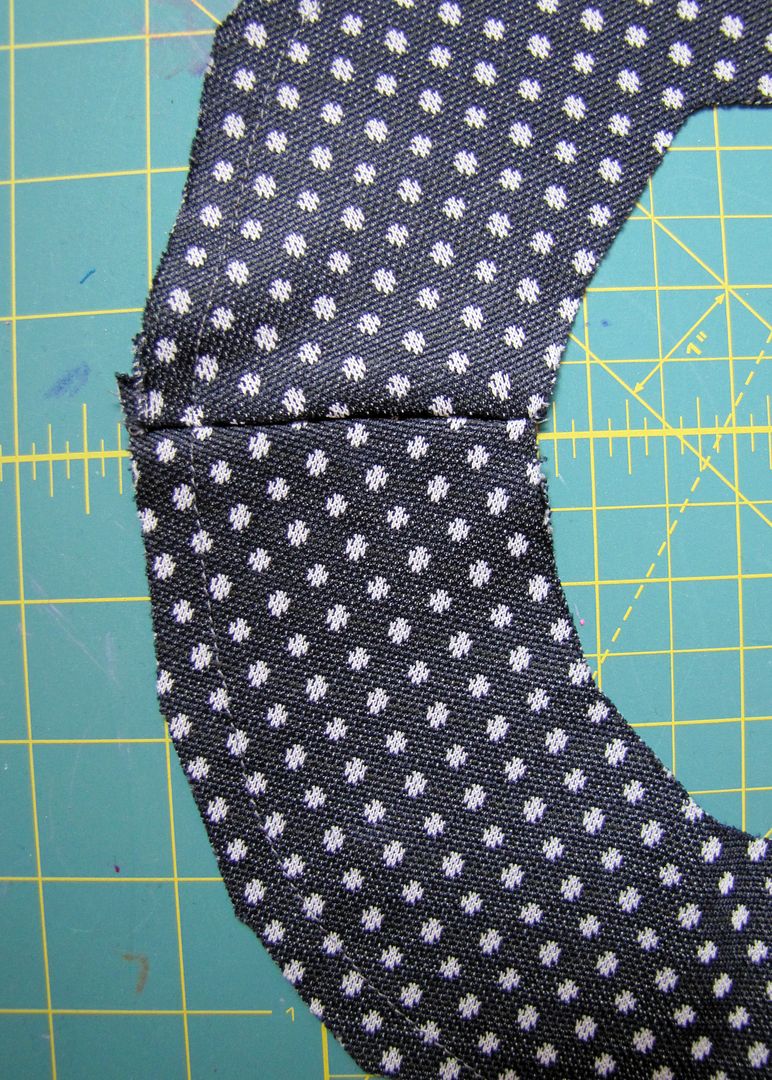
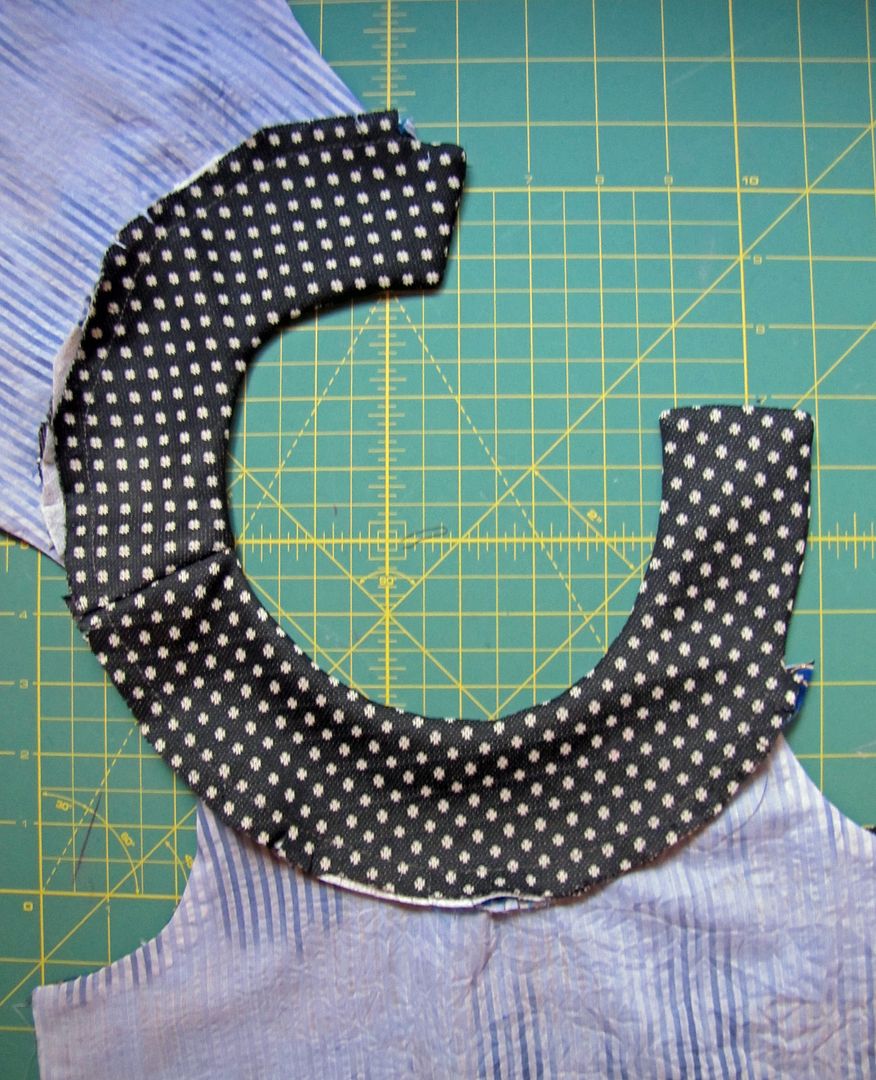
That is, you are sewing the end of one Back Yoke piece to the end of a Front Yoke piece on the side without the closure. (It's the shorter side from the center.)
Repeat for the other two yoke pieces.

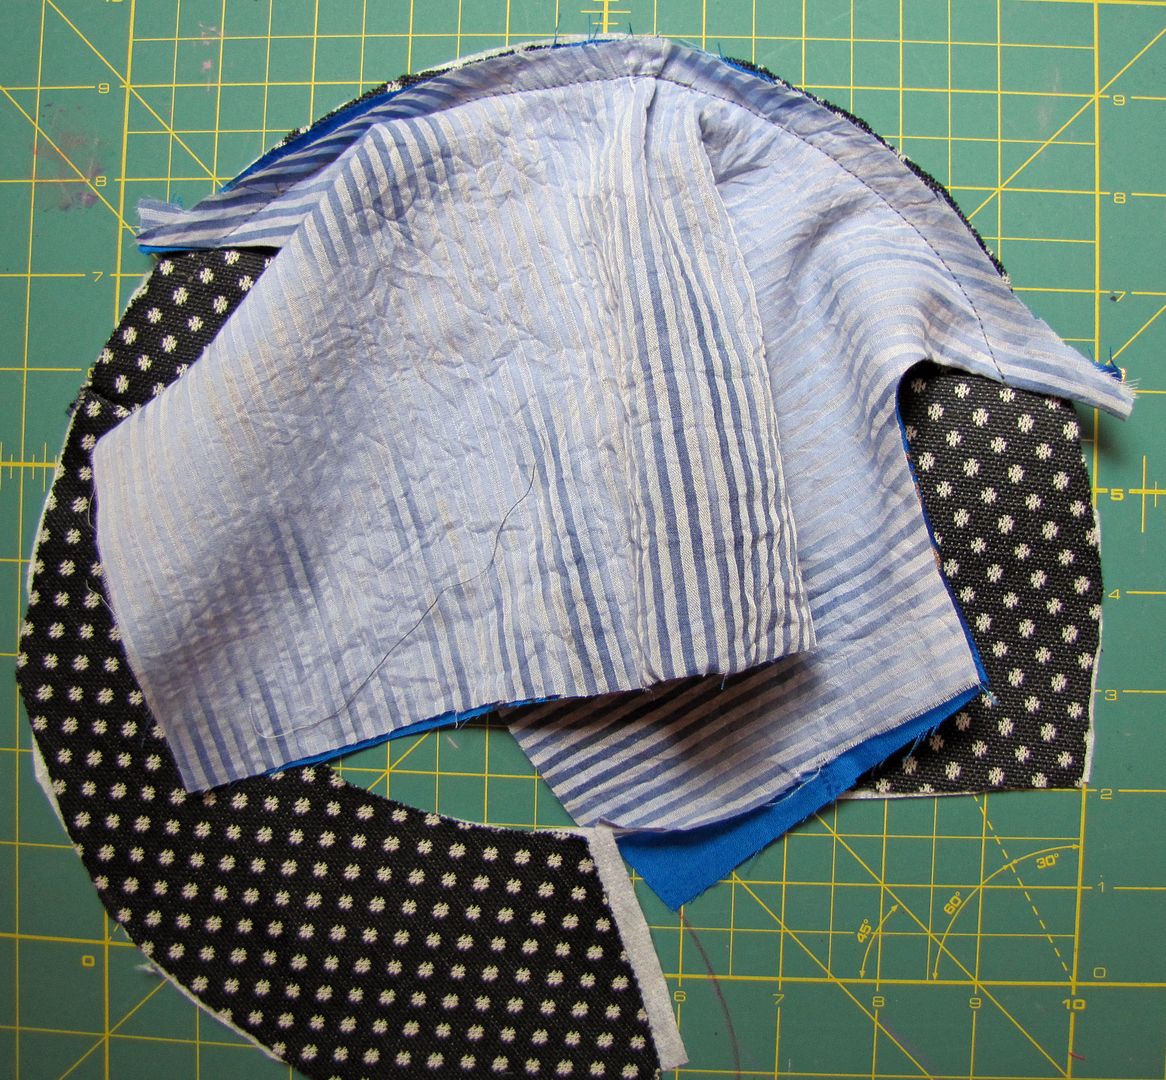
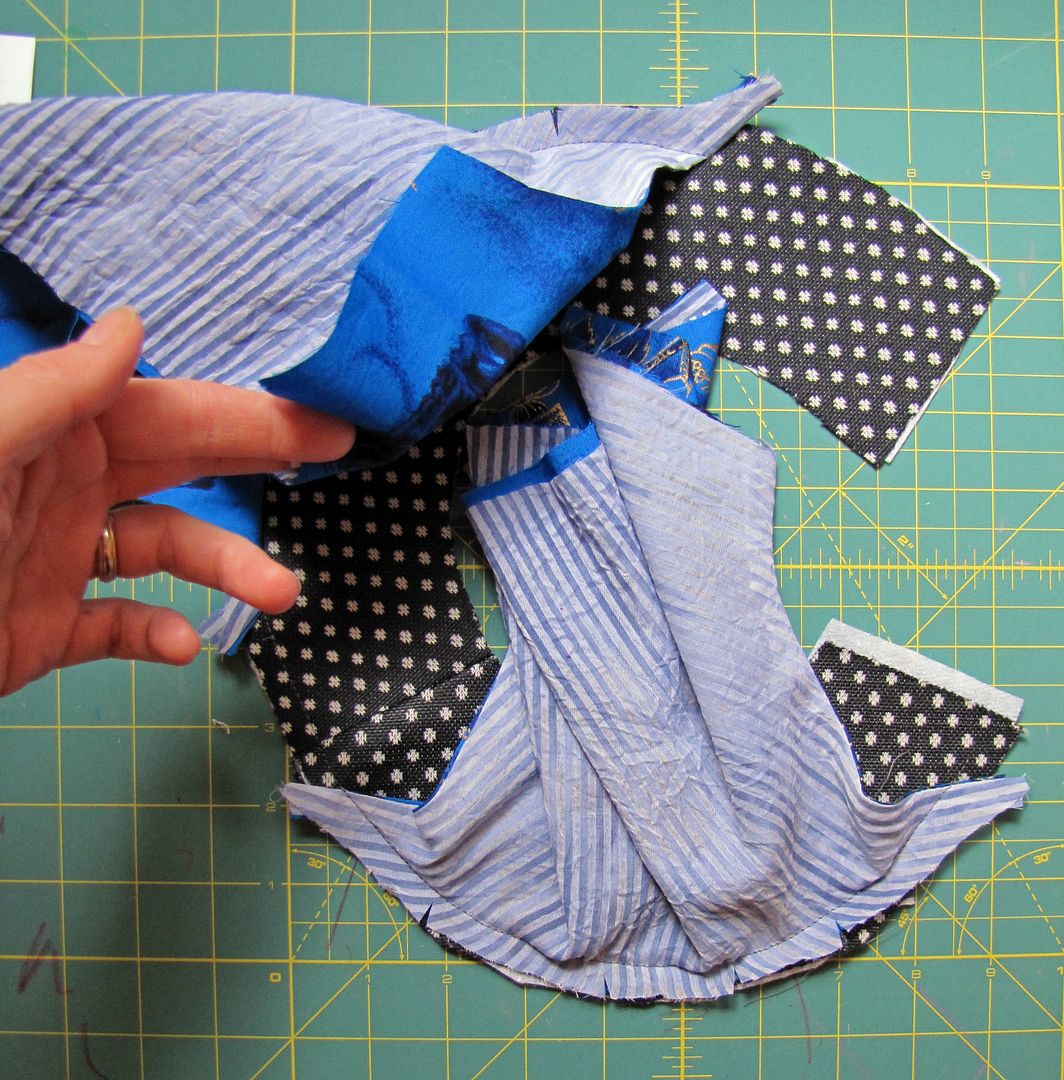
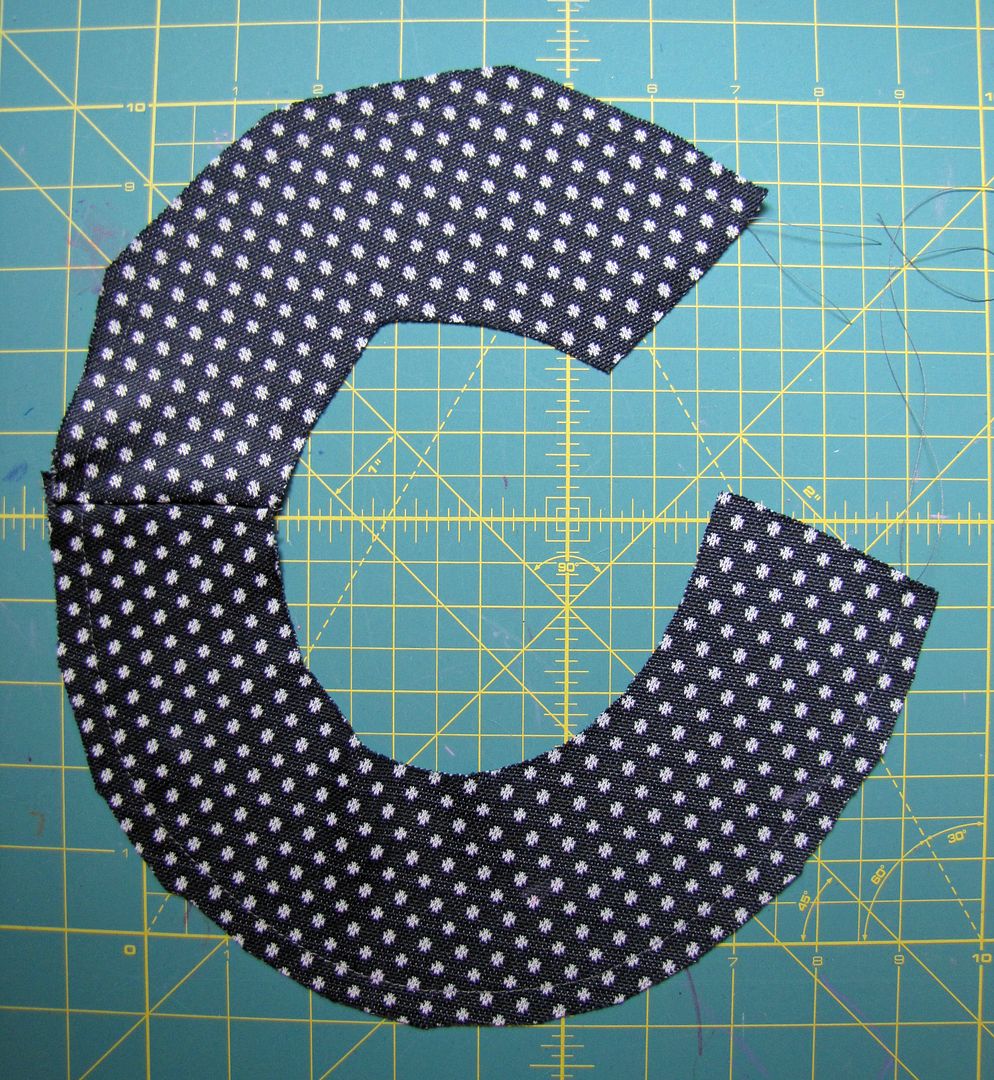
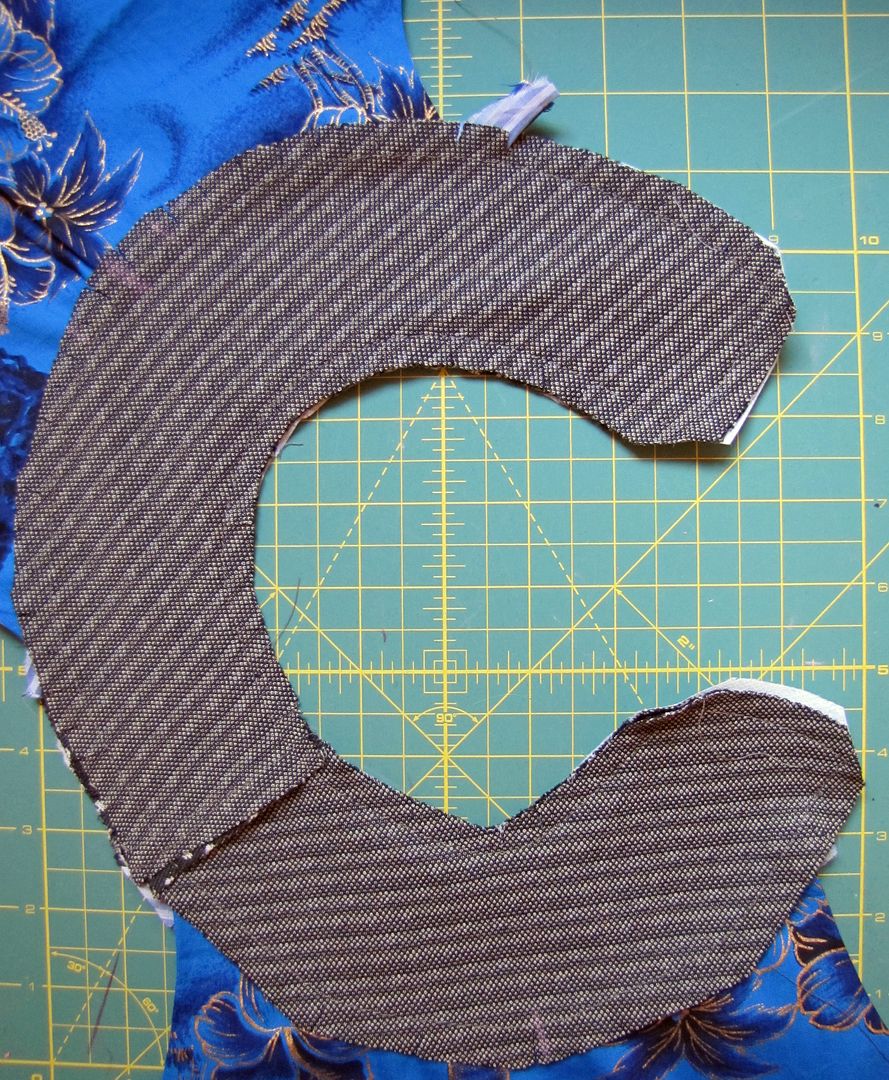
When you press them open, they come together to make a 'C'. This is both the inside and outside yoke pieces, right sides together:

Align raw edges and pin the center of the front bodice to the center mark on the front yoke piece, right sides together. From the center outwards, secure the raw edges of the yoke to the front bodice with pins. Stitch yoke in place. This will be the outside yoke piece.
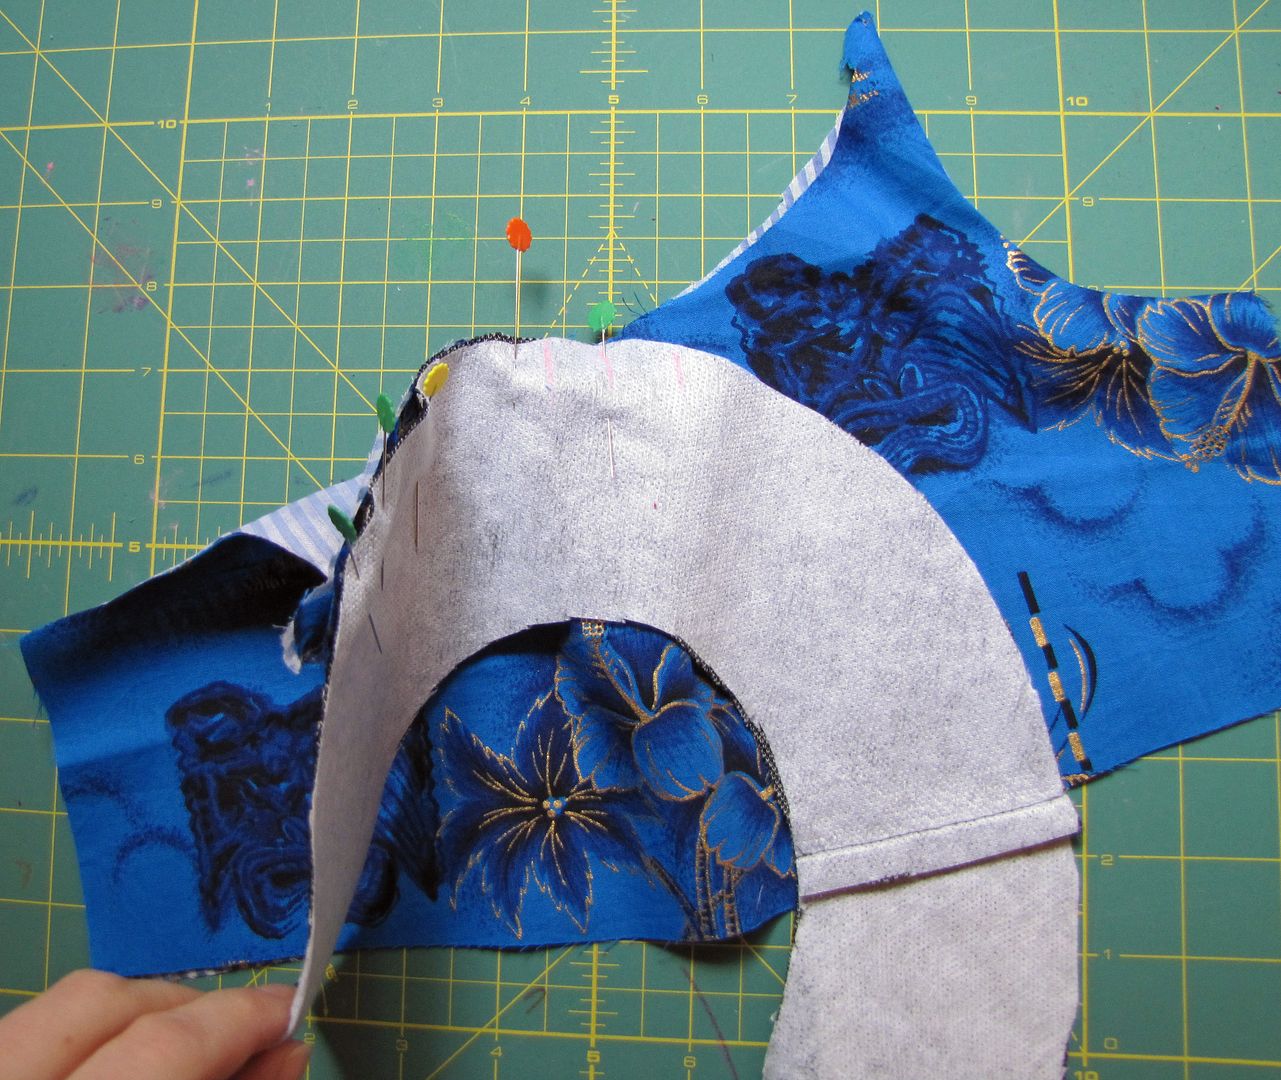
The bodice will not lay flat nicely for this seam, so extra pinning is necessary. Place your center mark of a Front Yoke piece (now part of the big 'C') in the middle of the bodice (gathered portion), right sides together. Pin.

Working from the center mark outwards, pin the yoke to the bodice. The bodice will curl around the yoke. One side pinned, from center outwards:
 Now both sides.
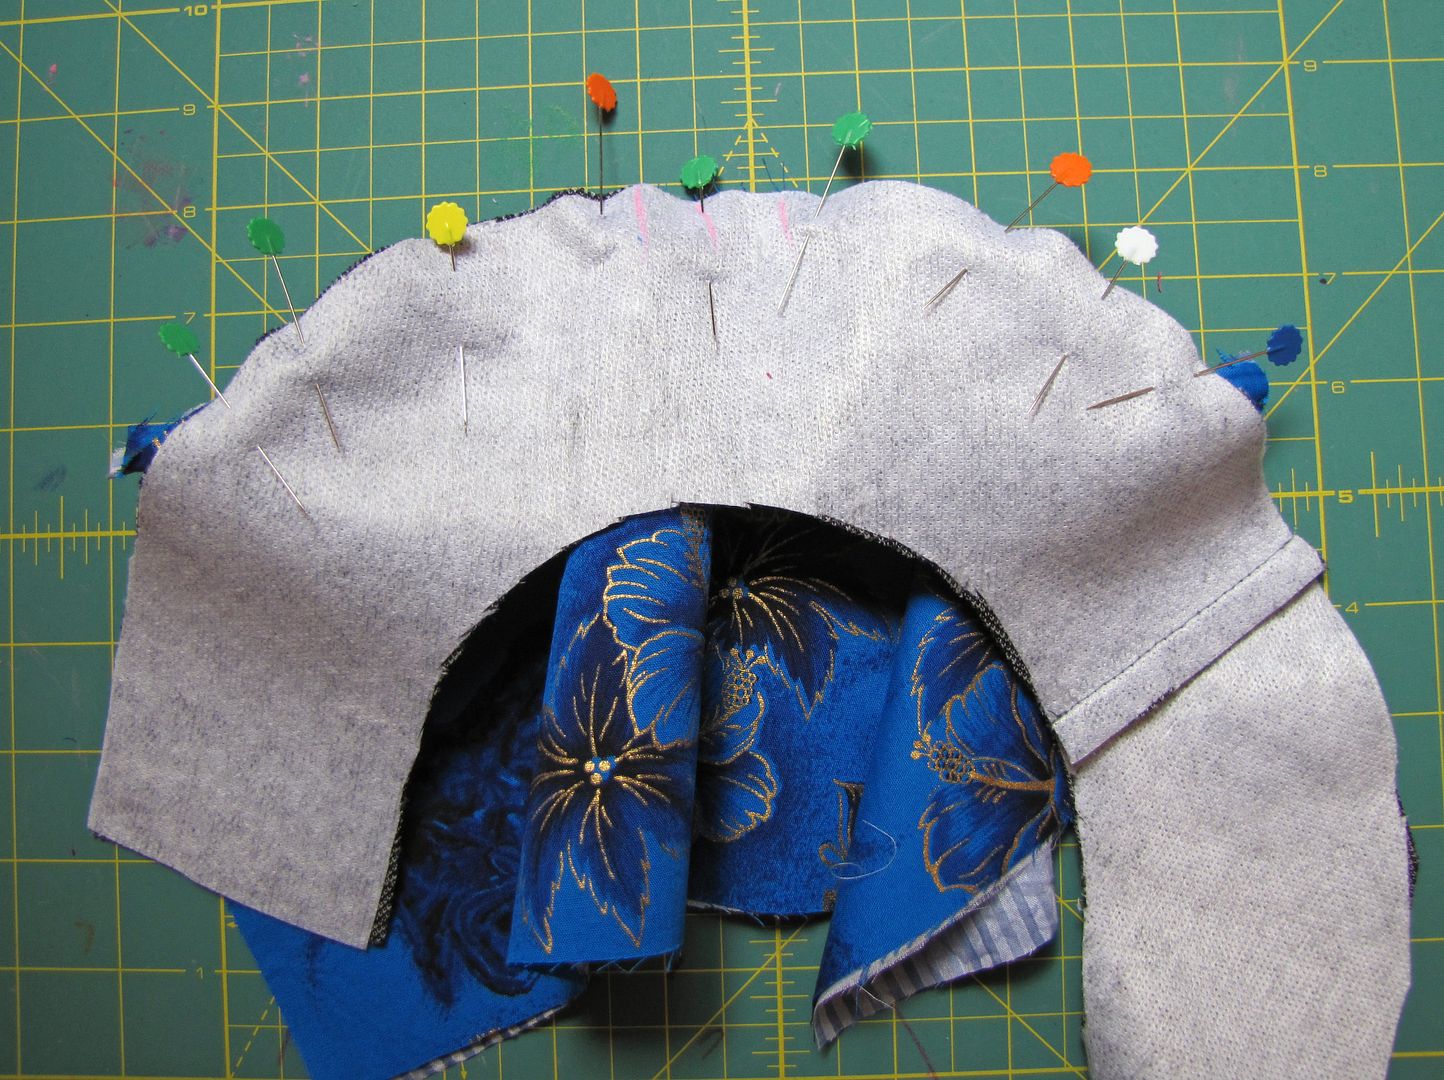
Here is a view of the other side of the bodice pinned to the yoke:
And stitch it on.
Align raw edges and marks, and pin the back bodice to the back of the outside yoke piece, right sides together. As with the front yoke piece, pin from the middle outwards and stitch the back bodice to the yoke.
This is the same procedure, just with the back portion. Center mark on the Back Yoke to center Back Bodice.
Pin from middle outwards,
and stitch in place.
Congratulations, you've now got the Outside yoke attached to the bodice.
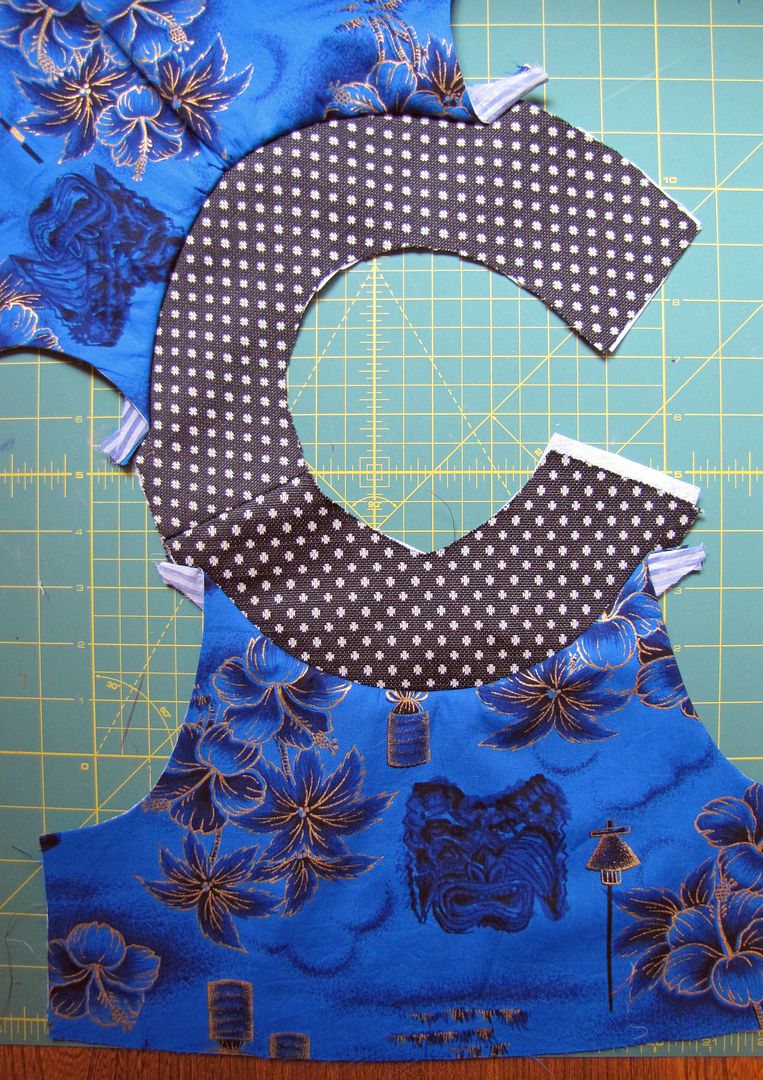
Still pretty rough, isn't it? The next step is to prepare the edges of the yoke that will not be sewn onto either the bodice or the yoke itself to be folded under and top stitched. What I'm talking about will become clear a bit later. For now, let's just go for it.
The instructions say,
On the outside yoke piece, stitch along the
bottom edge between the bodice pieces.
This will be a guideline for pressing the yoke
into a curve.
bottom edge between the bodice pieces.
This will be a guideline for pressing the yoke
into a curve.
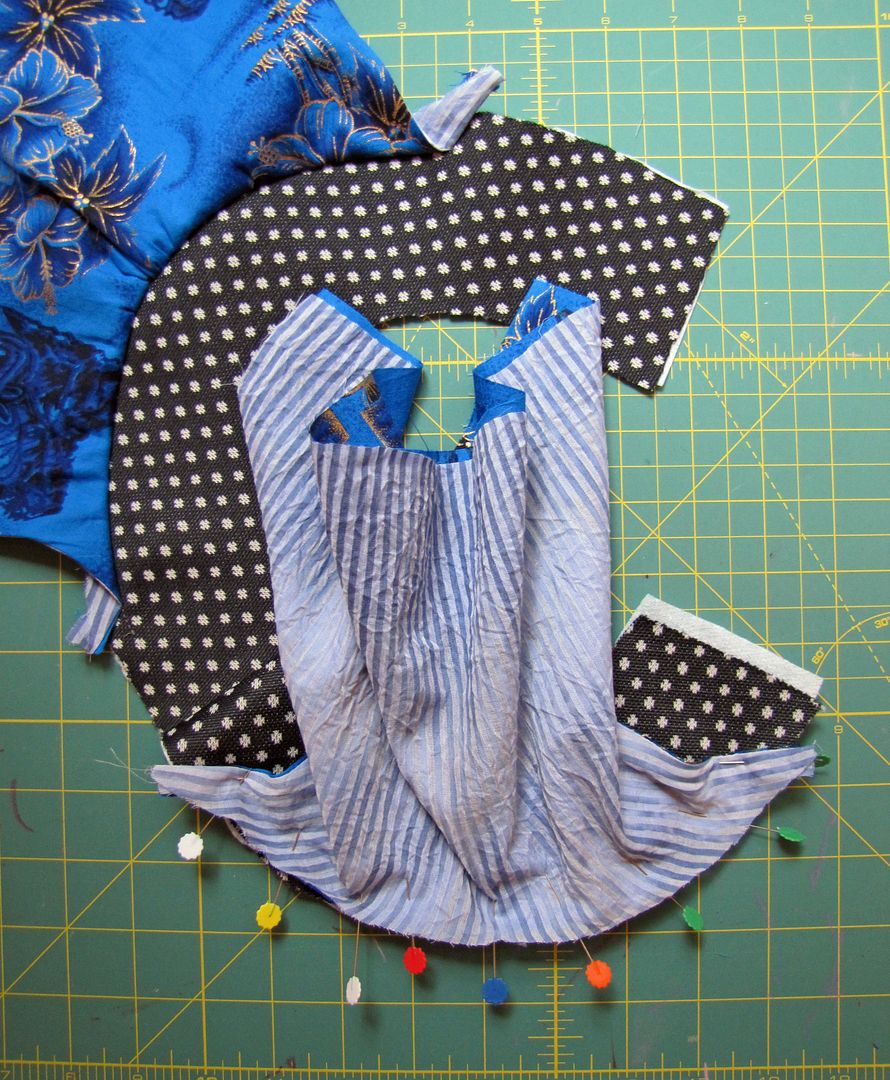
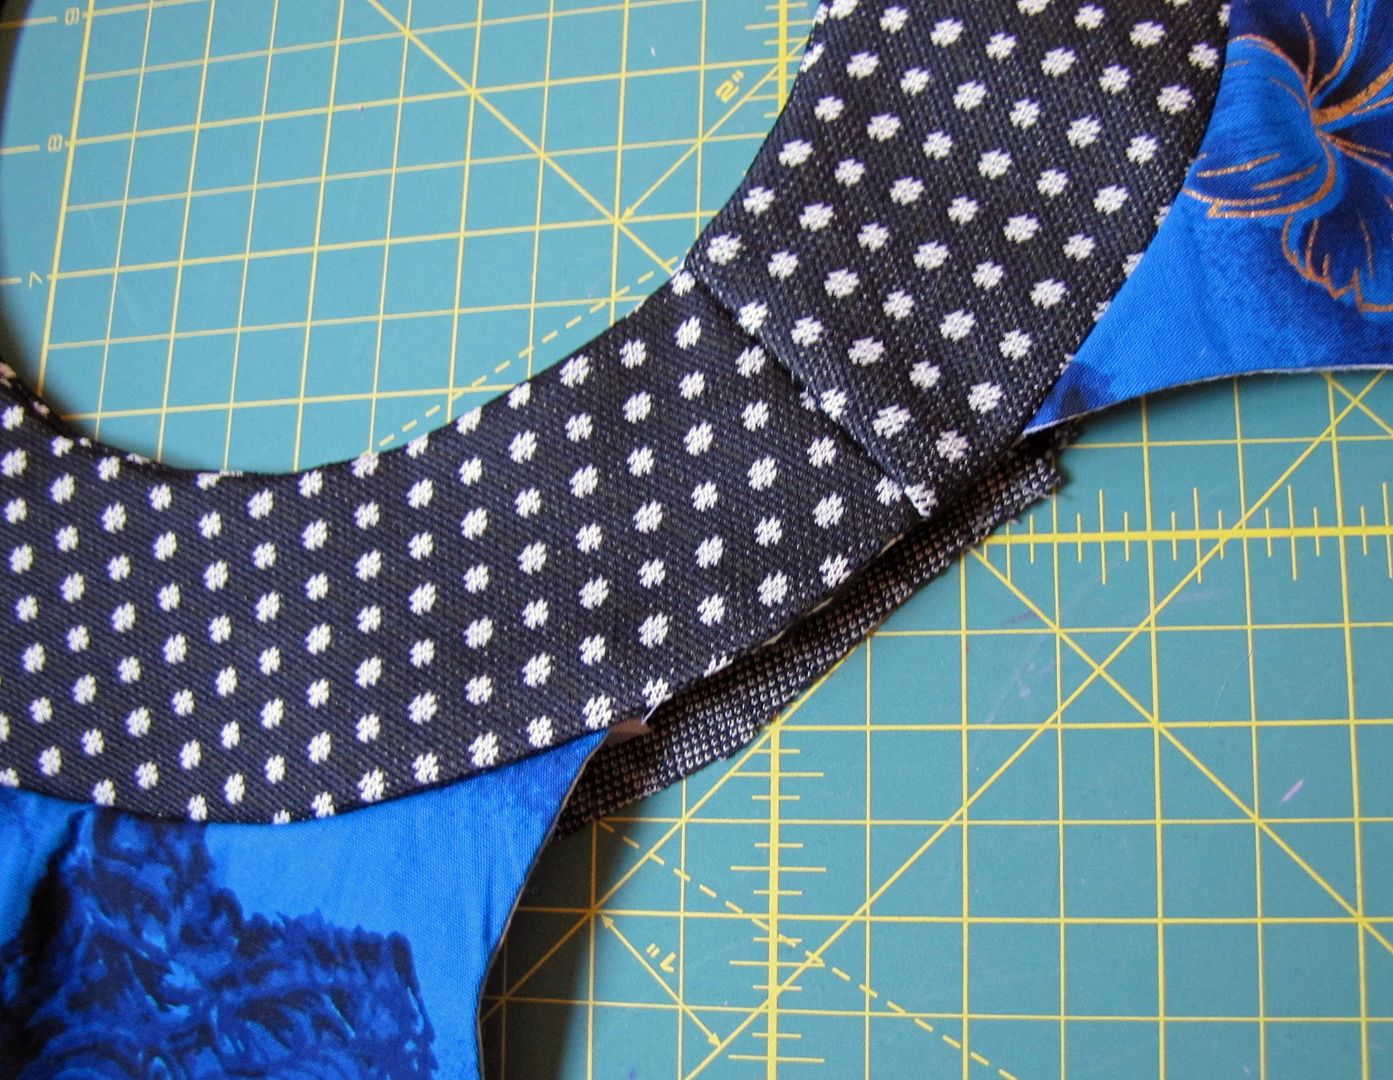
Start by tucking up your bodice pieces towards the middle of the yoke so you can have access to the bottom edge.
At the bit of yoke between the two bodice pieces, stitch (machine baste) along the curve at the 3/8" mark (the seam allowance).
That's all you have to do with that right now.
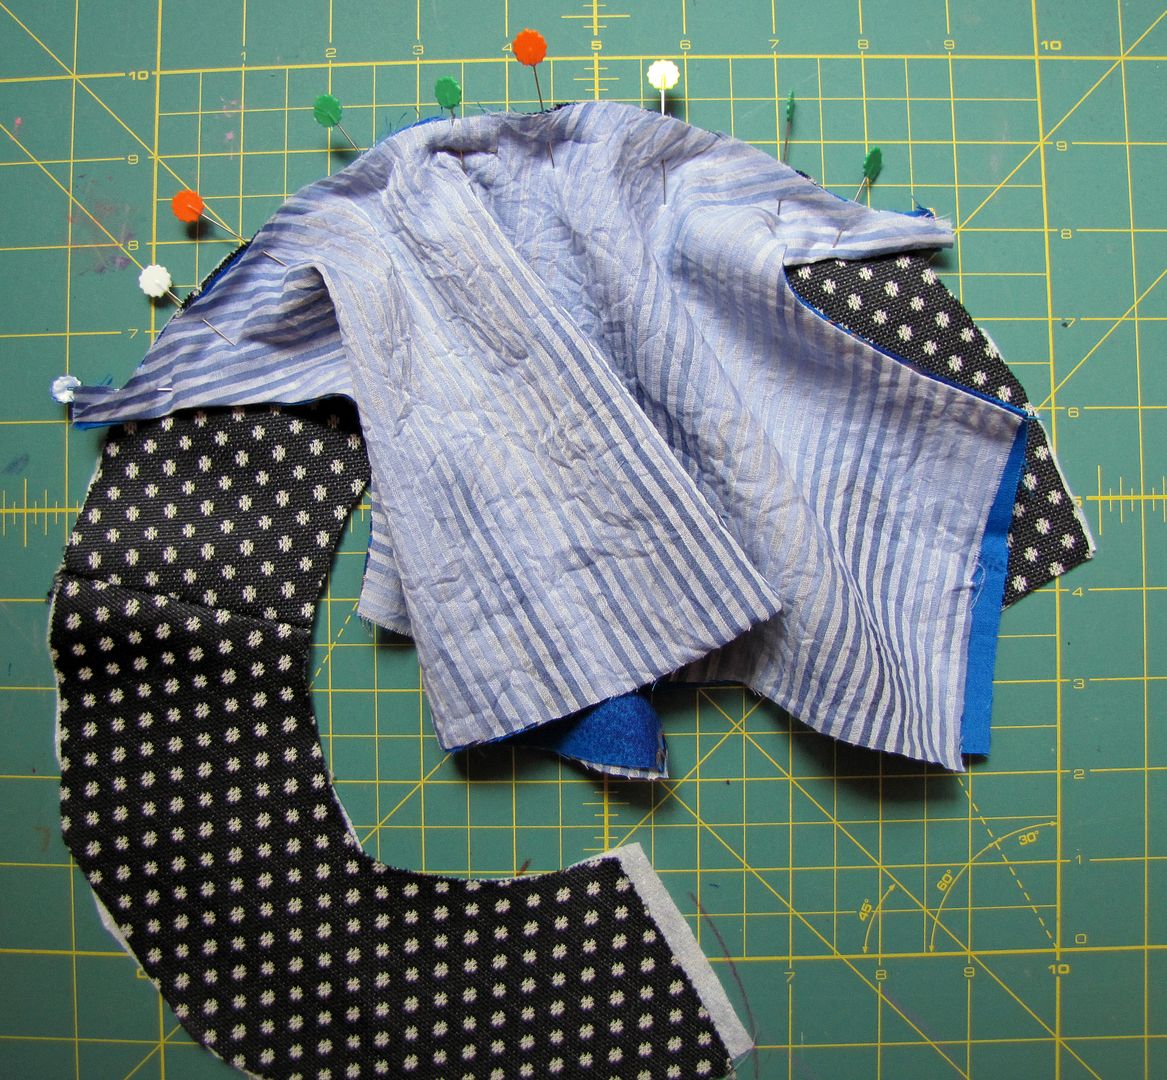
Turn over to your Inside Yoke piece (the other 'C') for the next bit:
On the inside yoke piece (which is not attached to the bodices), stitch a seam all along the bottom curve. This will be a guideline for pressing the inside yoke into a curve.
Look closer to see a line of stitching (machine basting) all around the outside of the 'C' at 3/8".
And now we can stop worrying about that bit too. The stitches we just put into the Front Yoke between the bodices and around the outside of the Back Yoke are going to help us later on. Right now it's time to marry together the Front and Back Yokes.
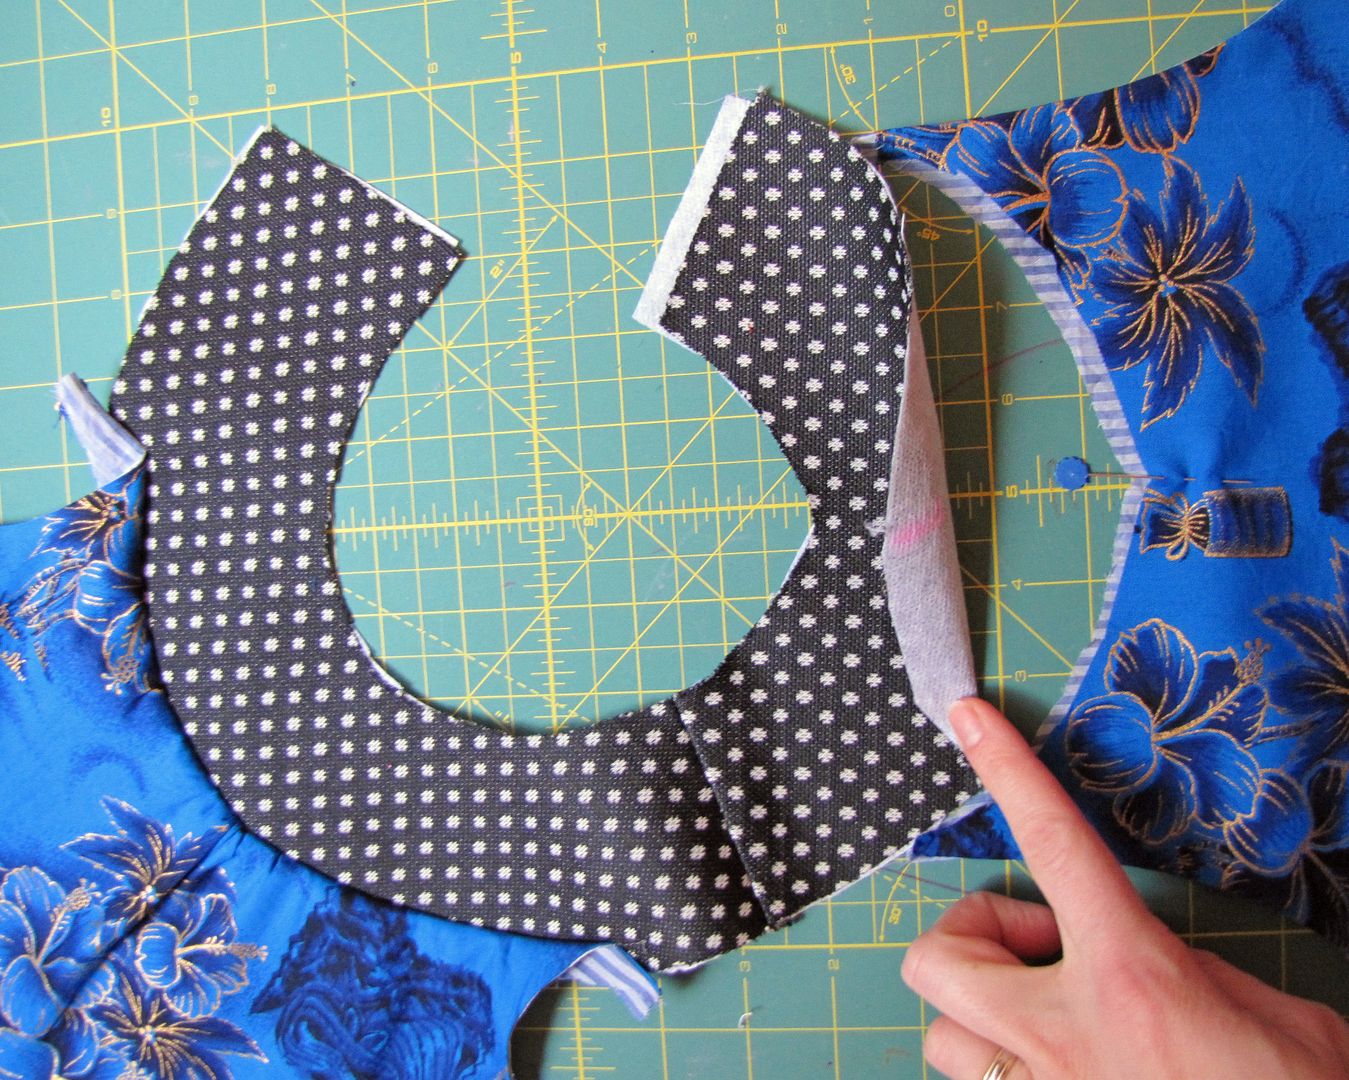
Align the outside and inside yoke pieces, right sides together. Pin and stitch the yoke as indicated by the illustration to the right. This will close the ends of the yoke and inside curve.
Here is the illustration:

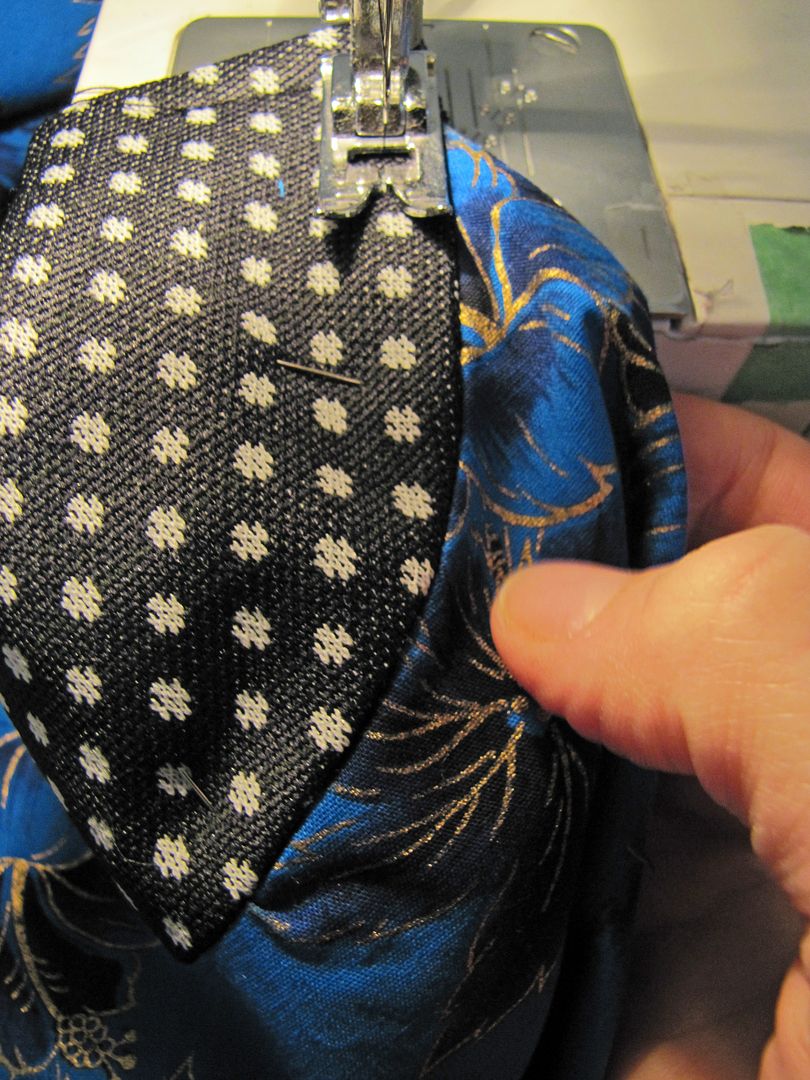
It seems like taking the long way around, but basically you are just sewing together as many seams as possible before turning the yoke right side out. Start by pinning the yokes together,
and place your needle just a hair's distance from where the bodice is joined to the yoke.
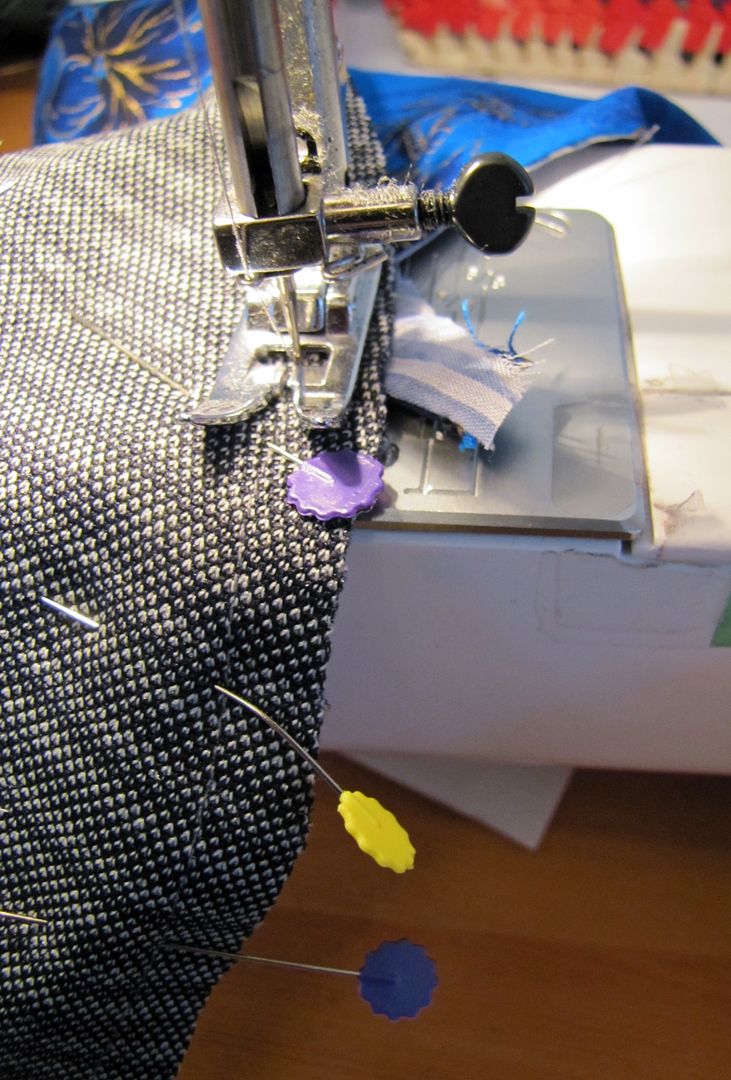
Then sew towards the end of the 'C' on the outside, follow the corners, turn into the middle curve, all the way around the inside track, turn again at the other corners, and finish just where the bodice meets on the other side.
You can see in the above photo how the stitching goes from the ends along the inside, but does not go over the portion where the bodices are attached.
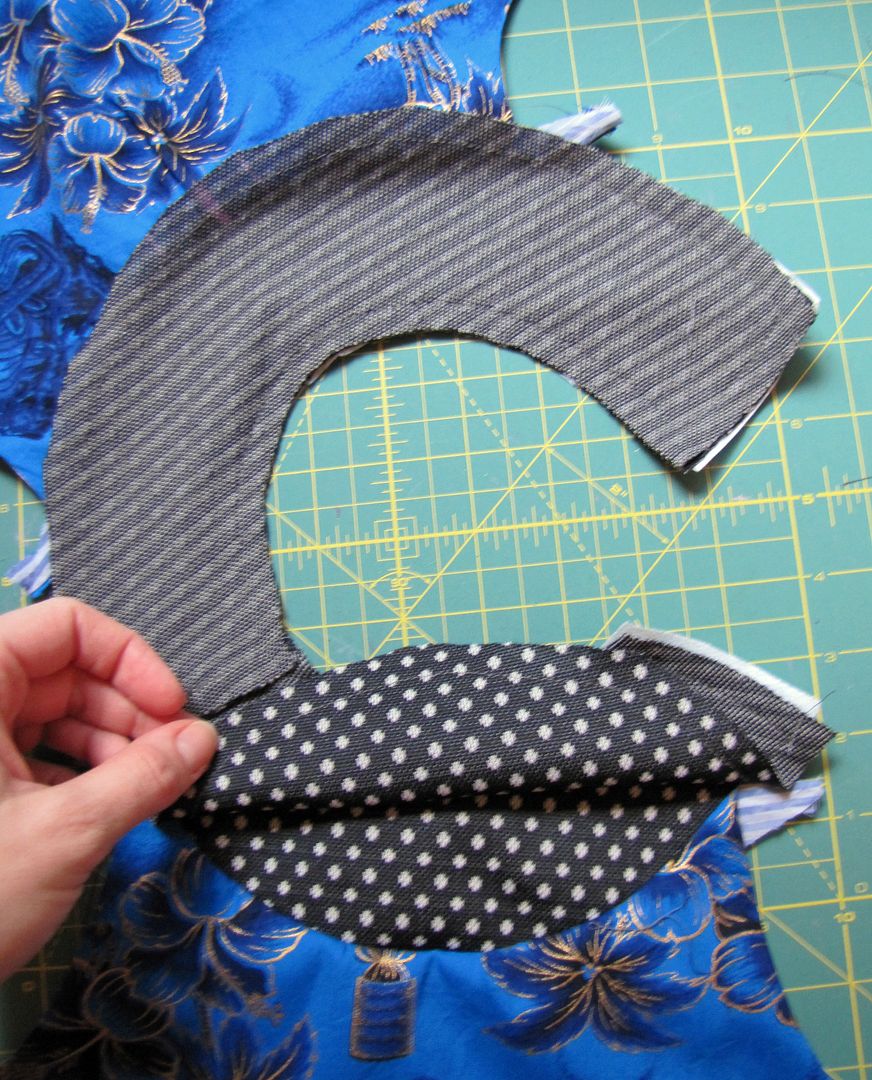
Clip the corners and curves all around the yoke on both inside and outside pieces. Turn yoke right side out and press ends.
All around the yoke, both sides, need clips in order to make a smooth curve. The more clips the better, though watch out not to cross the stitching. All along there should be either a seam or a the indicator stitches we sewed in earlier, so there should be no place where you may be tempted to clip too deep.
Turn the bodice inside out and press the seams.
Now you will see you have a couple places where you need to deal with the raw edges. Here is where the indicator stitches become relevant. The instructions say,
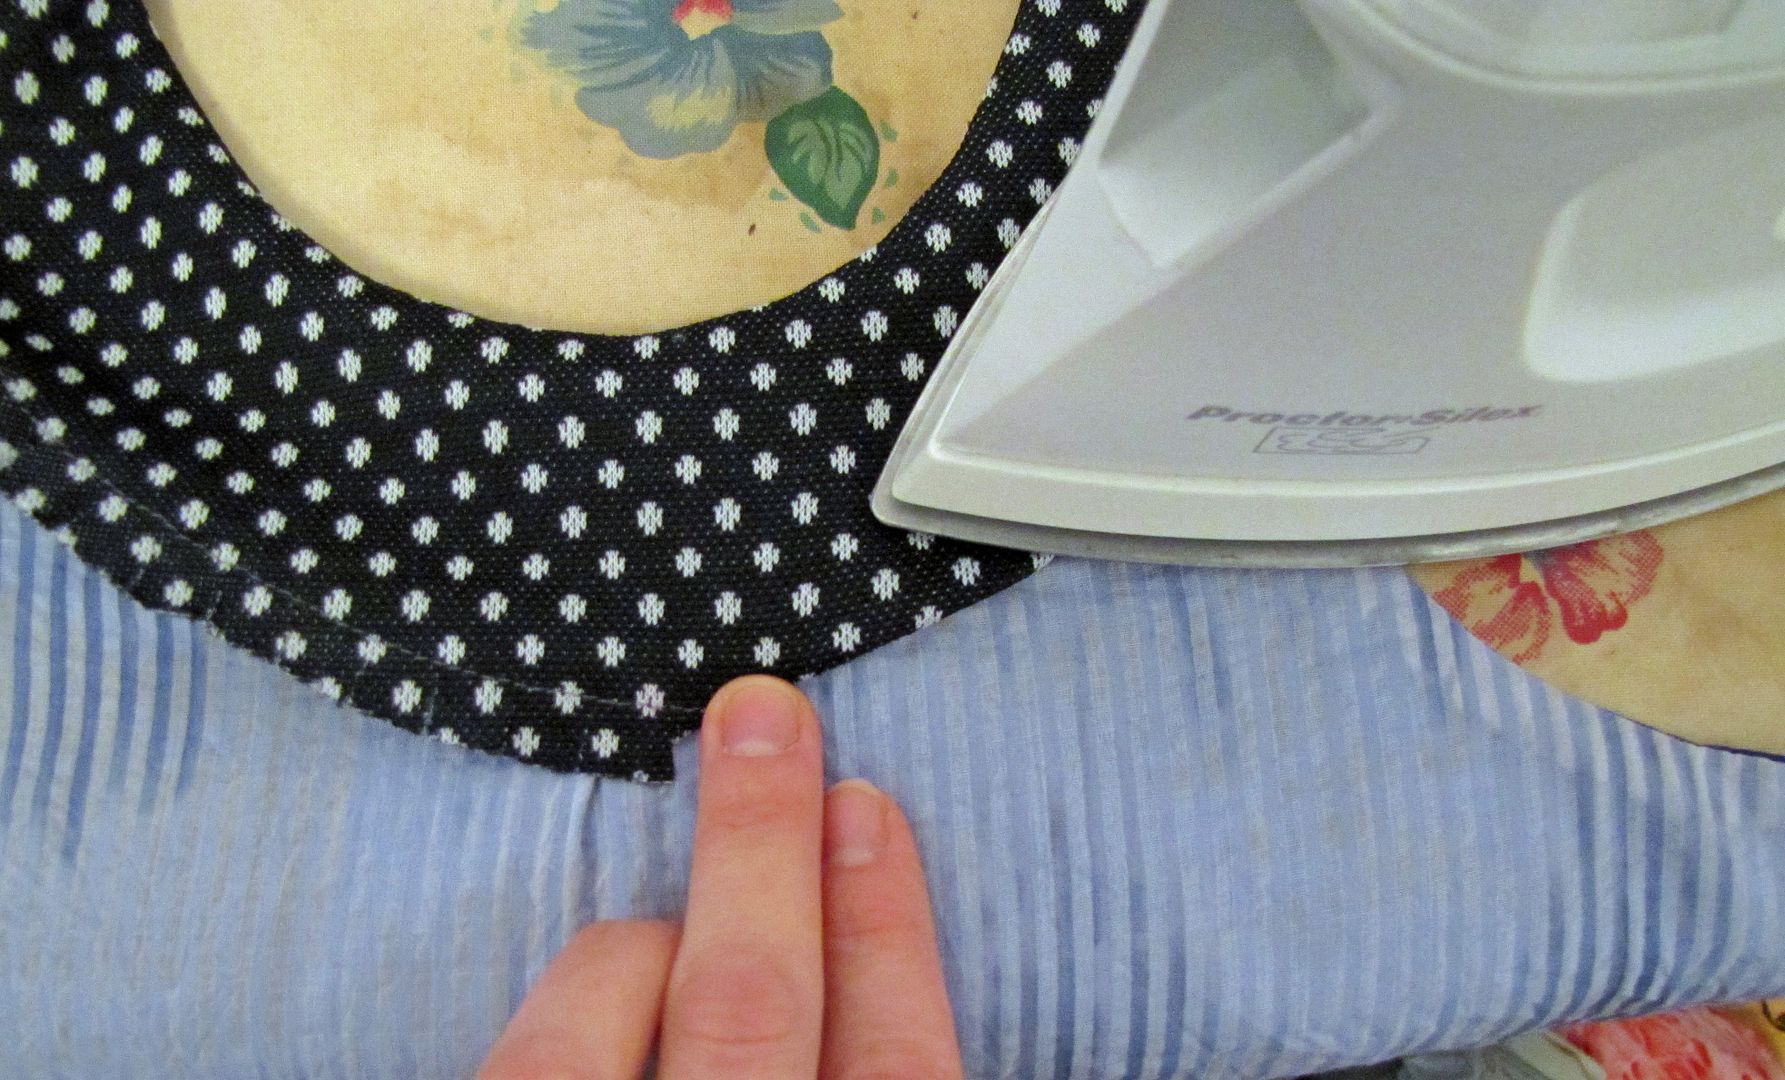
Use the guideline stitching between the bodice pieces to press the yoke into a curve.
That is the portion on the Top Yoke between the bodices that isn't attached to anything.

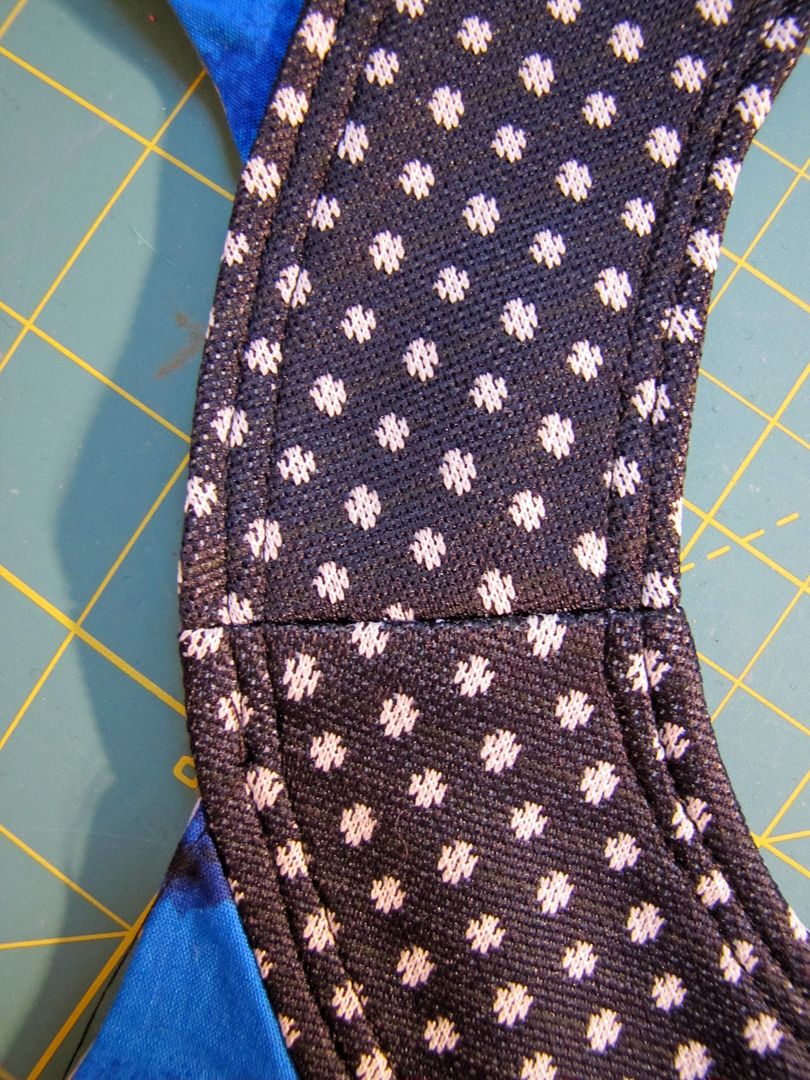
Fold that little bit back, using the indicator stitches as a guide, and press into a curve.

May as well press the bodice seams up into the yoke now too.
Ah, so smooth!
Use the guideline stitching to press the
bottom sides of the inside yoke into a
curve.
bottom sides of the inside yoke into a
curve.
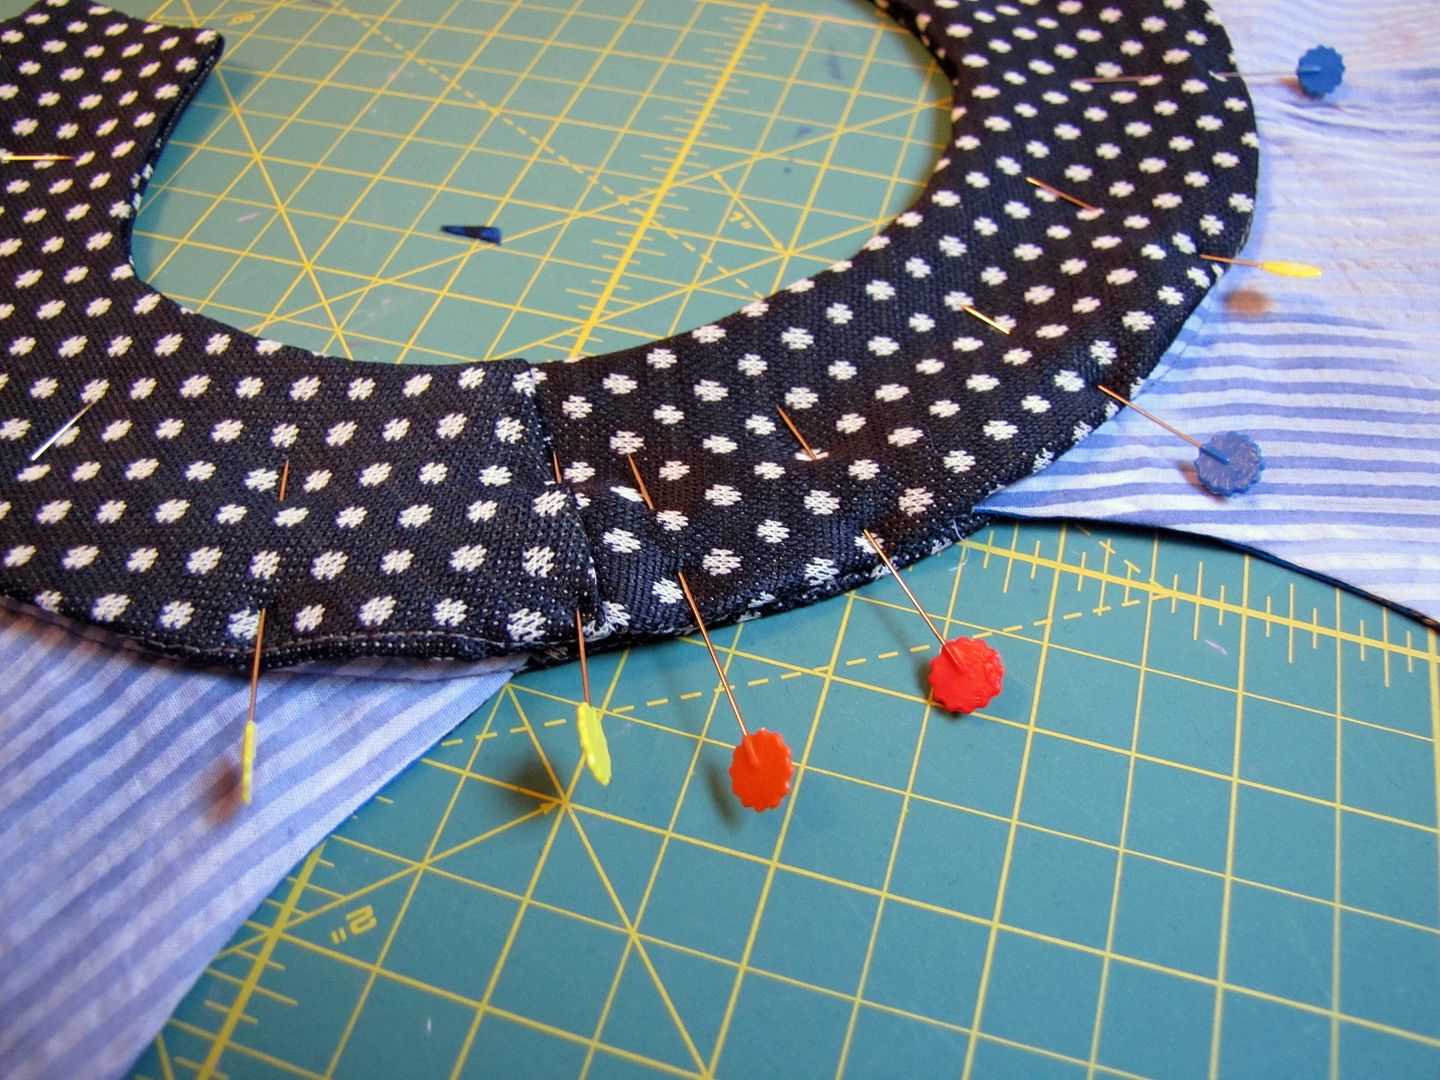
Okay, same deal as the bit between the bodices, but this time it's a bit bigger: the whole bottom bit of the inside yoke. Tuck in the seam allowance, folding along the guideline stitching, and press.
If it's not turning out perfect, don't worry. This is the inside of the yoke, no one will see it really. Do make sure that the portion between the bodices is nicely curved and aligned - this part will be prominent on the shoulder. Add some more clips if it'll help with a smoother curve.
If your fabric doesn't like to say put when pressed, pin as you go. You will have to pin anyway when you are done before you can stitch the whole bodice closed.
Top-stitch all around yoke at ¼” from edge.
Follow with a second top stitch at the 1/8”
mark (exactly in between the ¼” stitch and
the edge). Press stitching.
Follow with a second top stitch at the 1/8”
mark (exactly in between the ¼” stitch and
the edge). Press stitching.
Which means just that. Using the edge of your presser foot as a guide, stitch along the whole outer edge of the 'C'. When I stitch, I put it with the right side up (or Outside Yoke out) and feel along the bottom side with my fingers to make sure the Inside Yoke bottom edge is still tucked in.
With one round of top stitching done, a second line is put in half way between the first round and the edge of the yoke. The reason is that your first go may have missed some of the tucked up inside yoke. If you only want to put in one round of top stitching, make it at the 1/8" mark, just to make sure the inside is secure.
Almost there!
Overlap the yoke ends, according to overlap
mark on front yoke pattern piece and install
two snaps on overlap.
mark on front yoke pattern piece and install
two snaps on overlap.
What I do is put a couple of snaps (or, least the male bits) on the long overlapping part,
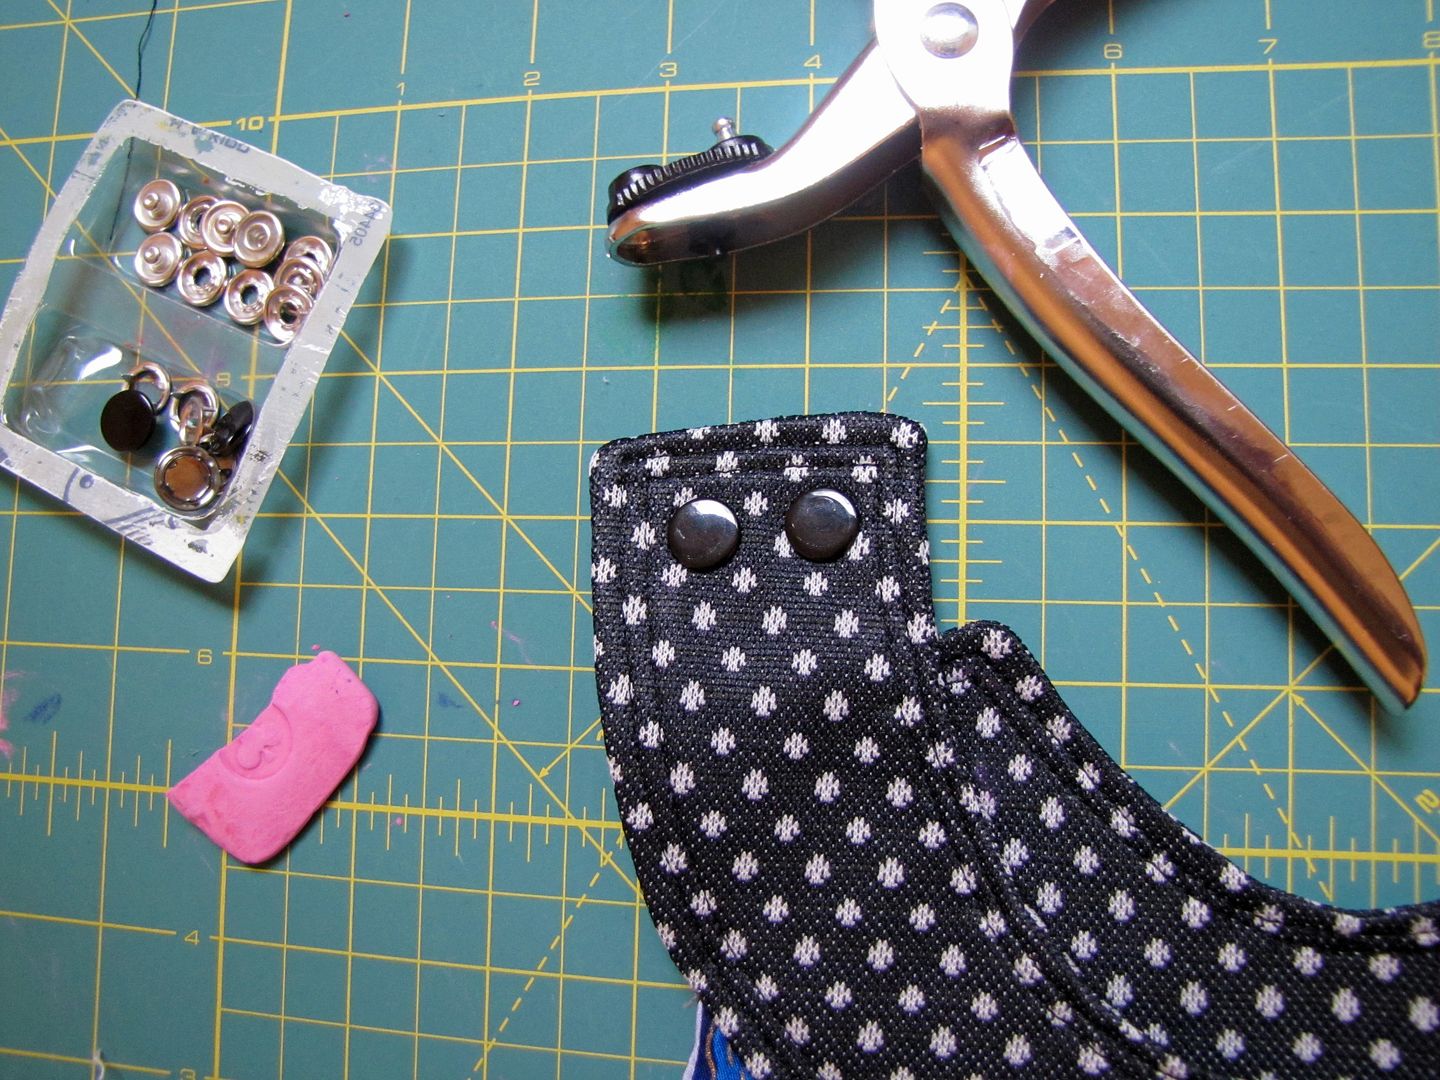
and then fold over the overlap and pin where the dress seems natural. A good time to try it on someone. You want to make sure that the shoulders are sitting even and nothing being pulled out of alignment. Pin the overlap in place while you mark where the other half of the snaps should go.

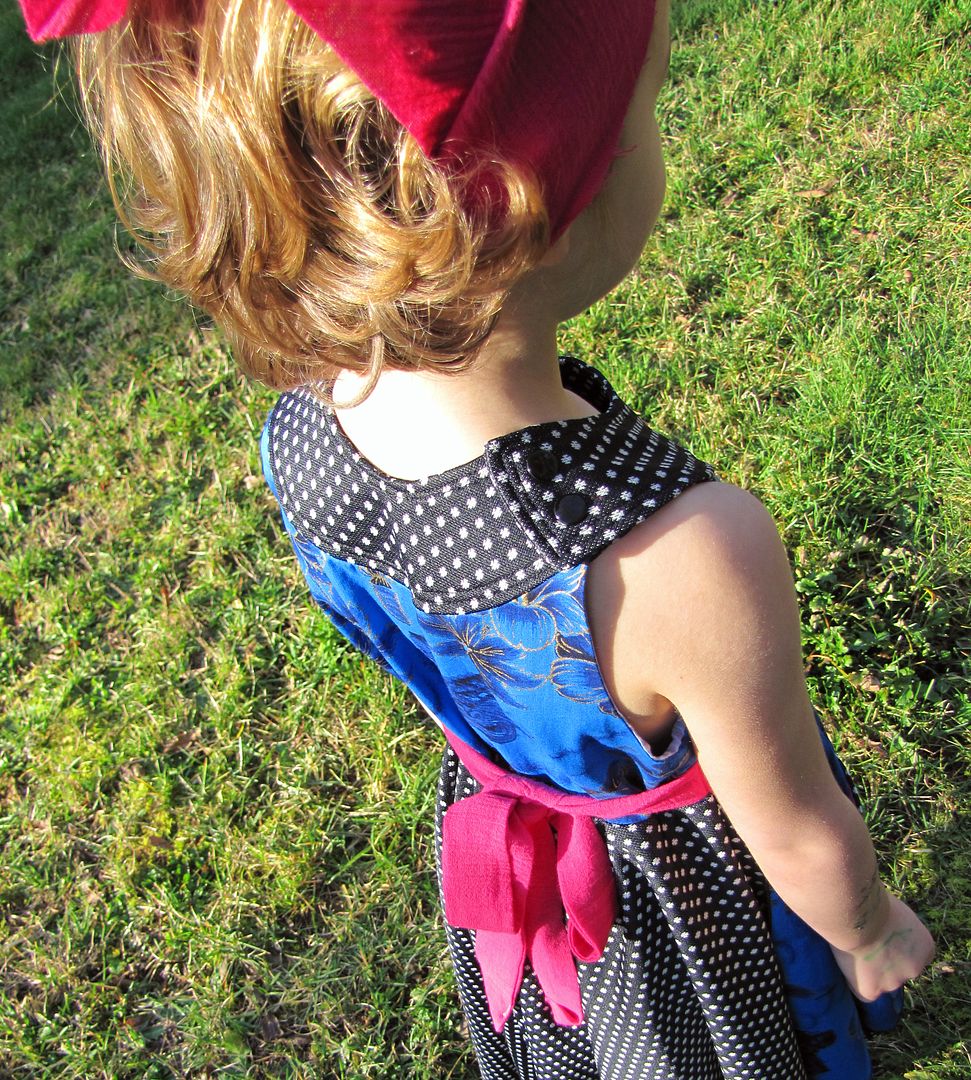
All done.
I hope this clears up any confusion (or avoids it) for constructing the yoke portion of the Revolution's Frock. Let me know either way so I can tweak this tutorial or bask in the glow of straight forward, albeit pic-heavy, tutorial.
One last note about Smootch's dress here. The apron is an add on to the pattern, one I am absolutely enamored with. Smootch loves it too - it's a perfect Cinderella dress, with the apron handy for her floor scrubber days and the rest twirly enough for a princess. We are both so goofy happy with this dress! So, thank you to those who have asked for additional yoke instructions for the opportunity to a make it. It has truly been my, and Smootch's, pleasure.

Fantastic tutorial! Well done!!
ReplyDeleteNow.. if only had I the time...
What a fabulous tutorial. Thank you! (And the last pic of the fair maiden twirling is beautiful)
ReplyDeleteYou really outdid yourself with that dress! I love the colors, prints and the added apron! I have that pattern on my 'must sew' list (which is loooong) so one of these days I am going to get that pattern and sew one, or six.
ReplyDeleteI've been wanting to make a dress almost like this one, with the apron front and circle skirt, i love circle skirts for some reason i find them easier than non circle skirts. anyways, like i was saying, how do you make the apron/ double layer circle skirt? what are the measurements for it?
ReplyDeleteHeather, the apron is just 1/2 of the circle dress, with the bottom edges rounded, and a couple of pockets. It's been sewn right onto the bodice at the same time as the skirt.
ReplyDeletethis is nothing short of awesome. thank you for posting this!
ReplyDeleteWhat a stinkin' cute dress! I don't have girls, but I know a few that would be in heaven with such a great twirly whirly skirt!
ReplyDeleteWhat a beautiful pattern! absolutely loved the colours, and the pics. Your daughter is so gorgeous.:)
ReplyDeleteMy daughter is only nine months right now; but i can almost visualise her twirling in this dress... I'm goin to make this one right away! :D
Oh my gosh! Thank you so much! Yokes have made me cry in the past. The first time I tried it, I put it on UPSIDE DOWN and my daughter ended up looking like she was wearing one of those post-neuter dog collars.
ReplyDeleteThank you- I have a question- did you put the yoke on the dress top before you sewed the sides of the dress up? I am working on the Anna Tunic by Amy Butler and you don't add the tunic til the end... and it has been a bear!!!
ReplyDeleteThanks for your tute!!
The top of my dress is already constructed before the yoke goes on to finish the neck. Just looking at the Anna Tunic, it looks to be similarly designed, but I wouldn't dare to guess how the whole thing is lined. Hope this tute helps :)
ReplyDeleteThe top of my dress is already constructed before the yoke goes on to finish the neck. Just looking at the Anna Tunic, it looks to be similarly designed, but I wouldn't dare to guess how the whole thing is lined. Hope this tute helps :)
ReplyDeleteHeavens thank you for your wonderful tutorial! Confirmation of my worst fears, I sewed my yoke on upside-down!
ReplyDeleteThanks for your help and I love your dress!
Oh my goodness! I am new at sewing with a machine, and although I have been doing pretty good so far, I got stuck for 2 days on the yokes of a pj top I was making for my daughter... That pattern says "easy", but the yoke part was everything but! I researched for 2 entire days with no success at all, until I found you. :)
ReplyDeleteYour step by step was nothing like the one I had to follow (thanks God, because that thing didn't make sense at all to me! Lol), and the piece I was making was completely different from yours, but I was able to get an idea of how to put that stuff together, so I adapted your explanation to whatever I could use on my top, and in the end I got EXACTLY to the last step of my pattern instructions. And the top turned out flawless... Ha! Unbelievable. And perfect!
Thank you so much for sharing! :)
Hi. Thanks for this.. How bout when you don't want to use snaps?
ReplyDelete