
Last post was about creating a yoke by modiifying a bodice sloper or pattern. Assembling the yoke is slightly more involved. The instructions here are for front and back yoke pieces and corresponding linings.
Depending on how your yoke is closed will affect the yoke assembly. I am going to assume that you are using a yoke with snaps on one shoulder, but if you have a back closure with buttons or zipper, you can just stitch together the front and back yoke pieces at the shoulder, skip the shoulder snap info, and then jump back in where the yoke and the lining are joined together.
Begin by stitching the front to back at the shoulders, if your design calls for it, of the yoke and the yoke lining.
Stitch at the seam allowance all the way round the yoke lining. This is to be a guide when sewing the yoke to the lining.
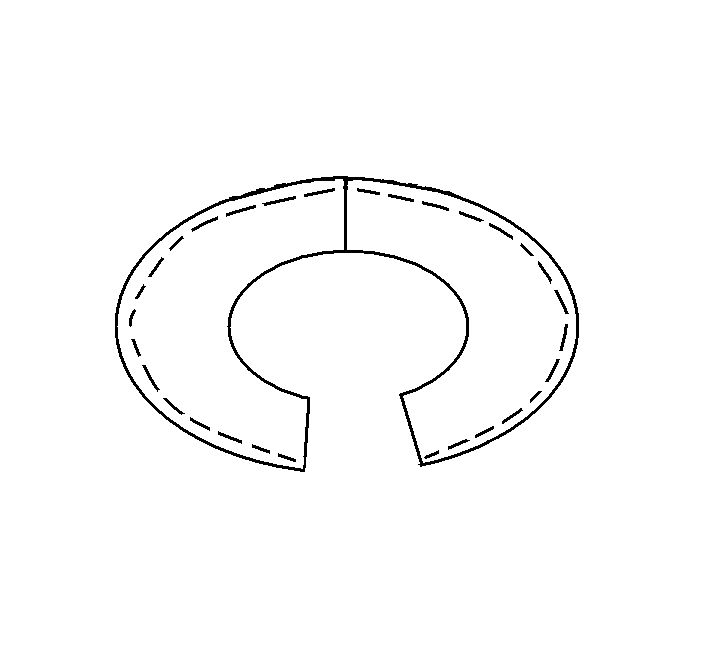
Clip along the curve by making a small vertical cut from the raw edge to almost where the seam allowance is to facilitate a smooth curve when sewn. Put aside the lining for now.
Attach the bodice front and back to the yoke piece in the appropriate postions. Continue the stitching around the arc from the one bodice piece around across any attached shoulders to the other bodice piece. This stitching will serve as a guide to pressing the curved edge.
Align the yoke with the lining, right sides together, and stitch together around the center arc, around any ends intended for closures and around the outside of the outside arc edge, stopping when the bodice is attached. Clip curves.
Align the yoke with the lining, right sides together, and stitch together around the center arc, around any ends intended for closures and around the outside of the outside arc edge, stopping when the bodice is attached. Clip curves.
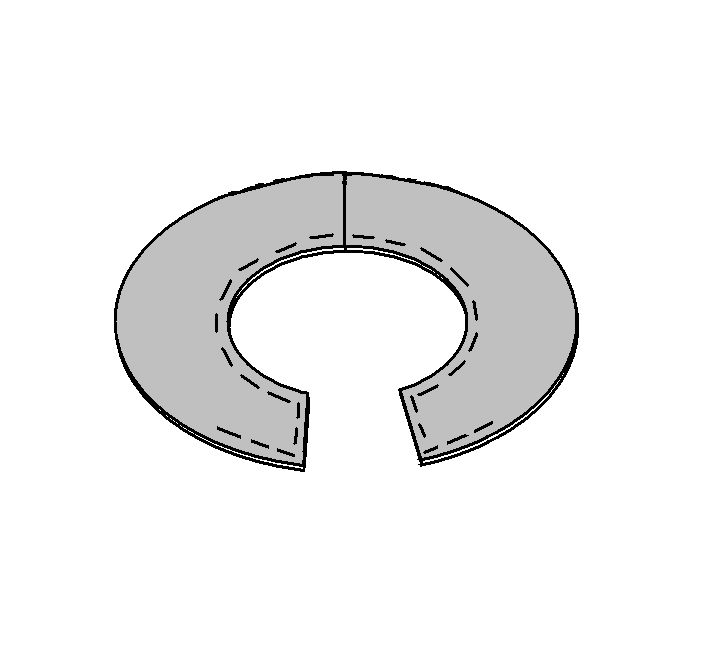
Turn the yoke right sides out and press seams. Use the stitching as a guide on the lining and the yoke to turn under and press any portions not attached to the bodice pieces.

I hope that was reasonably clear. Questions are welcome, of course :)
*****************************************************
This is a free tutorial and I encourage you to use the information in any way you need to (check the disclaimer at the bottom of the page). If it works for you, please consider supporting my etsy shop by purchasing a Little Print Design pattern or toss a dollar or two in my paypal to show appreciation and to encourage me to offer up even more quality patterns and tutorials.
Thank you!
Questions about the Donation? FAQ here.
Thank you, oh thank you dear crafty one,
ReplyDeleteFor showing me all this stuff.
I just discovered your website,
And woah mama, what a rush!
Your skills are outstanding,
Could I venture that they're legendary?
I know technically you're a mentor,
But I think of you as a Crafting Fairy.
(and not in a bad way!)
I hope good kharma happens your way,
you deserve to be famous - that much is true.
So here's the truth that when I grow up,
I wanna be as talented as you. :)
Thanks for this great tip. For little girls dresses, I'm beginning to be irritated by zippers and buttons. This is a great alternative to a simple dress opening. I can handle 2 snaps or 2 buttons...not the 6 to 8 on a child's dress!!! Great tutorial
ReplyDeleteCarrie, I'm in the same place as you.
ReplyDeleteAnon, :D!
my yoke is a front and back piece that buttons on each side at the shoulders. i have my pieces cut but can't figure out how to attach to the dress pieces. help!
ReplyDeleteAnon, did you get your yoke figured out?
ReplyDelete