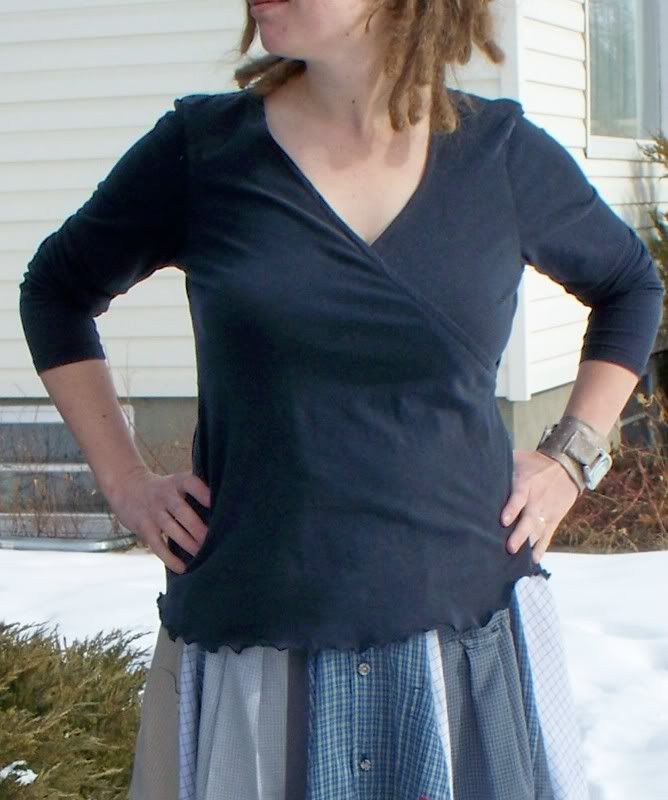
This is part 2 of making a circle skirt from men's button down shirts (otherwise known as: Men, lock up your closets). You can find part one here.
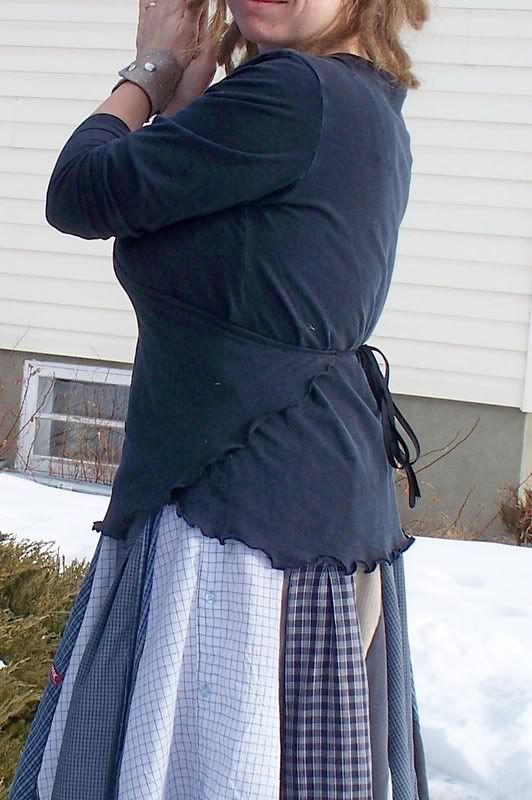
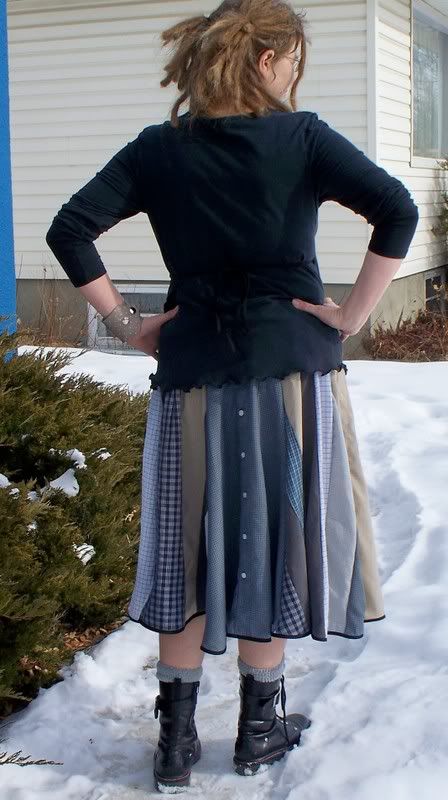
The skirt I have made here is made of 4 panels of strip work and 4 panels cut from the front of the shirts. If you want to restrict yourself to just strip work and forgo the large panels made of the shirt fronts, allow yourself a more than five shirts, unless you are in the small size range. Once you begin cutting your shirts you will quickly have a good idea if you have enough or will need to raid the closet for more.
(Warning: make sure you definitely have enough fabric to make into a patchwork skirt before you start to sew. There are few moments more horrible than when you realize that you do not have enough of the same fabric to finish the job and must a) rip out your seams and start again with more fabric, b) finish with a bunch of new fabric that doesn’t match the other three quarters of the skirt, or c) toss it all and start again. Nevermind the cliché about measuring twice, when you do patchwork, just keep cutting.)
As you can see, the skirt is actually made up of eight panels: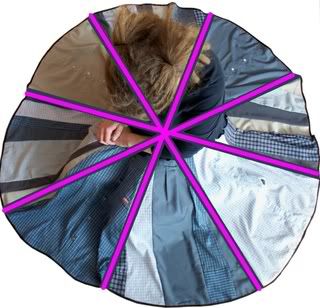 To make my panels, I made myself a circle skirt template. Using the same measurements as I do with a regular circle skirt (see part 1), I used the edge of an old bed sheet to make a template of ¼ of a skirt. If you have no old sheets, try extremely inexpensive or unlovable fabric. I usually have half a dozen or so old sheets on hand that I’ve bought at thrift stores because they make great solid squares for patchwork and tester fabric for new patterns (I’ve even occasionally pressed one into service on a bed).
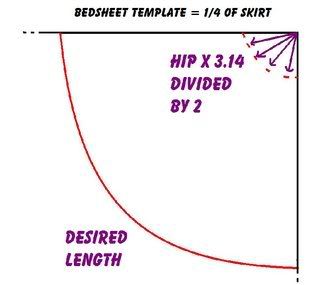 (You are asking why I am telling you to make a ¼ template rather than a 1/8 template, since we are cutting 1/8 of a circle panels. Well, you don’t have to. I found the ¼ template easier to make and more versatile for later projects, but you can fold you bed sheet at the 45 degree mark from the corner an make a 1/8 template. Whatever is easier for you.)
Now that you are armed with a template (which you should definitely keep around if you want to zip up a few circle skirts every now and then without having to do the whole math and measure thing), it is time to cut up some shirts. To begin, separate the sleeves from the shirt (cutting along the seam if possible. I save my sleeves to make the kids’ pants and capris.) Cut along the shoulder seams and take off the collars. If you are using the fronts of shirts as whole panels, button up the shirt and sew closed the front opening (trust me, you’ll appreciate this when you are wearing it, especially if you spend anytime around toddlers just learning to undo buttons).
With four fronts sewn closed, fold your template in half (lengthwise) and center it over one of the fronts. Cut out around your template, adding a seam allowance on the edges and top. Repeat for other 3 fronts.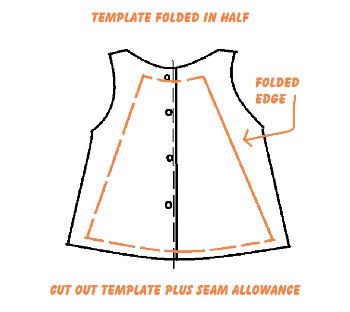 To make the stripwork panels, cut the backs of the shirts into strips (I cut mine into 5 pieces).
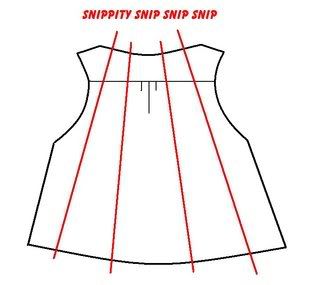 Sew back together to form four rough panels or bell shape sheets.
  Position your half template over top of a stripwork sheet and cut out, adding seam allowances on the sides and top. Do this for to make four 1/8 panels.
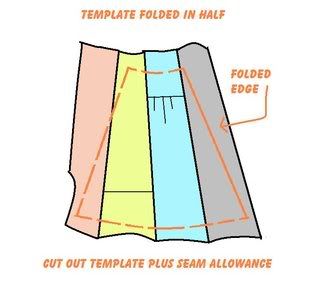 Now you should have 8 panels for your skirt. Sew together to form your circle skirt, alternating the shirt front panels with the stripwork panels. Add a waistband and hem the bottom, as per the instructions in part one.
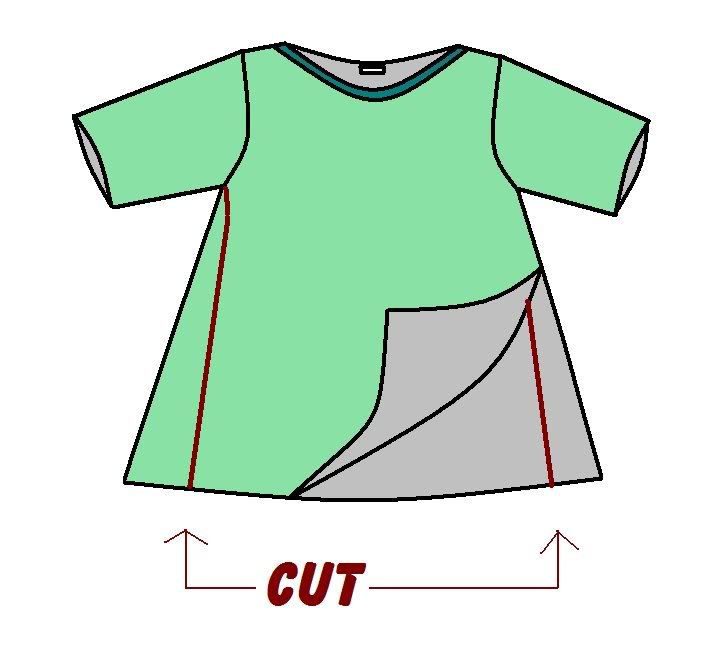
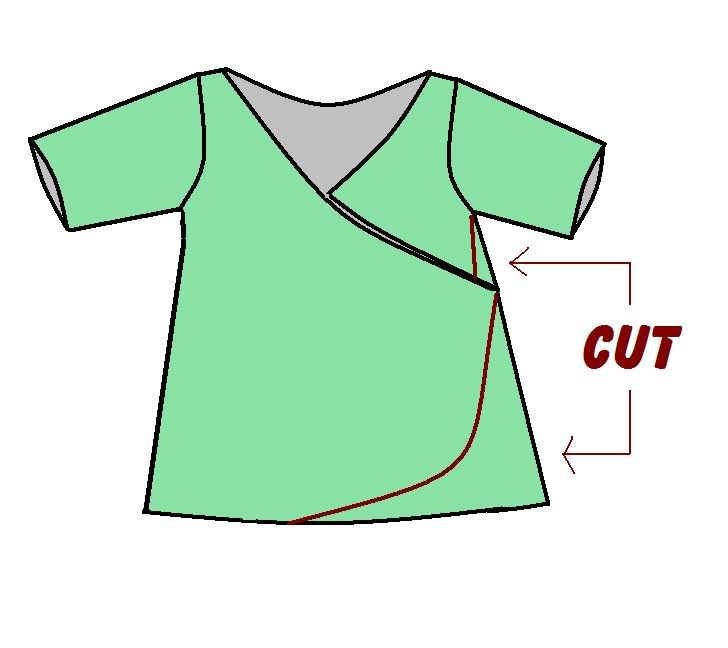
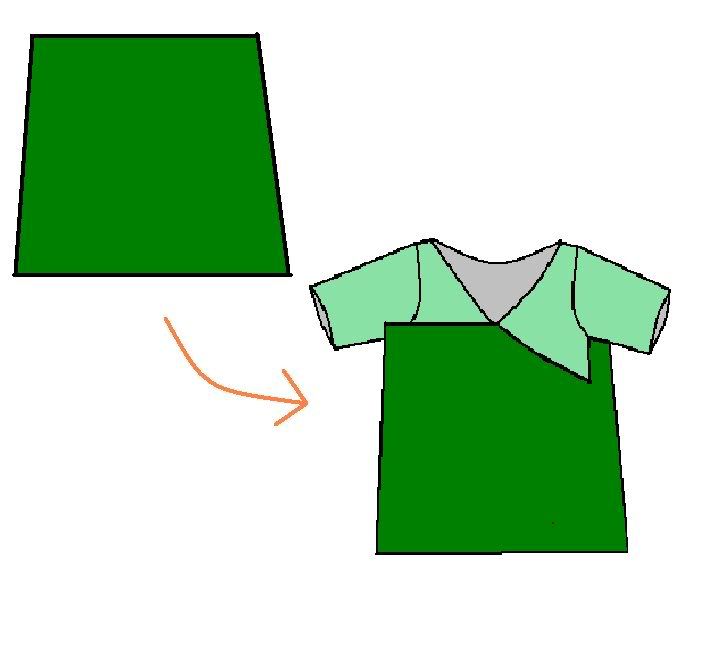
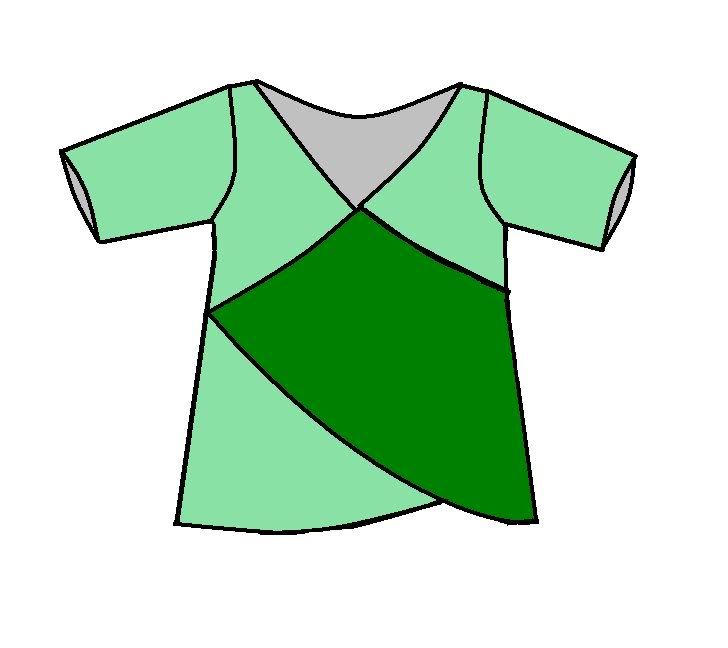
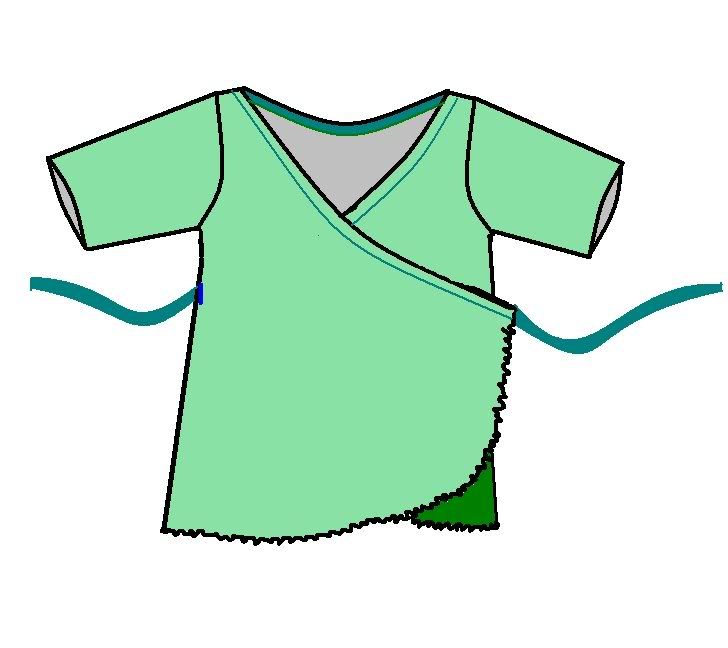
Use the extra shirt bits to make a patchwork dress for a little one, adding a bit of grandma’s old dress for contrast.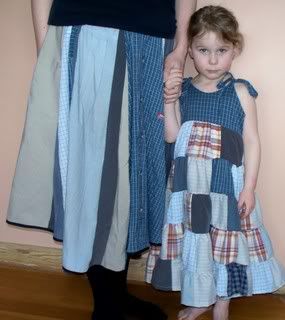 Done.
Done.
The skirt I have made here is made of 4 panels of strip work and 4 panels cut from the front of the shirts. If you want to restrict yourself to just strip work and forgo the large panels made of the shirt fronts, allow yourself a more than five shirts, unless you are in the small size range. Once you begin cutting your shirts you will quickly have a good idea if you have enough or will need to raid the closet for more.
(Warning: make sure you definitely have enough fabric to make into a patchwork skirt before you start to sew. There are few moments more horrible than when you realize that you do not have enough of the same fabric to finish the job and must a) rip out your seams and start again with more fabric, b) finish with a bunch of new fabric that doesn’t match the other three quarters of the skirt, or c) toss it all and start again. Nevermind the cliché about measuring twice, when you do patchwork, just keep cutting.)
As you can see, the skirt is actually made up of eight panels:
To make my panels, I made myself a circle skirt template. Using the same measurements as I do with a regular circle skirt (see part 1), I used the edge of an old bed sheet to make a template of ¼ of a skirt. If you have no old sheets, try extremely inexpensive or unlovable fabric. I usually have half a dozen or so old sheets on hand that I’ve bought at thrift stores because they make great solid squares for patchwork and tester fabric for new patterns (I’ve even occasionally pressed one into service on a bed). (You are asking why I am telling you to make a ¼ template rather than a 1/8 template, since we are cutting 1/8 of a circle panels. Well, you don’t have to. I found the ¼ template easier to make and more versatile for later projects, but you can fold you bed sheet at the 45 degree mark from the corner an make a 1/8 template. Whatever is easier for you.)Now that you are armed with a template (which you should definitely keep around if you want to zip up a few circle skirts every now and then without having to do the whole math and measure thing), it is time to cut up some shirts. To begin, separate the sleeves from the shirt (cutting along the seam if possible. I save my sleeves to make the kids’ pants and capris.) Cut along the shoulder seams and take off the collars. If you are using the fronts of shirts as whole panels, button up the shirt and sew closed the front opening (trust me, you’ll appreciate this when you are wearing it, especially if you spend anytime around toddlers just learning to undo buttons).
With four fronts sewn closed, fold your template in half (lengthwise) and center it over one of the fronts. Cut out around your template, adding a seam allowance on the edges and top. Repeat for other 3 fronts.
To make the stripwork panels, cut the backs of the shirts into strips (I cut mine into 5 pieces). Sew back together to form four rough panels or bell shape sheets. Position your half template over top of a stripwork sheet and cut out, adding seam allowances on the sides and top. Do this for to make four 1/8 panels.Now you should have 8 panels for your skirt. Sew together to form your circle skirt, alternating the shirt front panels with the stripwork panels. Add a waistband and hem the bottom, as per the instructions in part one.Use the extra shirt bits to make a patchwork dress for a little one, adding a bit of grandma’s old dress for contrast.
Done. *********************************************************************
This is a free tutorial and I encourage you to use the information in any way you need to (check the disclaimer at the bottom of the page). If it works for you, please consider supporting my etsy shop by purchasing a Little Print Design pattern or toss a dollar or two in my paypal to show appreciation and to encourage me to offer up even more quality patterns and tutorials.
Thank you!
Questions about the Donation? FAQ here.

 Ta-da, no seam circle skirt.
 If you do this twice, you will have two halves to join together for a circle skirt.
 Draw in the semi circle. This is where you will attach a waistband. Repeat this process using your desired length measurement. This is your bottom hem.