The pattern I use is a trace from an existing dress. I've been using this nice A-line pattern for most of my tee recons because the shape is so nice.
 To make a sleeve pattern I traced the shape of the sleeve onto paper
and then added some seam allowances and extra at the top for a bit of puff (but not too much with the knit material b/c they end up looking like little football players)

so, the doomed tee,

fold in half and put the front pattern over it. For this one the design was too big for the chest area so I did a little patching. I just folded the front pattern piece on the waist line and cut out the design plus a bit of seam allowance on the side.

Then took the name off the sleeve and cut out a the bottom plus a bit for seam allowance.
 and, here they are:
The back was just follow the pattern cut:

Sleeves were cut from the most horrible maternity shirt ever. If you are using stripes, watch which way you cut so they don't end up looking odd.

I also cut out the bottom ruffle. Mine is 3 inches.

So, all pieced together with the ruffle on

to make the lettuce edges I used a rolled hem stitch on the serger while stretching the fabric. The same effect can be made with a zigzag stitch on a regular machine (stitch off edge with a wide but tight zigzag).

My bottom ruffle didn't ruffle very good - probably because I had cut along the not very stretchy way of the knit (check it out, one way stretches more than the other and you want to cut crosswise along the stretch)
I decided the dress was missing something at this point so I cut up another tee I'd saved for recons and added a second ruffle (also roll hemmed one edge). I also cut some bias tape from the red tee for the neckline.This is me attaching the second ruffle.
 There's lots of ways to do this, but I just stitched if right along above the first (right sides together) and then added a second line of stitching to lift the ruffle high enough for nice layered effect.
The sleeves went on the usual way. (okay, I'm getting lazy, but I can answer questions here if anyone has them)
For the back, I find a couple of rows of shirring gathers the dress into a nice shape. To do this, I chalked a line across the back to mark where I wanted to gather and shirred 3 short lines there.

I also used 2 lines of shirring on the sleeves to gather them in

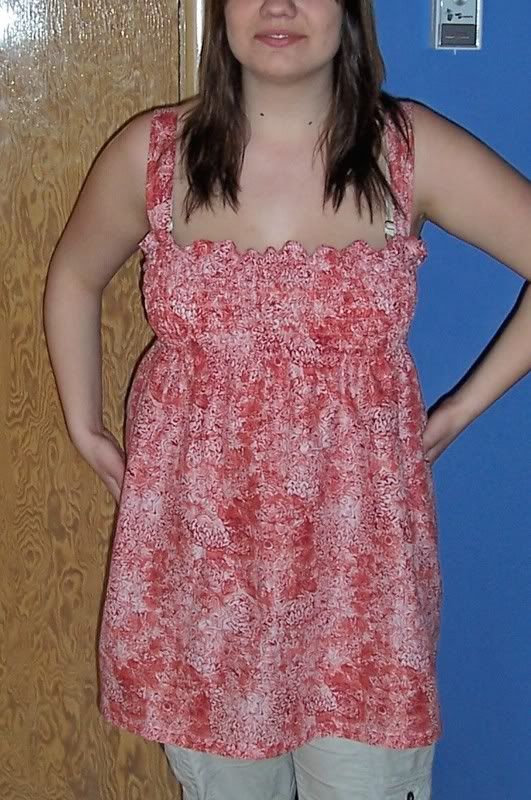
And, viola!

******************************************
This is a free tutorial and I encourage you to use the information in any way you need to (check the disclaimer at the bottom of the page). If it works for you, toss a dollar or two in my paypal to show appreciation and to encourage me to offer up even more quality patterns and tutorials.
Thank you!
Questions about the Donation? FAQ here.
 Shirring is one of the easiest and most satisfying techniques to learn. To make a top or dress you do not need a pattern and the only stitch you need is the regular straight stitch. Shirring is simply multiple rows of stitches using elastic thread.