One issue with the one piece is that, without the side seam, it can be difficult to add sewn-in pockets. I have been making do with stitching a pocket on top of the pant leg, but for Birdie's pants, being a mature man of almost 3 years now, I'd like something a bit more streamlined and less patchy.
This is my solution. The following tutorial is for designing in pockets on any pair of pants, but is specially designed for use with a one piece pattern. If you are wanting to use this with the Birdie Britches, which does not have a seperate waistband, you can just take it up all the way to the waist like in this pocket tutorial and proceed as usual with a touch more fabric around the waist (no biggie, if you aren't using wool). Alternatively, a few quick moves with a pair of scissors, adding in a bit of seam allowance, and you can make the waistband a seperate piece there also. (Remember, this is supposed to be fun.)
Adding Pockets to a One Piece Pants Pattern

Pull out your paper pattern, a couple extra sheets of paper, a pen, a ruler, and a drinking glass or bowl just a little bit wider than junior's hand.
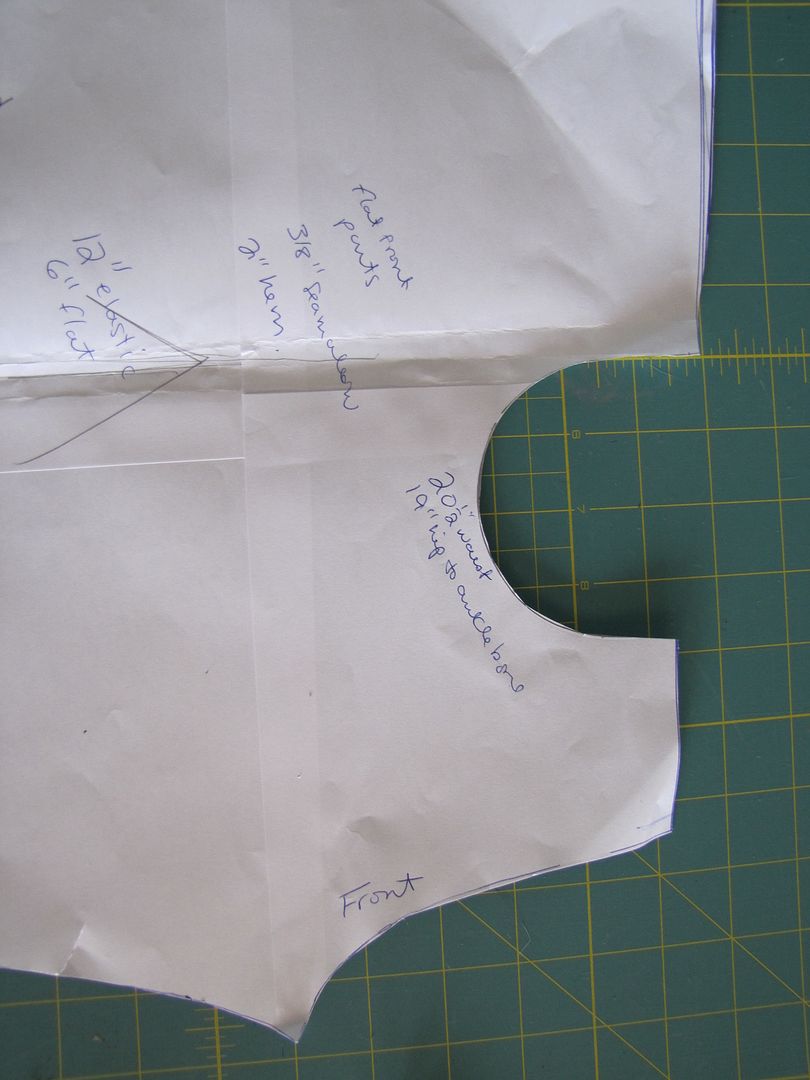
I chose a rounded shape for the pockets because I like them, and for their ease of sewing. Place the glass overtop of the area where the pocket is desired and trace the edge directly onto the pattern paper. To finish the pocket opening shape, draw a couple of lines up from the the circle edges to the waist of the pattern. Cut out pocket opening.
Generally, the pocket shape should appear like so:
Next step is draw the inside pocket pattern pieces. Trace the the 'U' pocket shape on a seperate piece of paper. On the paper, also draw the edge of the waist. (My pants always have a slope on them, so it's important I draw it exactly, but yours may be more forgiving.)
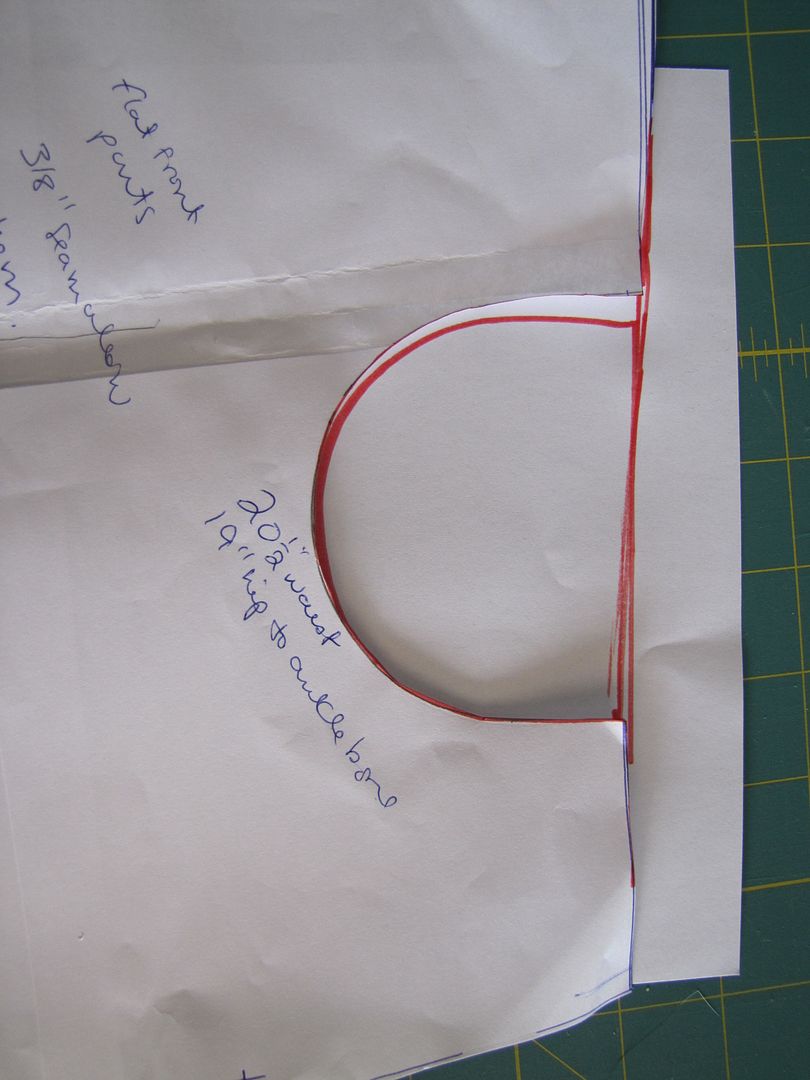
Now on the pocket paper, measure out some distance from the top of the pocket along the waistline. You are going to need a seam allowance around the pocket opening and another seam allowance around the outside edge of pocket, plus a bit of space in between. I found 1 1/4" to be a good measure for me, allowing for two 1/4" seams.

From the top line I drew out the shape of my pocket. (My pocket is about 6" long to please Birdie's need to push his hands down as far as he can into his pocket, which can reap havoc on shallow pockets. You may want yours half the size of mine.)
For this pocket, I wanted to use the same fabric behind the pocket as the pants, in order to keep them visually unobstrusive, but also wanted to minimize the fabric bulk, so the pocket is constructed partially of shell (pants) fabric and partially from a lightweight broadcloth for the parts that do not show on the outside.
This means that the top half of the back part of the pocket (the part closest to the legs, without the opening) is half shell and half lining fabrics. The front part of the inside pocket (inside, with opening) is entirely of lining fabric.
To draw the inside pocket pieces, mark a dashed line about 2" below the bottom of the pocket opening on already drawn pocket to indicate the divide between shell and lining fabrics. Trace the top half of the pocket piece without the opening, adding on a seam allowance to the bottom side of the dashed line (to attach the lining fabric portion of the pocket). This top piece will show on the outside of the pants (as seen through the pocket opening) and be cut from shell fabric.
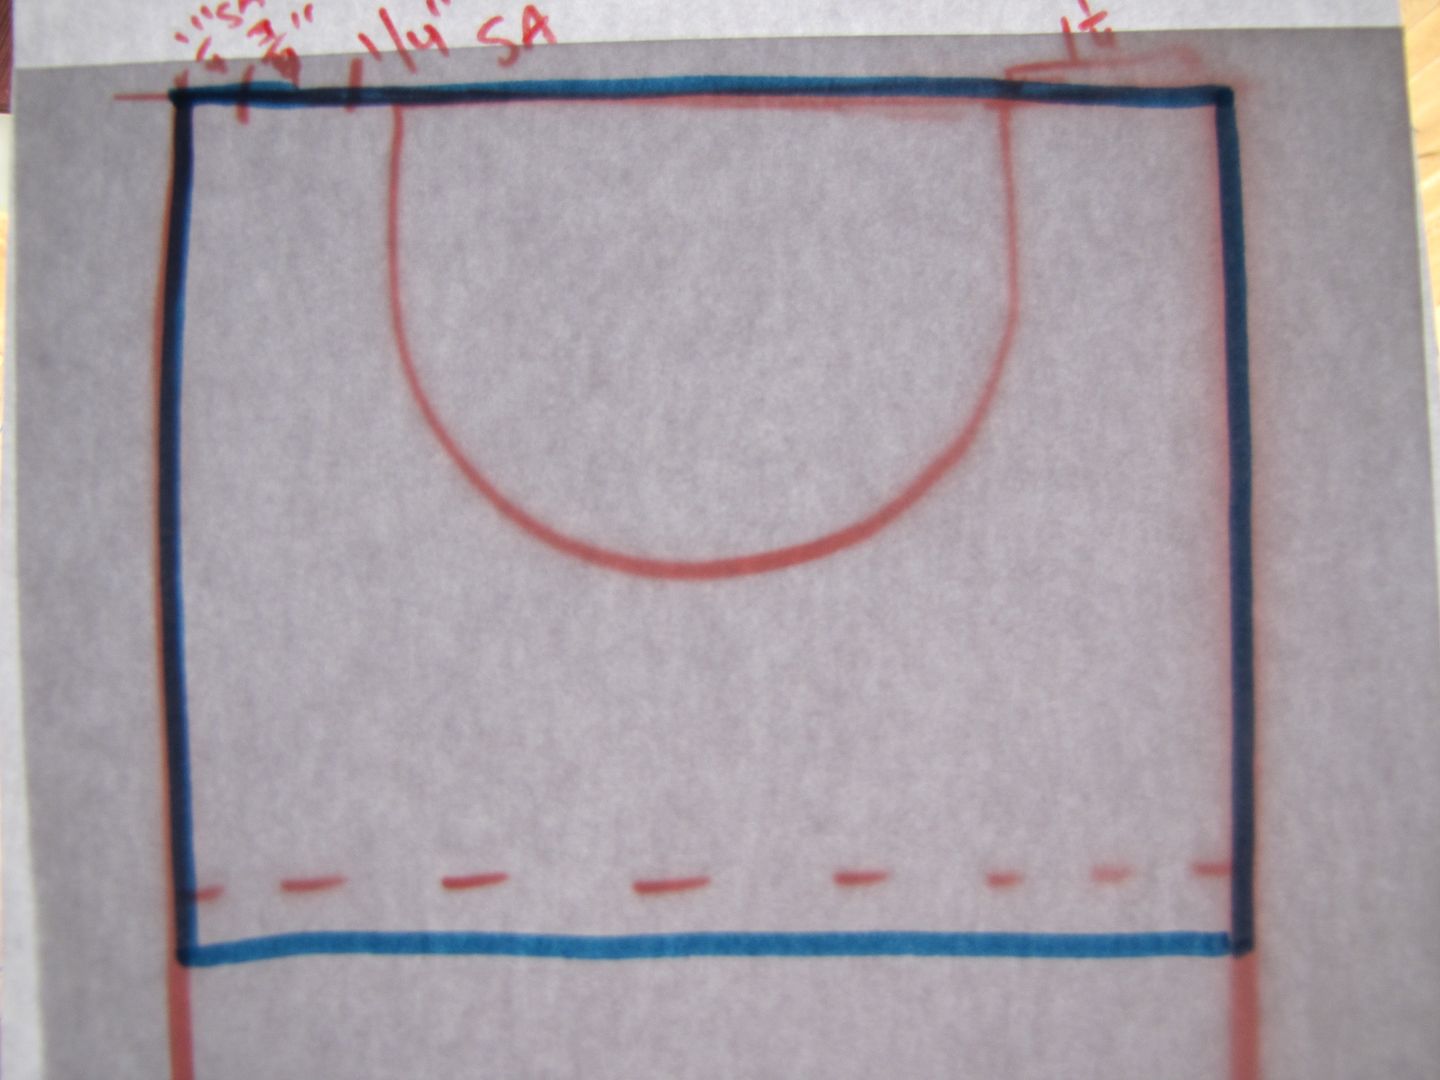
Trace the bottom half of the back of the pocket piece, and add a seam allowance to the top portion, above the dashed line (where the shell fabric will be sewn on).
The front part of the inside of the pocket is your first drawn piece with the pocket opening cut out. With all your pieces cut out, you will have something that looks like these:

Label your pieces with whatever makes sense to you, but also indicate the number of pieces to cut and out of what fabric.
To assemble the pocket, begin with your pocket pieces for the back in your shell and fabric lining. Sew them together to create on back pocket piece:
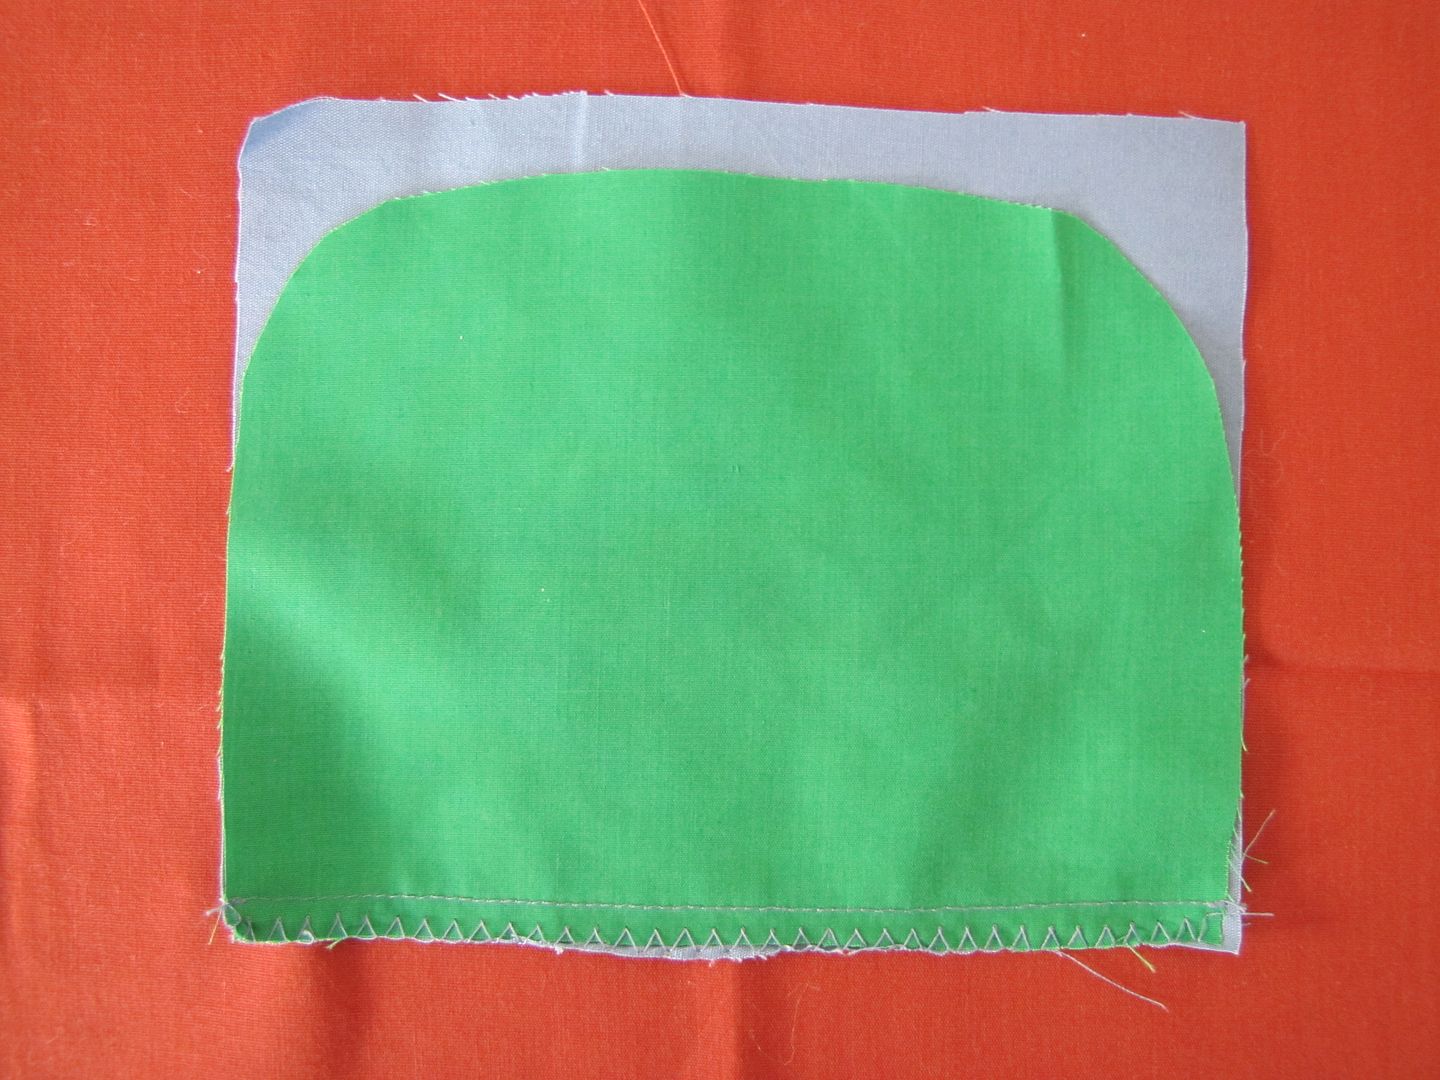
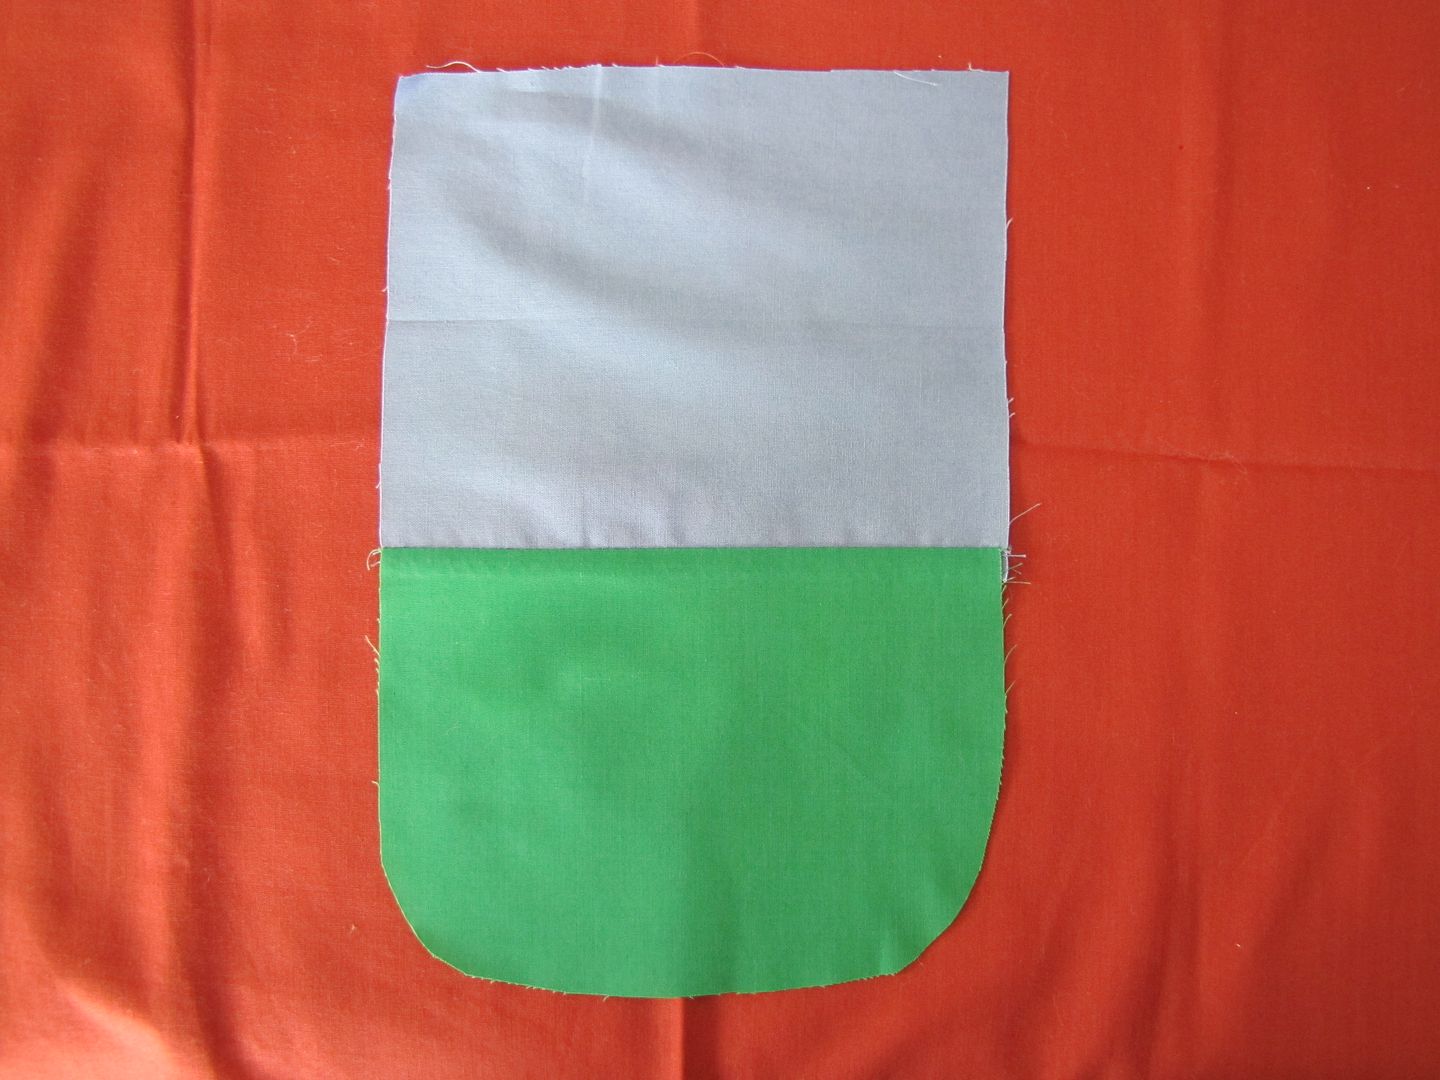
Press the back pocket open and put it to the side.
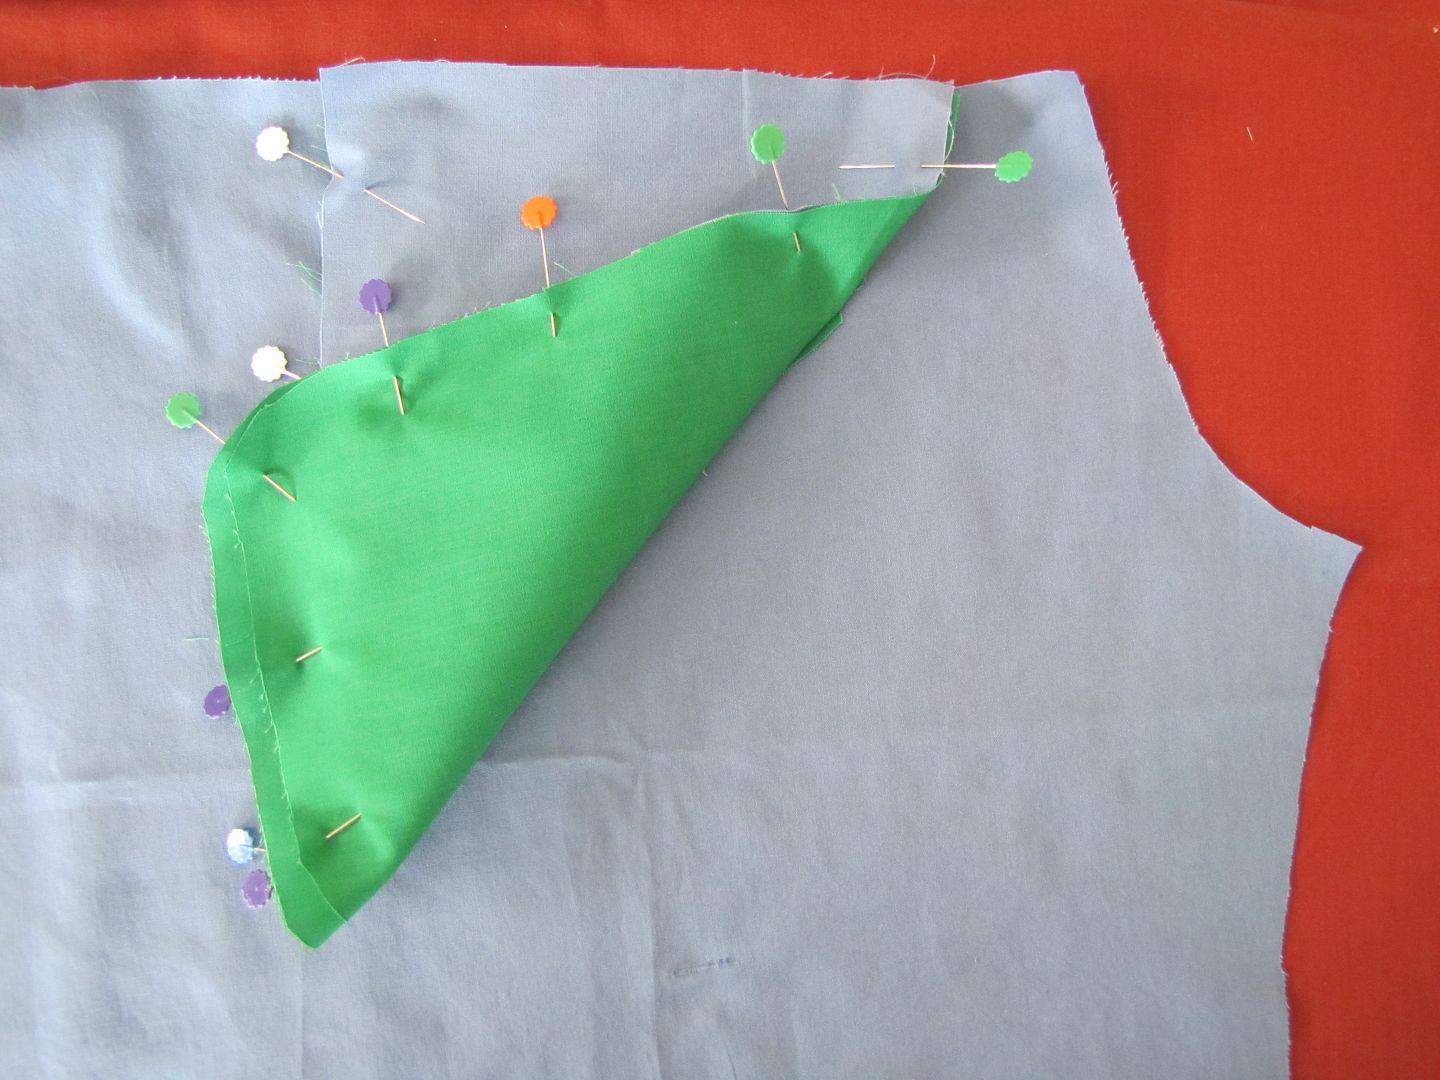
Sew on the front inside piece to the pants by aligning the 'U' shapes, right sides together. Pin in place.
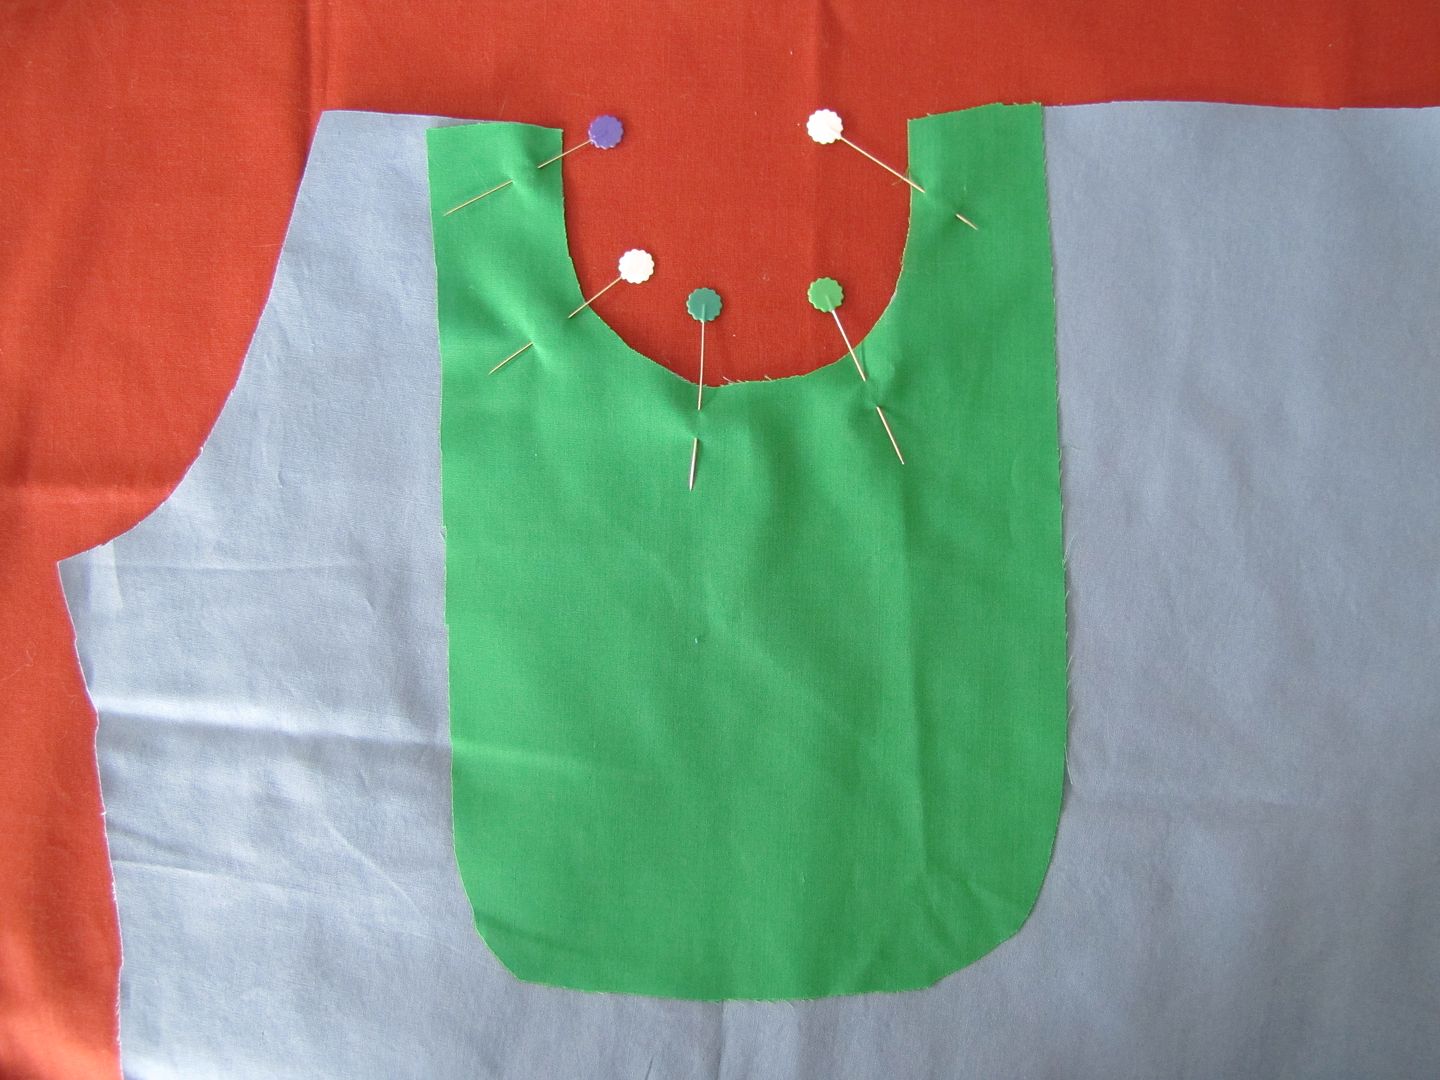
Stitch all around the 'U' shape.

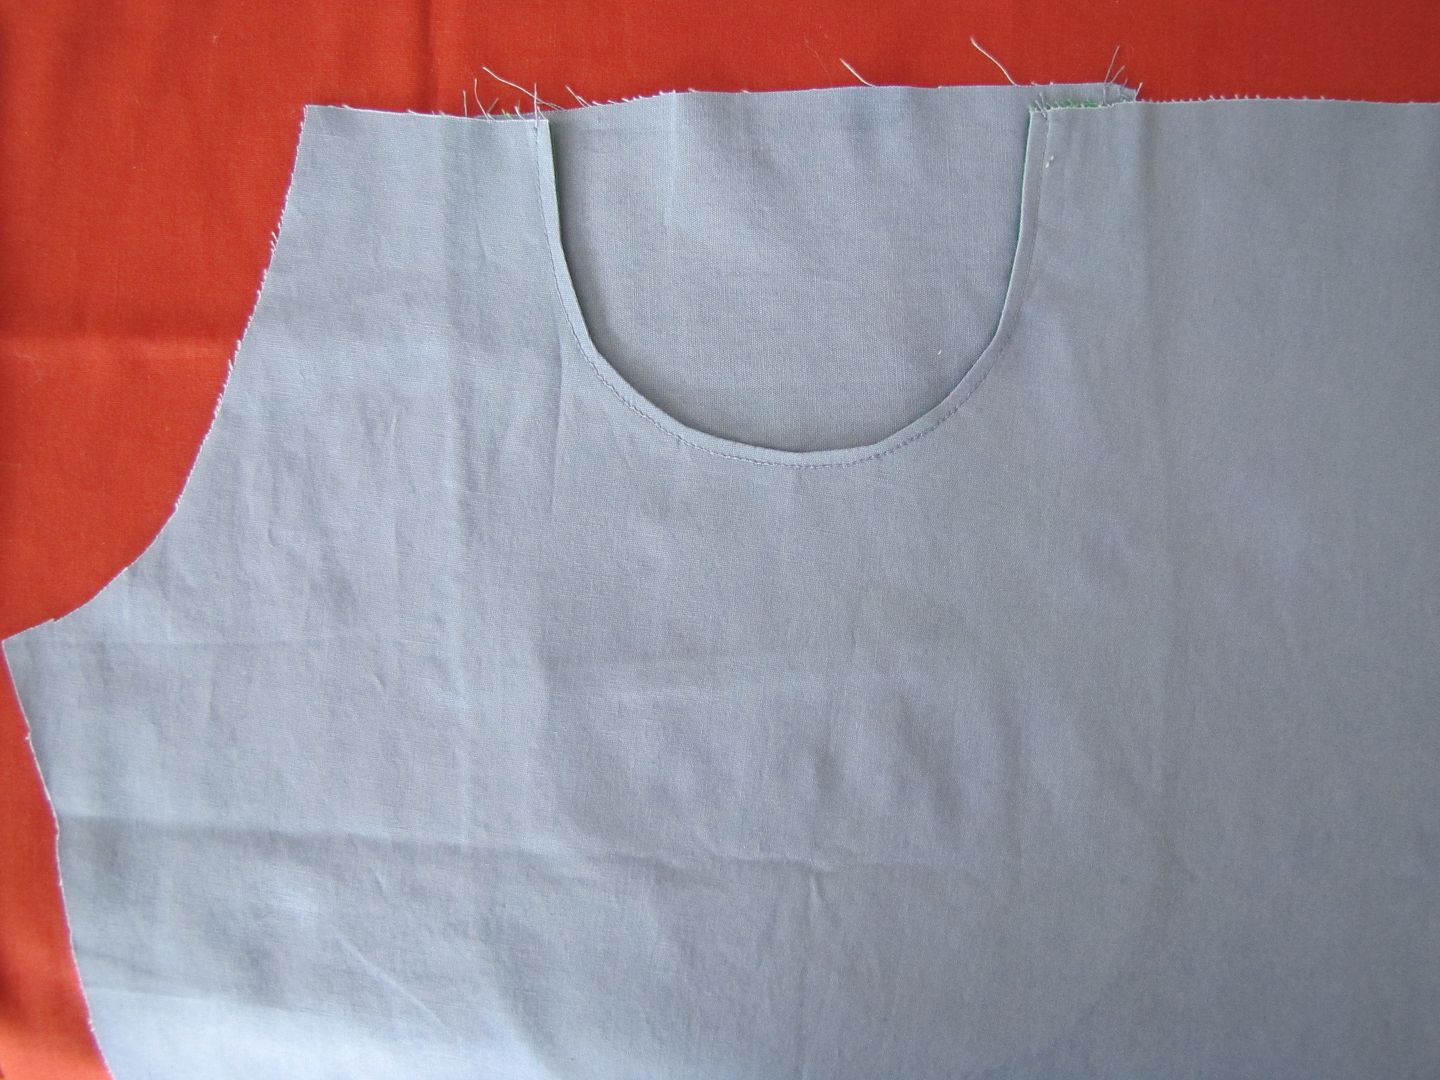
Cut a few notches out of the curve before flipping the pocket to the wrong side of the pants and pressing flat. Top stitch around the pocket opening for a nice finish.
View from the right side of the pants:

View of the wrong side of the pants:
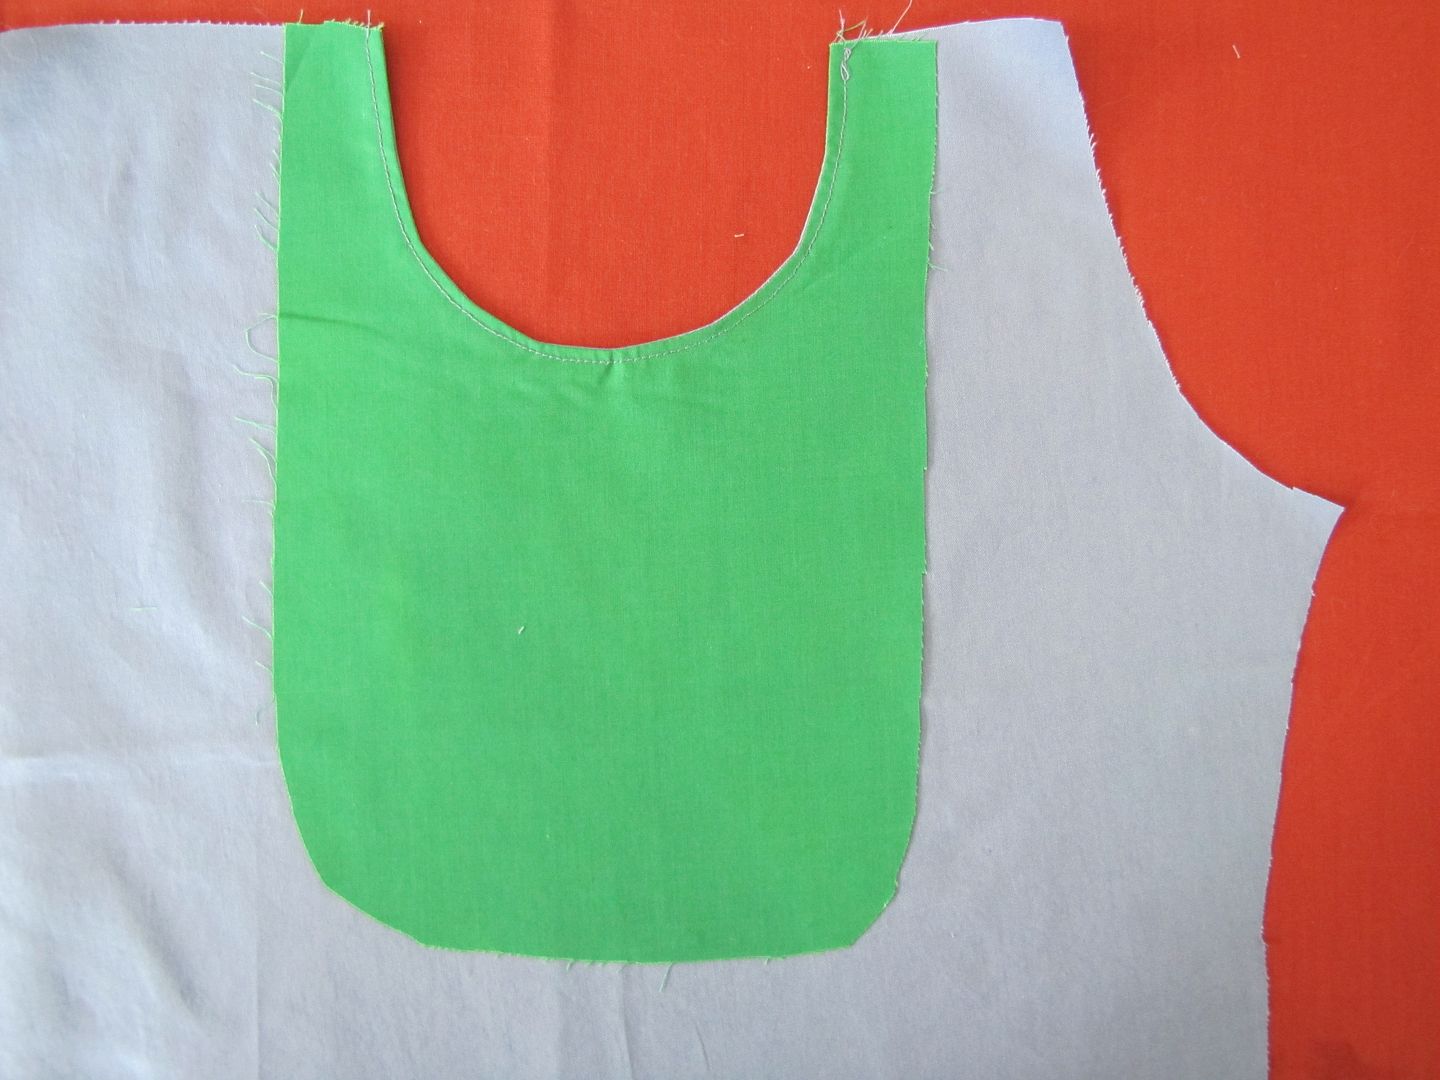
On the wrong side of the pants, align the back pocket piece over top of the front pocket piece, wrong sides together. Pin the edges of the pockets together (but do not pin to the pants*).
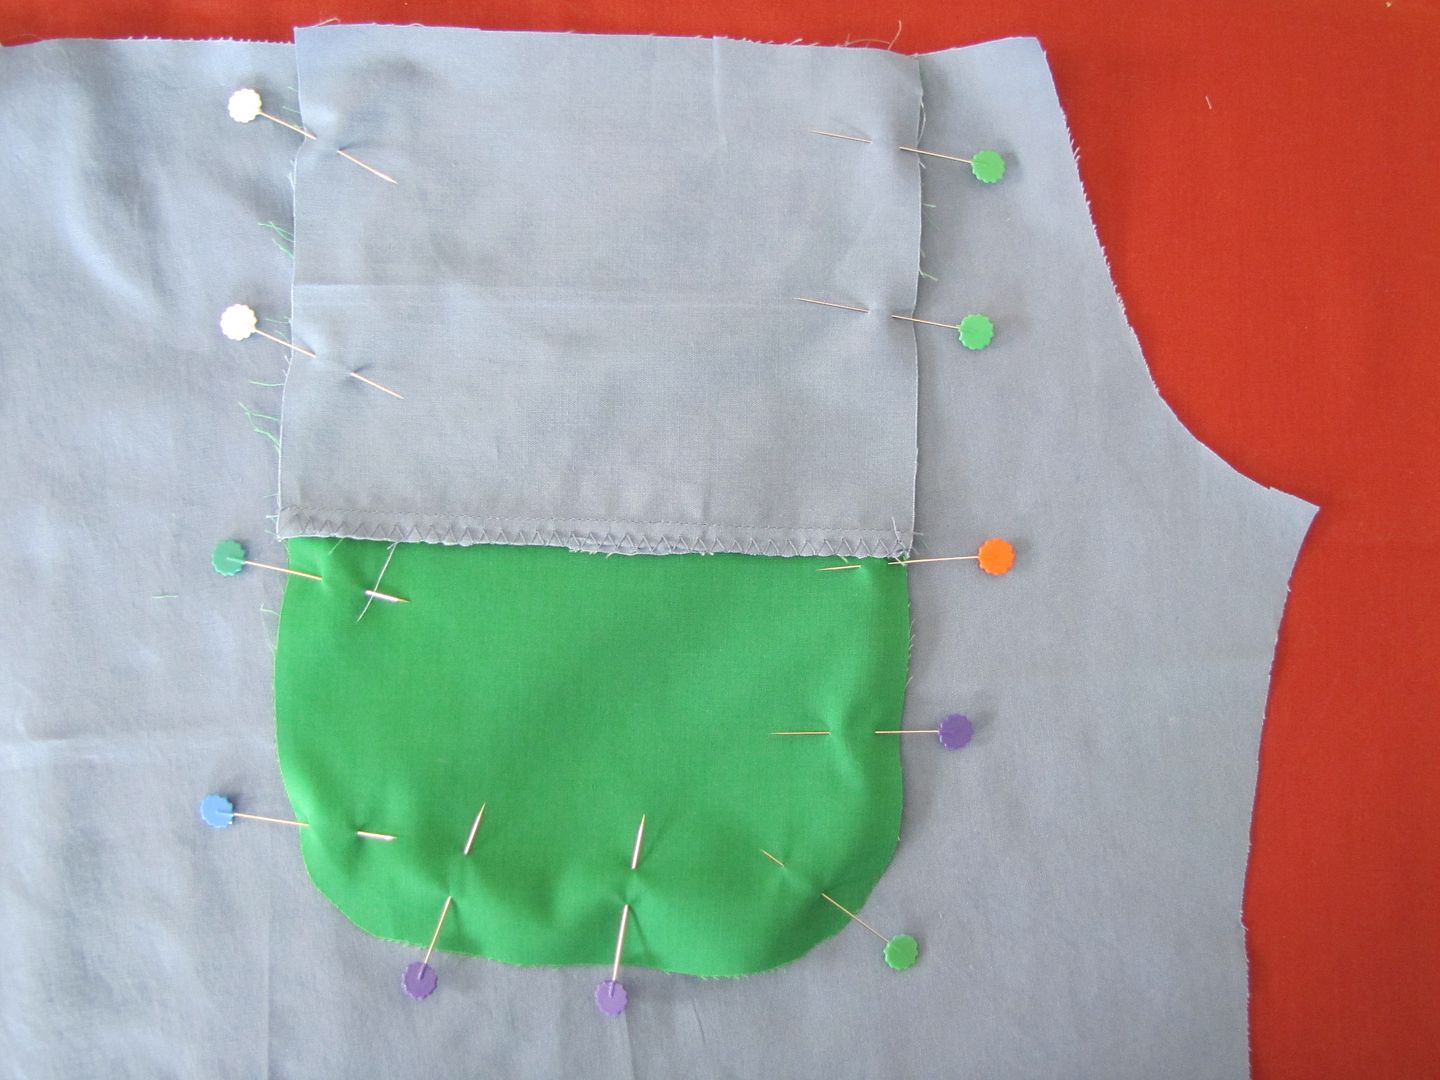
Sew around the outside of the pocket.

Turn the pants right side out and press.
Now you can proceed as usual, assembling your pants. If you find that the top of the pocket wants to slip while sewing the waistband, pin or machine baste the top in place.
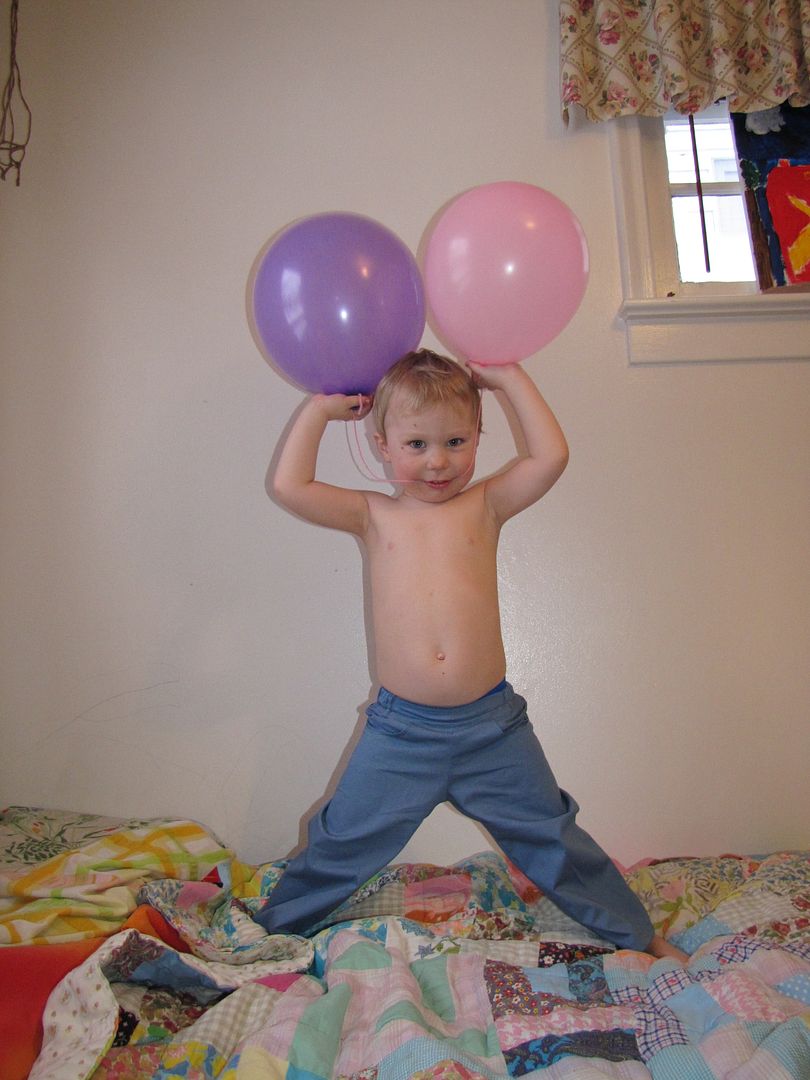
When you are all done, you can put them on your child and completely fail to get a proper picture of them :)
Done.
===========================================================
* While I did say do not pin the pocket to the pants, you actually can for a nice effect. Finish the edges of the pocket and then before sewing the edges together, pin the whole lot to the pants. Then sew the pocket directly to the pants. You can use contrasting stitching for an interesting look, which would look extra nice with a top stitched faux fly.
Here is a pair I did just that, except the thread is quite well hidden. You may have to zoom in to get a good look:
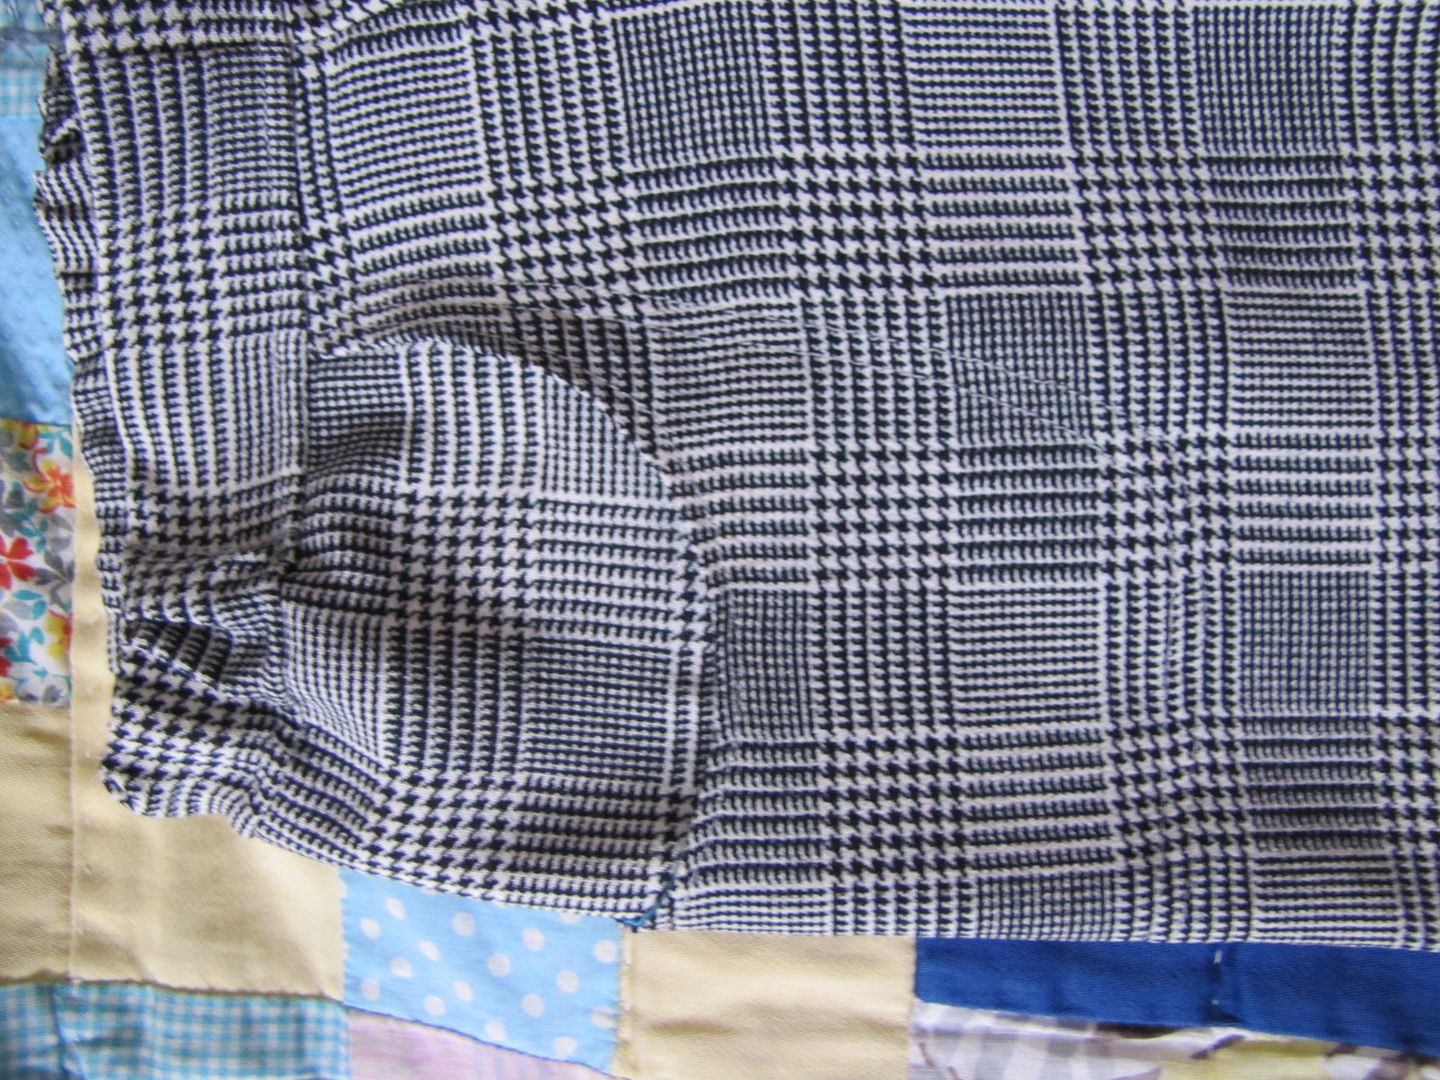
Just an idea ;)


Genius, I tell you! Genius.
ReplyDeleteI like to think so :D
ReplyDeleteLove your avatar, babyzilla :)
I think I love you. I must do something like this for my little boy.
ReplyDeleteWhy, thank you!
ReplyDeleteI think we probably have quite a bit in common, what with the veganism, the sewing, and having 2 kids with a girl (mine is 3 1/2) being the elder and a boy being the younger (mine will be 2 next month). Your son reminds me a lot of my son.
Your blog is a great inspiration! Keep on keepin' on.
This is so well explained! I love your tutorials, I learn so much! Thanks for sharing, I'll be linking to this.
ReplyDeleteHello,
ReplyDeleteLove the pockets. Do you have instructions for making one-piece pants/pockets for adults. I have done some Google searches, and all the one piece pants and flat front one piece pants are for kids.
Thanks,
Barbra Ann
Thanks for sharing! Made some 1-piece sweat pants from a free pattern and I needed a visual of what side-pockets would look like in those side-seamless pants. This helped a lot!
ReplyDelete